Thanks to the scalability of the PHP programming language, it can be used to build everything from a small personal site to a full-fledged content management system, and even to libraries and extensions meant to be used by other PHP developers. And since every PHP project has its own scope and requirements, you, as the developer, have the ability to customize your PHP settings, so they meet your needs. This customization of your development environment is done by editing the contents of your PHP.ini file. In this article, we will show you how to edit your PHP.ini file and we will also go over some of the more popular directives, which are contained within the PHP.ini file.
How Can I Edit My PHP.ini File?
The ability to customize your PHP settings is an advanced web hosting feature. As such, if you are using our free web hosting package, you would need to upgrade to one of our premium shared hosting plans in order to be able to edit your PHP.ini file. To get started customizing your PHP settings, follow the steps below:
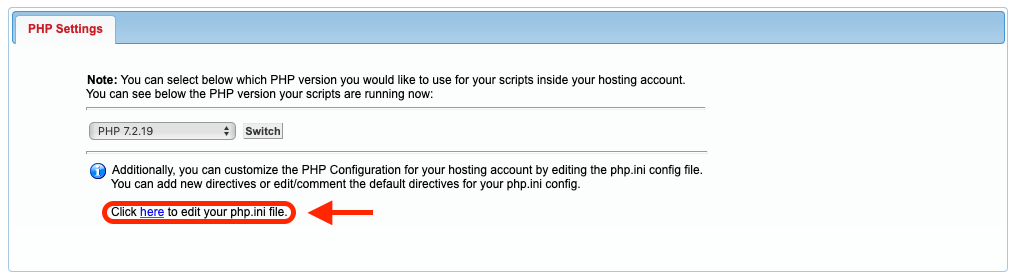
- Open the PHP Settings section of the Control Panel.
- On the screen, you will see the text Click here to edit your php.ini file. To be taken to the contents of your PHP.ini file, click on the here link, as shown in the screenshot below:
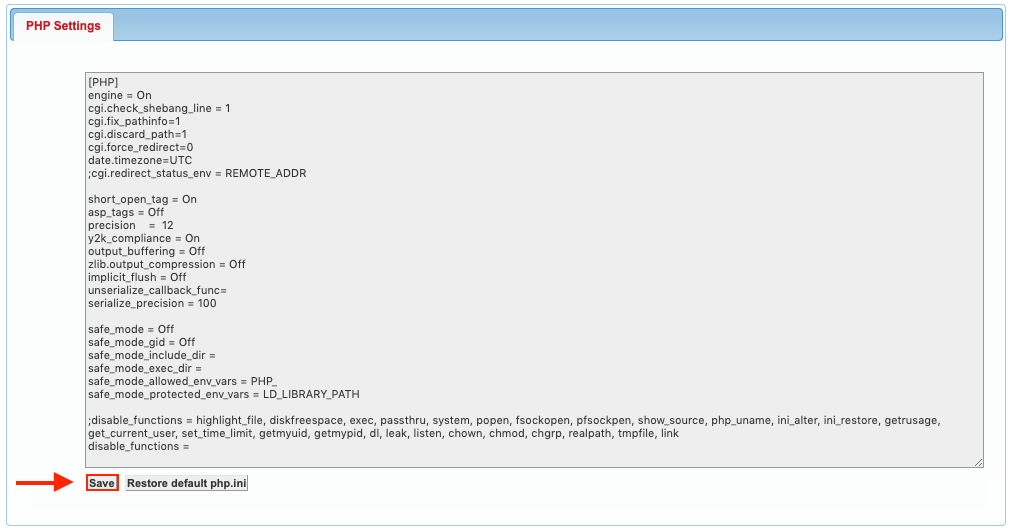
- You should now have full access to the contents of your PHP.ini file. Make all necessary edits and confirm your changes by clicking on the Save button:
What Types of Edits Can I Perform in My PHP.ini File?
There are two main types of edits you can make when customizing your PHP settings – you can either activate/deactivate certain PHP extensions or you can change the values assigned to some variables.
Inactive PHP extensions have a semicolon ( ; ) prepended to their names, for example:
;extension=ftp.so
To make the above extension active, all that you need to do is to remove the starting semicolon. So, the active version of the extension will look like this:
extension=ftp.so
The PHP.ini file also contains variables that are assigned a value, such as the one below:
upload_max_filesize = 15M
If you need to update the value for a certain variable, simply replace the existing value with your new one:
upload_max_filesize = 30M
In the example above, the value for the upload_max_filesize variable was doubled from 15M to 30M.
Note: unlike regular PHP code, you do not end your PHP.ini lines with a semicolon. Semicolons are instead used to create comments.
Can I Add New Directives to the PHP.ini File?
While the list of directives that come preloaded in your PHP.ini file is quite exhaustive, on occasion you may need to activate an extension or set a variable that is not included in the default list. The good news is that it is indeed possible to include new directives to your PHP.ini file. As long as these new directives are supported by the default PHP installation and do not require specific third party software to run, you should be able to achieve your desired results. As an example, by placing the following directive on a new line in your PHP.ini file, you will be able to control the maximum execution time of your PHP scripts:
max_execution_time = 300
How Can I Confirm That My Changes Are Applied?
Editing your PHP.ini file is easy enough, but how do you verify that the changes have been successfully applied? By following the steps below, you will create a small PHP script that will generate a page displaying the entire PHP configuration of your hosting account. You can then consult this configuration page in order to verify that your PHP.ini file edits have been successfully applied.
- Go to the File Manager section of the Control Panel.
- Double-click on the folder named after your domain name to open it. If you don’t have a domain name yet, you can register one in the Domain Manager.
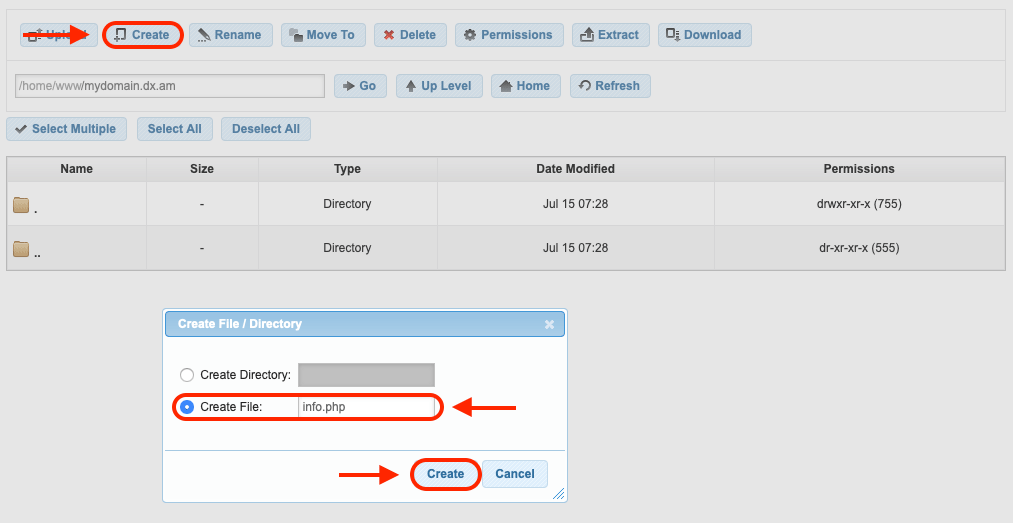
- Click on the Create button and select the option to make a new file.
- Name the new file info.php. Confirm your choice by clicking on the Create button, as shown in the screenshot below:
- Double-click the newly created file to open it.
- Paste the following code inside of the file:
<?php

phpinfo();

?>
- Press the Save button to save your changes.
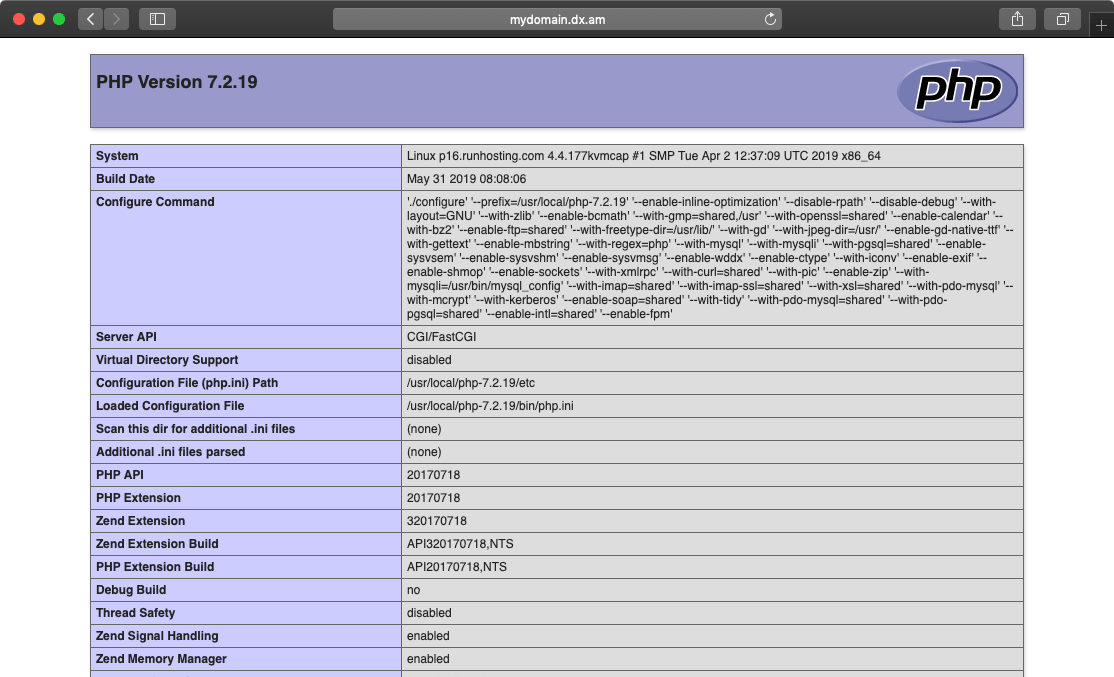
- Next, you need to open the info.php file using your web browser. In order to do so, navigate to
http://your-domain.com/info.php. Make sure that you replaceyour-domain.comwith your actual domain name. The end result should look like the page, shown in the screenshot below:
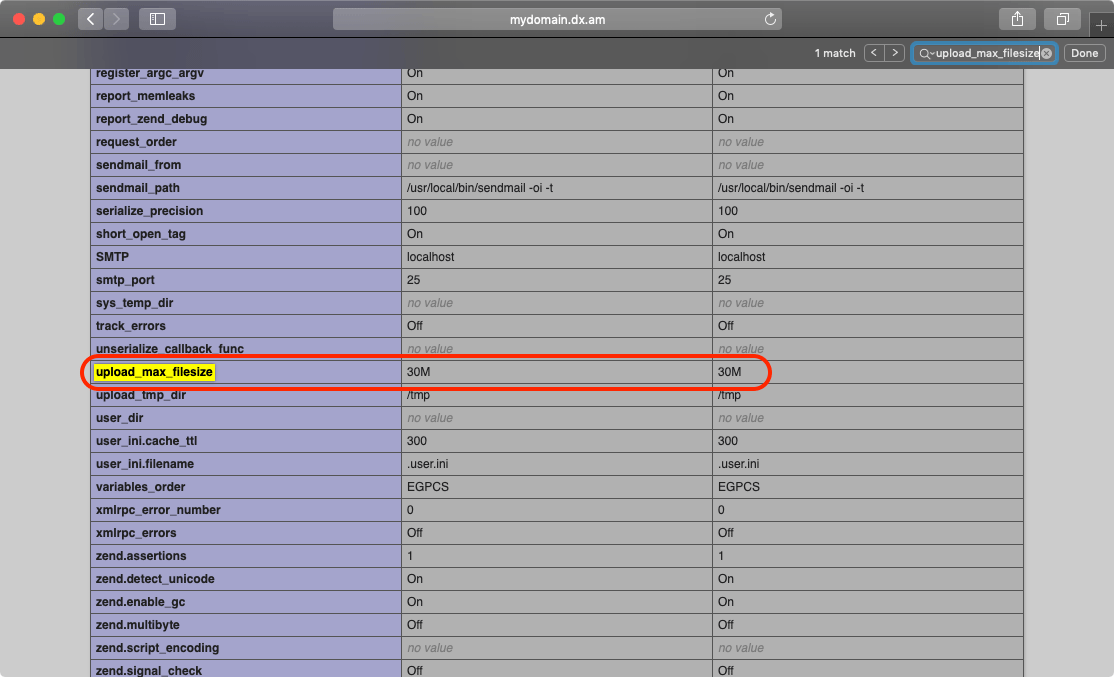
- Use Ctrl + F (Command + F on Mac) to find the variable or extension that you are interested in. Below you can see that the
upload_max_filesizevariable, which we used in one of the previous examples, was successfully updated from15Mto30M:
How Can I Reset My PHP.ini File?
If you corrupt your PHP.ini file by accident or just want a fresh start, you can easily reset it in two ways.
Your first option is to use the dedicated Restore default php.ini button which is part of the PHP.ini file editing interface. Follow the steps below to reset your PHP.ini file:
- Open the PHP Settings section of the Control Panel.
- On the screen, you will see the text Click here to edit your php.ini file. To be taken to the contents of your PHP.ini file, click on the here link, as shown in the screenshot below:
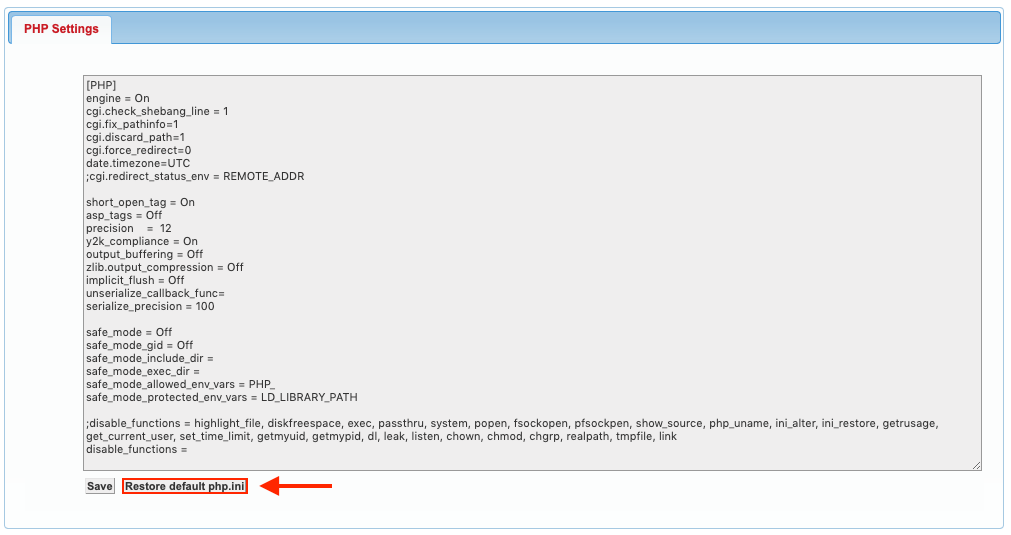
- Press the Restore default php.ini button, as shown in the screenshot below. Once you press this button, the default PHP.ini file will be restored and saved automatically.
The other way you can reset your PHP.ini file is by changing the PHP version that your hosting account uses. Whenever you change your PHP version, your PHP.ini file gets reset automatically. For a step-by-step guide, you can refer to our article which details how to update the PHP version of your hosting account.
Which Are Some of the More Noteworthy PHP.ini Directives?
Below is a brief list of some of the more popular PHP.ini directives and variables that you may need to change at some point:
max_execution_timedetermines the number of seconds PHP scripts are allowed to run.output_bufferingallows your site to continue loading, even if new PHP headers are set while data is being sent to the client.error_reportingallows you to determine the types of errors that will be reported by the server.display_errorsallows you to display or hide PHP errors from your live site.memory_limitsets the memory limit for your web application.post_max_sizelimits the size of the POST request a client can send to the server.upload_max_filesizeis a limit on the maximum size of file uploads.extension=soap.soallows you activate/deactivate the SOAP client extension.
Conclusion
Whether you are a seasoned web developer or just a regular site owner, chances are that at some point you will need to customize your PHP.ini file. Even if you don’t write PHP code yourself, the CMS that you are using may require some adjustments to be made to your PHP.ini file. As such, knowing how to access and edit the contents of your PHP.ini file will help you get your site up and running as quickly as possible.