How to Install a Drupal Theme

Home » Knowledge Base » Design Tools » Drupal » How to Install a Drupal Theme

Drupal themes control how your website looks and how its content is displayed on each web page. Themes are an important part of each Drupal project, as they enable you to fully customize the appearance of your website to suit your aesthetic needs and requirements.

In the following paragraphs, we share how to install a theme on your Drupal website.


How to Install a Drupal Theme

To install a Drupal theme, you’ll first need to choose and download one that suits your needs, and then install it through your Drupal admin panel.

In the following paragraphs, we share how to do so.


1. Choose and Download a Theme to Your Device

You can find all kinds of themes on Drupal’s official theme library at Drupal.org. When selecting a theme, make sure it’s compatible with your version of Drupal.

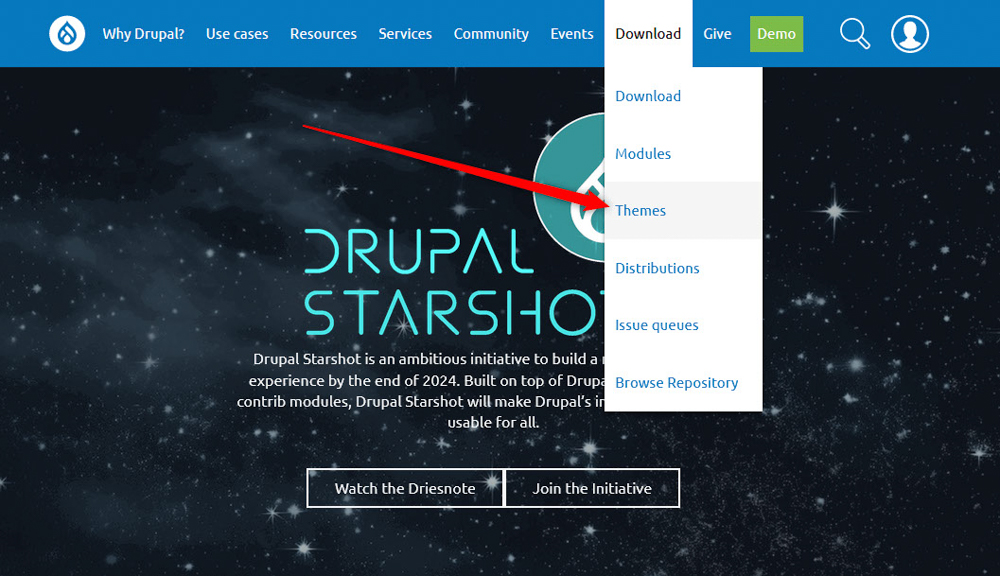
To download a theme, from the homepage of Drupal.org, navigate to Download->Themes:

Download themes from Drupal Website


Then, find a Drupal theme that suits your needs.

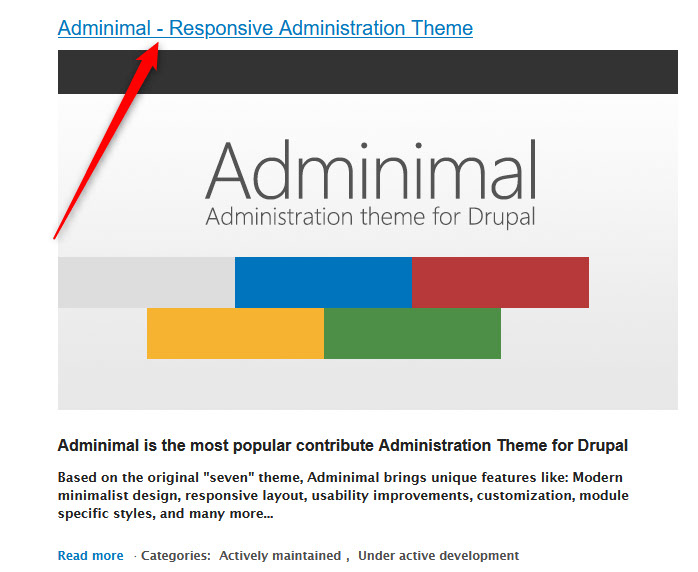
For this demonstration, we will be working with Adminimal.

Once you find a theme you would want to use, click on its name:

Select a Drupal Theme from the Library


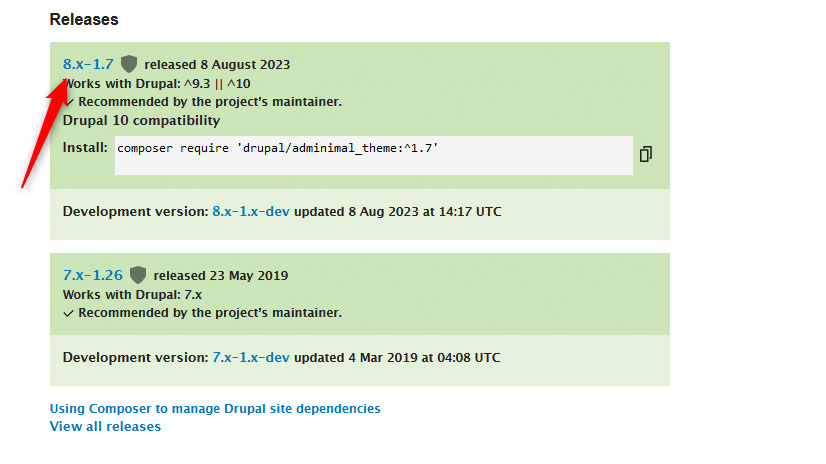
Then, download the tar.gz or zip file to your device by clicking the version that is compatible with your version of Drupal:

Select the right version of Drupal Theme


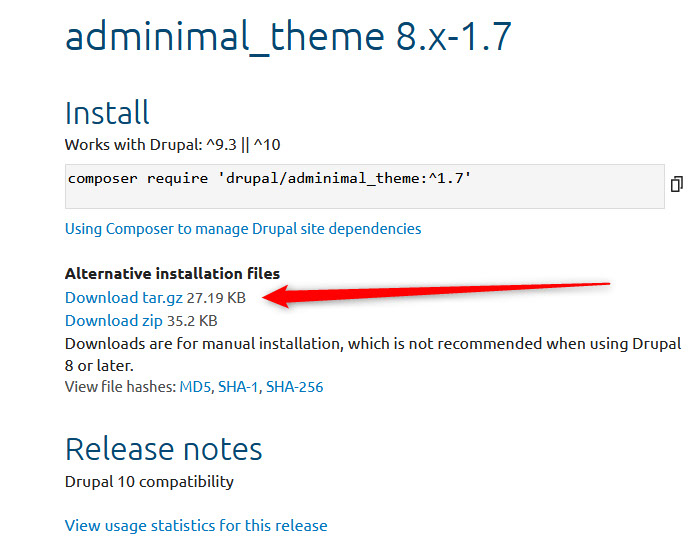
A new page will load. From there, click on the tar.gz file. This will prompt the download process:

Download the Drupal theme to your device


2. Upload the Theme to Drupal

You can directly use your Drupal admin dashboard to upload the theme to Drupal.

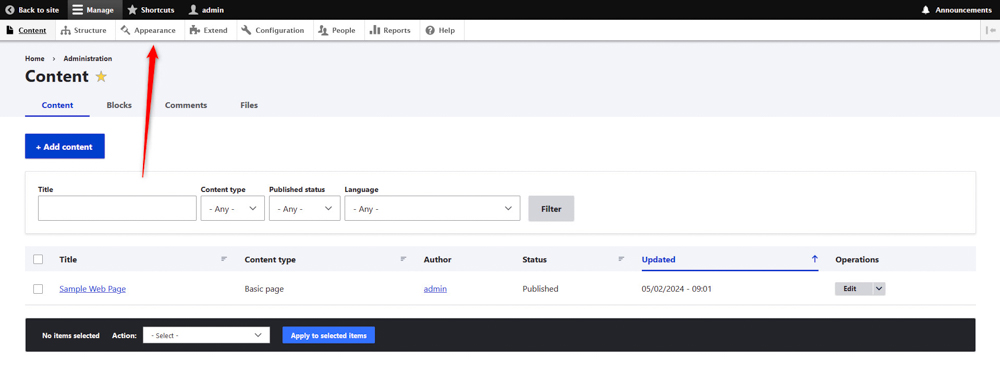
To do so, log in to your Drupal site as an administrator.

Then, go to Appearance via the top menu:

Drupal dashboard Appearance menu


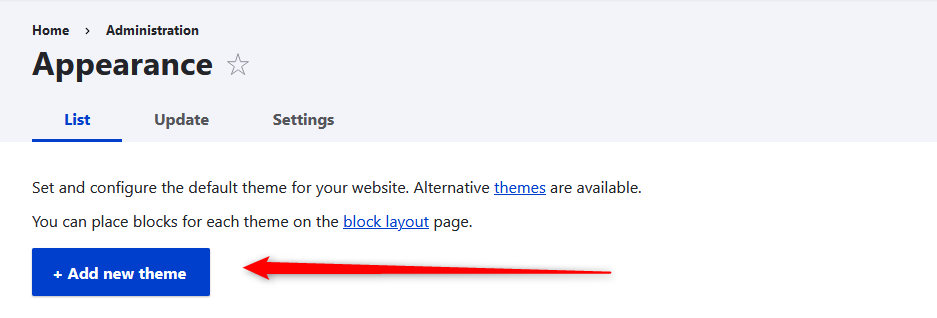
Then, click the blue + Add new theme button.

how to install Drupal theme


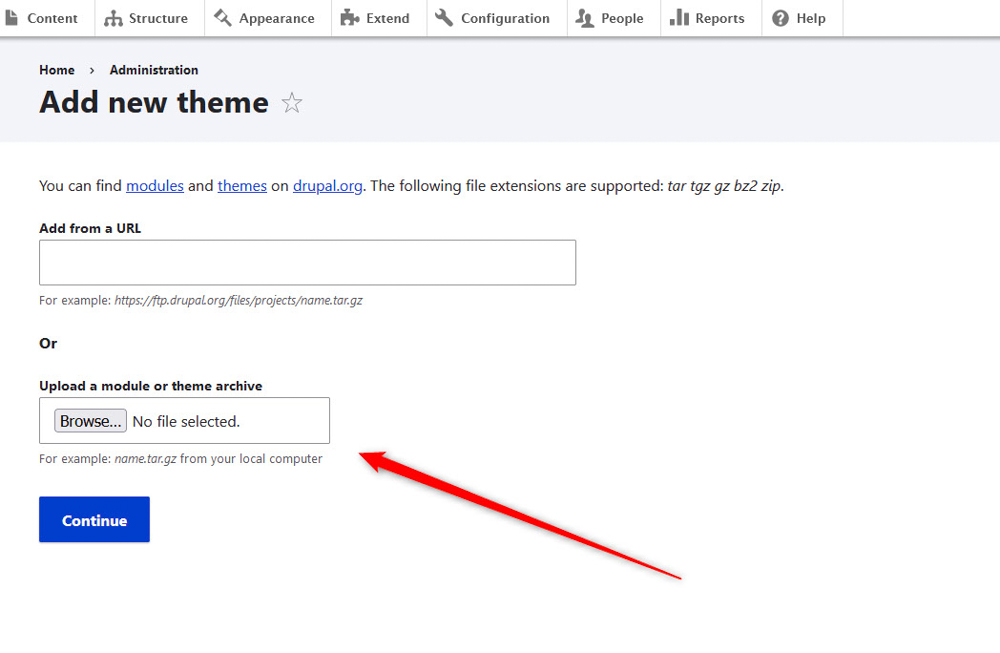
Then, select browse… and find the downloaded theme file on your computer, and select it:

Browse Drupal Theme


After the theme is uploaded, you’ll receive a confirmation message such as this:

Theme upload confirmation message


3. Install the Theme on Your Drupal Website

Now that the theme is uploaded to your Drupal website, it is time to install it, so you can start using it.

To do so, while logged in Drupal, go to Appearance from the top menu:

Drupal Appearance Menu


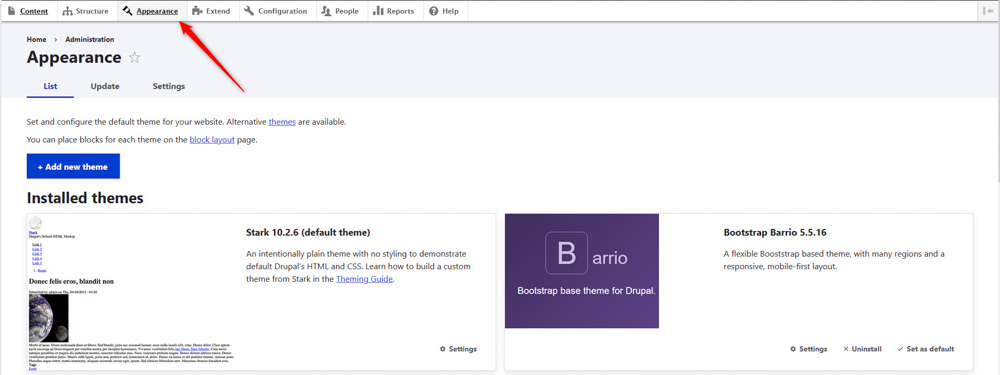
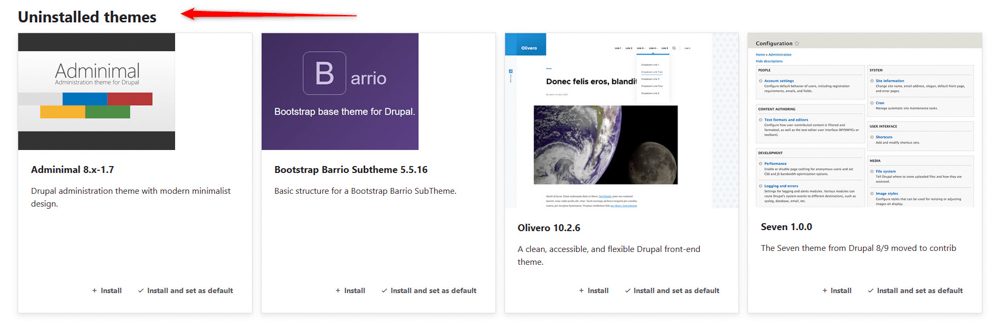
Then, scroll down the page and locate the Uninstalled Themes section:

Drupal Uninstalled Themes 


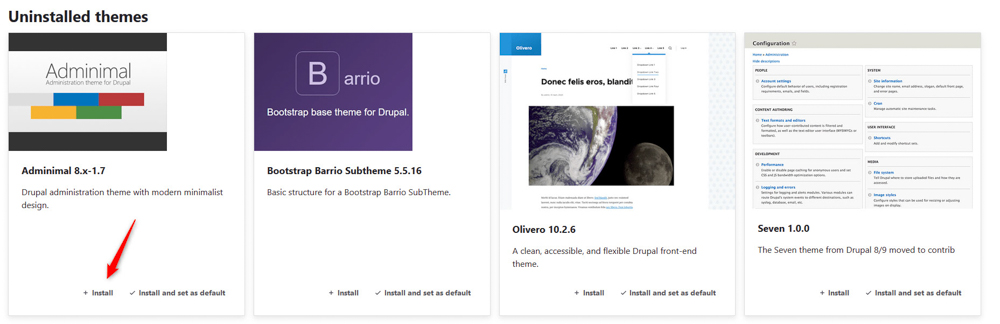
Within this section, locate the theme you want to install and click on the + Install button right below the theme featured image:

Install Drupal Theme


4. Review Your Website

After installing the Drupal theme, navigate through your site to see how the new theme looks and ensure everything is functioning correctly. If there are issues, check the theme’s documentation or support forums for troubleshooting.

By following these steps, you should be able to install and configure a new Drupal theme on your website without much trouble. Always make sure to back up your site before making significant changes like changing a theme.

Read also:


Was this post helpful?

i

Relevant tags:

Connect

Latest posts:

How to Fix 308 Permanent Redirect

308 Permanent Redirect is an HTTPS status code indicating that the requested resource has been permanently moved to another location. Similar to 301 Moved Permanently, 308 informs the user of the movement of a given online resource, and unlike the 301 redirect, 308...

How to Fix 301 Error Moved Permanently

The 301 Moved Permanently is an HTTP status code that indicates a permanent relocation of an online resource from a given URL to a new one. More technically, the moved resource has been moved to the new URL specified in the Location header. The HTTP 301 status code is...

How to Fix 307 Temporary Redirect

307 Temporary Redirect is a response HTTP status code that indicates the requested resource has been moved to a different URL for a limited period of time. Unlike a 301 permanent redirect, the 307 Temporary Redirect message indicates that the change is temporary and...

How to Access Crontab Settings

To access the crontab settings, first, you need to log in to your AwardSpace hosting panel. After you have logged in, head to Crontab Settings, located within the Advanced Tools category:   After you click the Crontab Settings icon, a new page should load. Once...

How to Check My Auto Renewals

To check your AwardSpace hosting plan auto-renewals, first log in to the admin dashboard. Then, head to Wallet, within the Orders & Invoices section:   After that, click the Auto Renewals tab, where you can check any relevant information about your hosting...


Create a website for free!


Free forever

Our Support Team is Here to Help


If you need any questions answered, don't hesitate and contact us. Click the button below and follow the instructions. You can expect an answer within an hour.


Contact AwardSpace


iNewest knowledge base articles

How to Fix 308 Permanent Redirect

308 Permanent Redirect is an HTTPS status code indicating that the requested resource has been permanently moved to another location. Similar to 301 Moved Permanently, 308 informs the user of the movement of a given online resource, and unlike the 301 redirect, 308...

How to Fix 301 Error Moved Permanently

The 301 Moved Permanently is an HTTP status code that indicates a permanent relocation of an online resource from a given URL to a new one. More technically, the moved resource has been moved to the new URL specified in the Location header. The HTTP 301 status code is...

How to Fix 307 Temporary Redirect

307 Temporary Redirect is a response HTTP status code that indicates the requested resource has been moved to a different URL for a limited period of time. Unlike a 301 permanent redirect, the 307 Temporary Redirect message indicates that the change is temporary and...

How to Access Crontab Settings

To access the crontab settings, first, you need to log in to your AwardSpace hosting panel. After you have logged in, head to Crontab Settings, located within the Advanced Tools category:   After you click the Crontab Settings icon, a new page should load. Once...

How to Check My Auto Renewals

To check your AwardSpace hosting plan auto-renewals, first log in to the admin dashboard. Then, head to Wallet, within the Orders & Invoices section:   After that, click the Auto Renewals tab, where you can check any relevant information about your hosting...

How to Check My Payment Requests

To check your payment requests, first log in to the AwardSpace hosting panel. Then, head to Wallet within the Orders & Invoices category:   Then, click the Payment Requests tab. There, you can browse all the information you need about your...

Even more web tutorials

Check out our web hosting knowledge base and the WordPress tutorials to learn more, and be better prepared for your website creation and maintenance journey.