How to Display Fields in Different Modes in SuiteCRM

Home » Knowledge Base » Design Tools » SuiteCRM » How to Display Fields in Different Modes in SuiteCRM

SuiteCRM allows for various customisations of fields. Such are the Detail View, Edit View and List View. Understanding how to customise these is important for tailoring your SuiteCRM project to your preferences. Whether you are streaming data entries or are trying to improve the interface for the end users, understanding how to display fields in different modes helps create a cleaner and more efficient experience.

This article walks you through the basics of field modes, how to manage them, and where to make changes in SuiteCRM.


What are Field Display Modes

In SuiteCRM, modules such as Contacts, Leads, Accounts, and custom modules use different view modes to present various types of data more effectively, for example:

  • Edit View: Used when creating or editing a record. Such fields typically contain fields such as text boxes and drop-down menus.
  • Detail View: This is the read-only version of a record. Such a mode is useful for quickly reviewing information without making any accidental changes.
  • List View: Displays multiple records in a grid or a table format.
  • Mobile View: Optimised view for mobile devices.
  • Subpanel View: The fields are related to the module’s subpanels.

Each mode serves a different purpose and might come in handy in various situations.


How to Manage Field Display

The easiest approach by far is by using SuiteCRM’s Studio, the built-in interface for customising modules.

To manage fields via SuiteCRM Studio, follow these steps:

First, log in to Suite CRM.

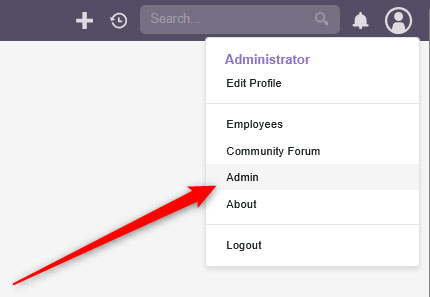
After you log in to the CMS, hover your mouse over your profile picture at the top right corner of the page and from the drop-down menu, click on Admin:

SuiteCRM admin page button


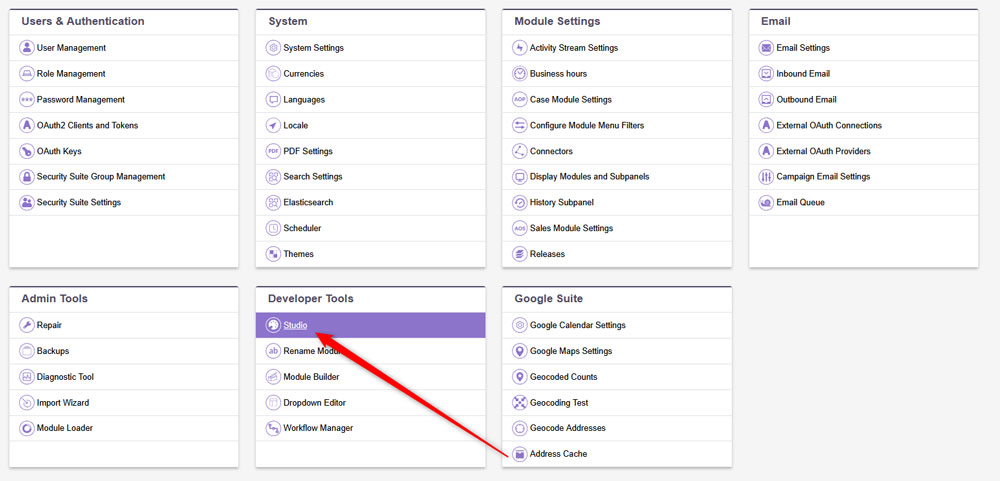
After you click on Admin, a new page will load. From there, click on Studio from the Developer Tools box:

Access the SuiteCRM studio interface


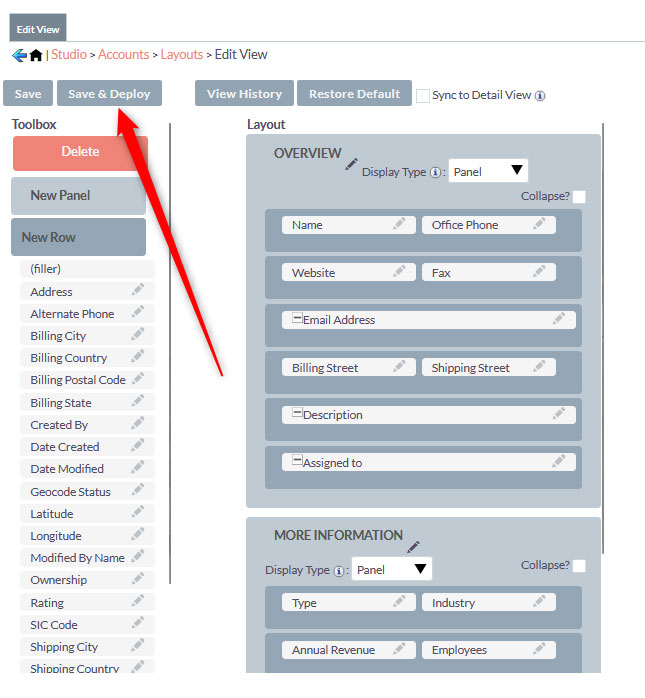
After you click on Studio, select a module from the list on the left of the page. Once you do so, from the drop-down menu, select one of the following views:

  • Layouts -> Edit View
  • Layouts -> Detail View
  • Layouts -> List View


Browse the layout types in Studio


Then, drag and drop the fields where you wish them to appear, or remove them from the layout. Once you are done with your editing, click on Save & Deploy, so SuiteCRM saves and applies the changes you’ve just made:

Save & Deploy settings, so Suite CRM can apply all changes you made


Tips and Tricks

To get the most out of the modes, follow these tips:

  • Avoid Clutter: Show only the most important fields for each context.
  • Use panels: Group fields into logical sections (Contact Info, Internal Data)
  • Leverage Roles and Security: Use SuiteCRM’s Role Management to show or hide sensitive fields for specific users.


Conclusion

Displaying fields in different modes in SuiteCRM can help you improve your project’s interface and improve user experience. With the handy Studio interface, you can tailor how the data in SuiteCRM appears just the way you want it to appear.

Was this post helpful?

i

Relevant tags:

Connect

Latest posts:

How to Check My Hosting Limits

To check your hosting limits, follow these steps: First, log in to the hosting control panel. Then, via the dashboard, head to Hosting Settings:   After that, click the Hosting Limits tab:   Then, you will access the information about your account's hosting...

How to Access the Security Settings of My Domains

Accessing the security settings of your hosted domains is easy with AwardSpace. You can access the settings in just a few minutes by following the steps below. First, log in to the AwardSpace hosting panel. Then, head to the Domain Manager page by clicking the...

How to Access The Name Servers Settings of My Domain

Accessing the name server settings with AwardSpace is quite simple. Just follow the next steps. First, log in to the AwardSpace hosting panel. Then, head to Domain Manager:   After that, locate the domain whose Name Server settings you wish to access and click...

How to Access the DNS Settings of My Domains

Accessing the DNS settings of your domains is easy with AwardSpace. The process is comprised of a few simple steps and requires only a minute or two of your time. First, log in to the AwardSpace hosting panel. Then, head to the Domain Manager:   After that,...


Create a website for free!


Free forever

Our Support Team is Here to Help


If you need any questions answered, don't hesitate and contact us. Click the button below and follow the instructions. You can expect an answer within an hour.


Contact AwardSpace


iNewest knowledge base articles

How to Check My Hosting Limits

To check your hosting limits, follow these steps: First, log in to the hosting control panel. Then, via the dashboard, head to Hosting Settings:   After that, click the Hosting Limits tab:   Then, you will access the information about your account's hosting...

How to Access the Security Settings of My Domains

Accessing the security settings of your hosted domains is easy with AwardSpace. You can access the settings in just a few minutes by following the steps below. First, log in to the AwardSpace hosting panel. Then, head to the Domain Manager page by clicking the...

How to Access The Name Servers Settings of My Domain

Accessing the name server settings with AwardSpace is quite simple. Just follow the next steps. First, log in to the AwardSpace hosting panel. Then, head to Domain Manager:   After that, locate the domain whose Name Server settings you wish to access and click...

How to Access the DNS Settings of My Domains

Accessing the DNS settings of your domains is easy with AwardSpace. The process is comprised of a few simple steps and requires only a minute or two of your time. First, log in to the AwardSpace hosting panel. Then, head to the Domain Manager:   After that,...

How to Access The Settings for My Subdomains

Accessing the settings for your subdomain with AwardSpace is quite simple. First, log in to the AwardSpace hosting panel. Then, head to Domain Manager:   A new page should open. Once you see it, scroll down until you see your list of hosted subdomains:  ...

Even more web tutorials

Check out our web hosting knowledge base and the WordPress tutorials to learn more, and be better prepared for your website creation and maintenance journey.