How to Set Up Your HomePage in Zen Cart

Home » Knowledge Base » Design Tools » Zen Cart » How to Set Up Your HomePage in Zen Cart

Given that your Zen Cart homepage is often the first page your customers see, it is important to make it functional and aesthetically pleasing so you can make a good first impression. This guide showcases how to set up your homepage in Zen Cart and showcases how to display products, banners, write a simple welcome message and other tips.

Step 1: Log in to the Zen Cart Admin Panel

To begin with the homepage setup, log in to Zen Cart.

Step 2: Edit the Welcome Message

A good start is to add a welcome message that all your visitors see when they first land on your Zen Cart website. To create one, do the following:

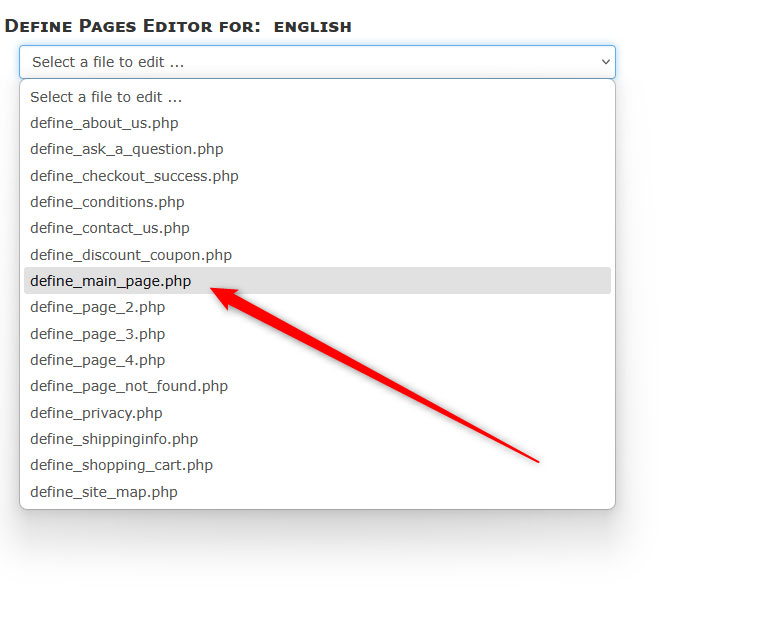
Go to Tools -> Define Pages Editor:

Set up your Zen Cart homepage by using the define pages editor


Then, select define_main_page.php from the dropdown menu:

Select Define Main Page Editor in Zen Cart to edit homepage


Once you select to edit the main page on your Zen Cart website, use the editor to add and modify the content that is displayed on the homepage:

Modify homepage via the page editor in Zen Cart


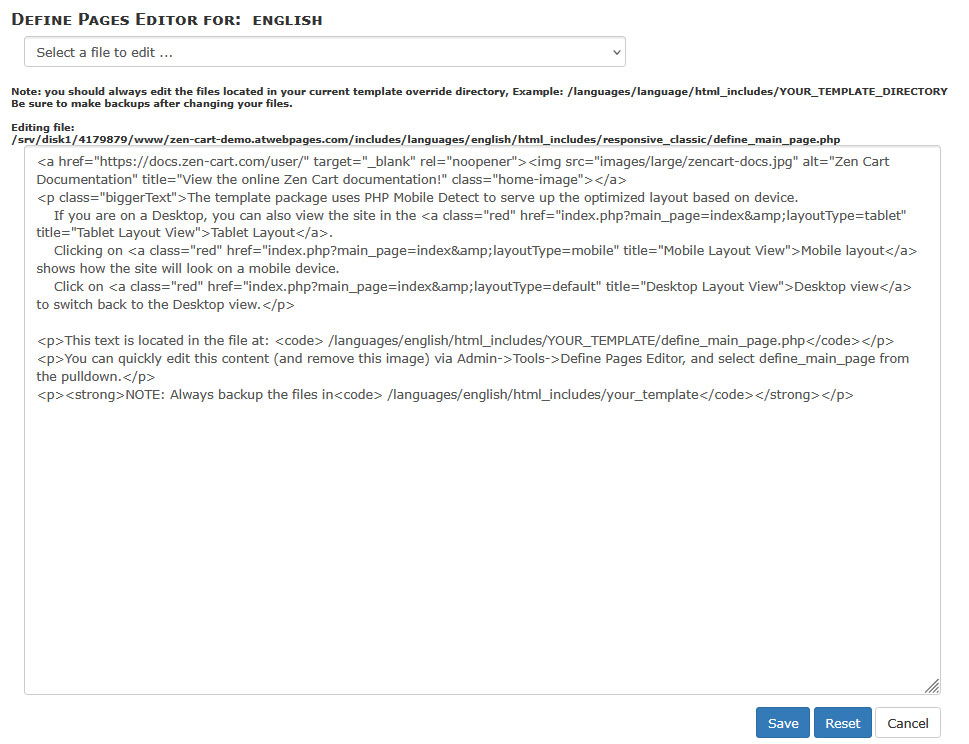
After you finish editing, click on the blue Save button, located at the bottom of the page, so Zen Cart applies and saves the changes you just made:

Save page changes to apply your homepage setup settings


3. Show or Hide Homepage Elements

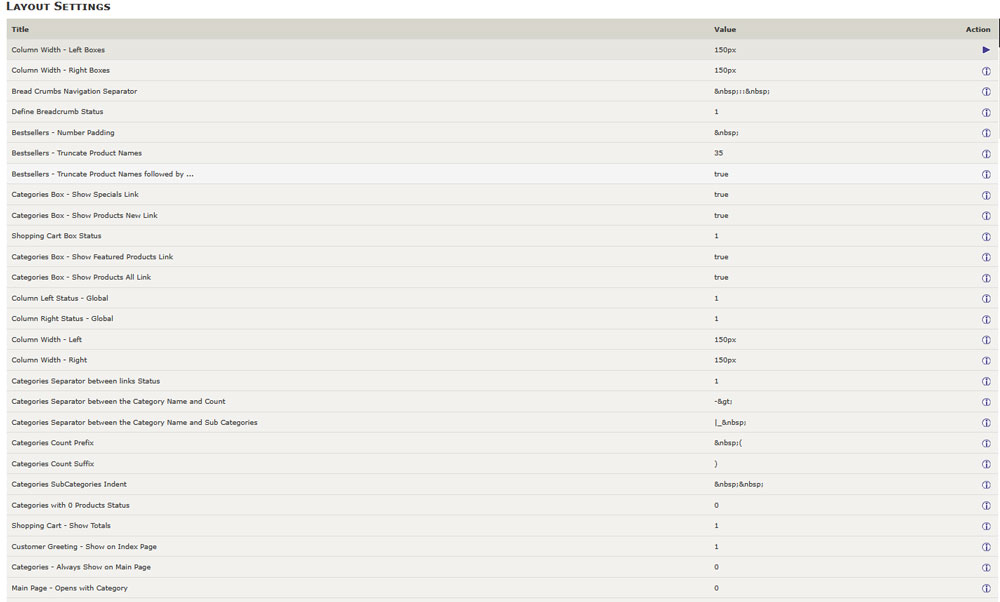
After you added a welcome message, it is time to start adding or hiding elements on your homepage. To do so, simply navigate to Configuration -> Layout Settings:

Access the layout settings in Zen Cart


From here, you can adjust numerous settings such as:

  • Show New Products on Main Page – Use this to display new products.
  • Show Featured Products on Main Page – Enable to display the hand-picked items and other special products.
  • Show Specials on Main Page – Use this to showcase discounts and limited-time offers.
  • Show or hide products and product categories on the Main Page – Set to true to list the product categories.


4. Add Promotional Banners

Banners are a handy tool to display additional information on your Zen Cart homepage. To add banners, follow these steps:

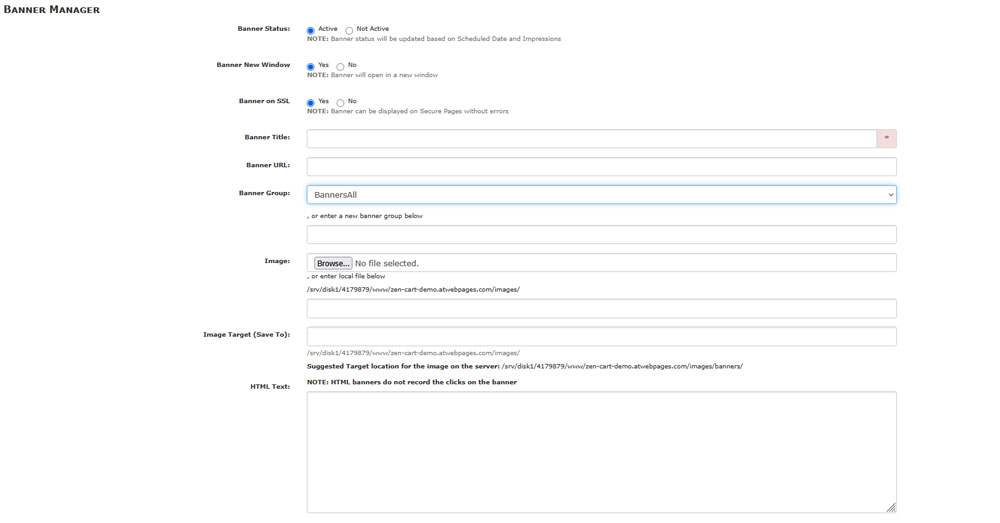
Navigate to Tools -> Banner Manager:

Banner Manager Settings in Zen Cart


Then, click on New Banner and upload your image:

Add New Banner in Zen Cart


Fill in the banner details:

Fill in Zen Cart Banner Details


5. Customize Your Template Layout

Zen Cart allows you to use various templates to shape the overall layout of your online store. You can select different templates and rearrange elements with a few simple steps:

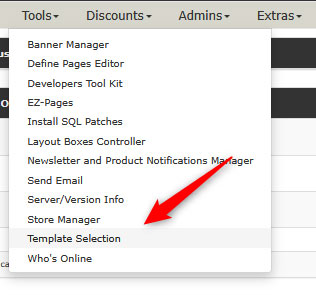
Navigate to Tools -> Template Selection to select or install a template:

Access the Layout and Templates settings in Zen Cart admin panel


From this page, you can use the Add New Templates, preview them, and create a template/language association:

Access the Template Selection options in Zen Cart


6. Enhance Store SEO

You can improve your store’s SEO. Here’s how to access these settings:

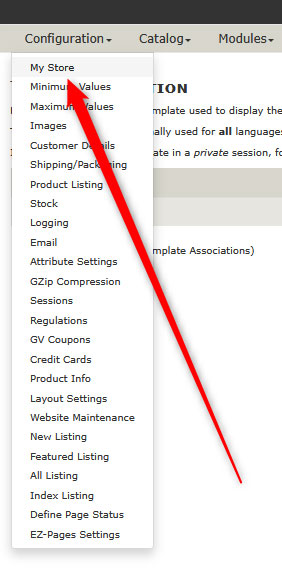
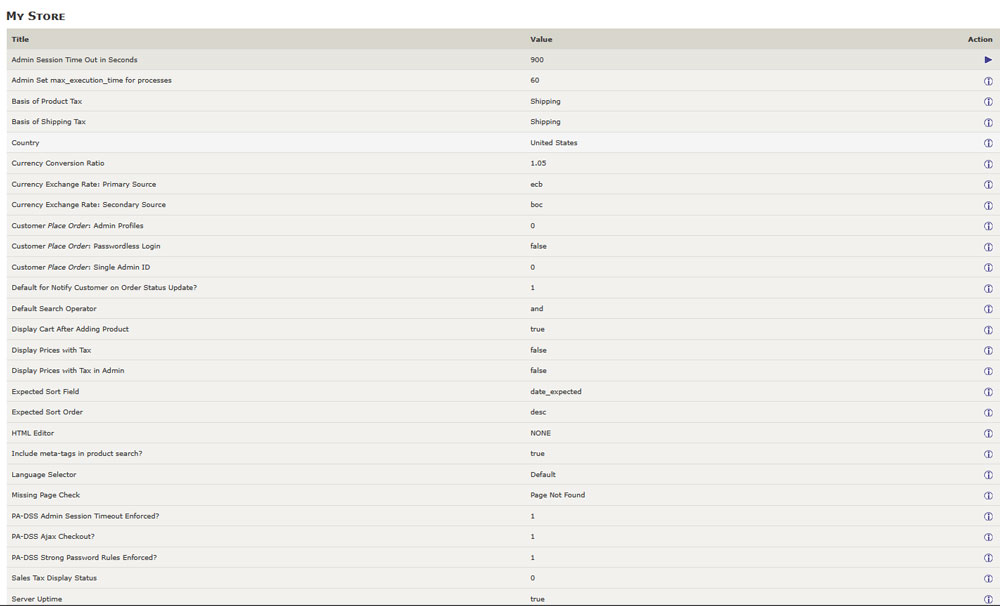
Navigate to Configuration -> My Store:

My Store settings in Zen Cart


From this section, you can edit various settings, including Store Name, Store Owner and Store Address, and Phone:

Acess the Zen Cart My Store Settings


Remember to use relatable keywords, so you improve your SEO score.

You can also use SEO-friendly URLs by installing plugins such as Ultimate SEO URLs or Simple SEO URLs

Keep in mind that a well-optimized homepage can significantly improve your store’s online visibility and generate more traffic towards your pages.

If you are interested in the topic of SEO, then check out our comprehensive guide:

What is SEO and How Does it Work?

Also, check how to make a full Zen Cart store setup.


7. Clear Cache and Test

Now that you have applied various changes to your Zen Cart homepage, it is time to run a quick test, so to ensure everything works just fine.To do so:


Conclusion – How to Set Up Your HomePage in Zen Cart

Setting up your Zen Cart homepage is important, as it contributes to converting store visitors to paying customers. With just a few clicks here and there, you can set up your homepage in no time and enjoy improved traffic performance.

Was this post helpful?

i

Relevant tags:

Connect

Latest posts:

How to Check My Auto Renewals

To check your AwardSpace hosting plan auto-renewals, first log in to the admin dashboard. Then, head to Wallet, within the Orders & Invoices section:   After that, click the Auto Renewals tab, where you can check any relevant information about your hosting...

How to Check My Payment Requests

To check your payment requests, first log in to the AwardSpace hosting panel. Then, head to Wallet within the Orders & Invoices category:   Then, click the Payment Requests tab. There, you can browse all the information you need about your...

How to Check My Invoices

To check your invoices in AwardSpace, first log in to the hosting panel. From there, head to Invoices within the Orders & Invoices category:   From this place, you can browse order references, payment orders, payment types, order dates, and various...

How to Check My Wallet Flow

To check your wallet flow, first log in to the AwardSpace hosting panel. Then, click on Wallet within Payments & Invoices:   After that, click the Wallet Flow tab. This is where you can see details about your wallet flaw:

How to Check My Incomplete Orders

To check your incomplete orders, first log in to the AwardSpace hosting panel. Then, head to Incomplete Orders within Orders & Invoices:   Then, you can check the list within the Incomplete Orders tab:  


Create a website for free!


Free forever

Our Support Team is Here to Help


If you need any questions answered, don't hesitate and contact us. Click the button below and follow the instructions. You can expect an answer within an hour.


Contact AwardSpace


iNewest knowledge base articles

How to Check My Auto Renewals

To check your AwardSpace hosting plan auto-renewals, first log in to the admin dashboard. Then, head to Wallet, within the Orders & Invoices section:   After that, click the Auto Renewals tab, where you can check any relevant information about your hosting...

How to Check My Payment Requests

To check your payment requests, first log in to the AwardSpace hosting panel. Then, head to Wallet within the Orders & Invoices category:   Then, click the Payment Requests tab. There, you can browse all the information you need about your...

How to Check My Invoices

To check your invoices in AwardSpace, first log in to the hosting panel. From there, head to Invoices within the Orders & Invoices category:   From this place, you can browse order references, payment orders, payment types, order dates, and various...

How to Check My Wallet Flow

To check your wallet flow, first log in to the AwardSpace hosting panel. Then, click on Wallet within Payments & Invoices:   After that, click the Wallet Flow tab. This is where you can see details about your wallet flaw:

How to Check My Incomplete Orders

To check your incomplete orders, first log in to the AwardSpace hosting panel. Then, head to Incomplete Orders within Orders & Invoices:   Then, you can check the list within the Incomplete Orders tab:  

How to Check My Canceled Orders

To check your canceled orders with AwardSpace, first, log in to the hosting panel. Then, head to Caneled Orders within the Orders & Invoices category:   Then, within the Canceled Orders tab, you can browse your canceled orders with AwardSpace:

Even more web tutorials

Check out our web hosting knowledge base and the WordPress tutorials to learn more, and be better prepared for your website creation and maintenance journey.