How to Upload Files in Zenphoto

Home » Knowledge Base » Design Tools » Zenphoto » How to Upload Files in Zenphoto

Knowing how to upload files in Zenphoto is a fundamental skill. In this guide, we share how to go through the process and manage your project and media library quickly and easily.


Step 1: Log in to Zenphoto

The first step in the process is to log in to Zenphoto.


Step 2: Navigate to the Upload Section

Once logged in, via the Zenphoto admin panel, head to the Upload tab:

Navigate to the Upload tab in Zenphoto admin panel


Step 3: Choose an Album or Create a New Album

After you have accessed the Upload tab, you can select to create a new album for your images or upload them to an already existing one.

  • To use an already existing album, select one from the drop-down menu.
  • To create a new album, give it a name and description, and hit Enter.


Step 4: Upload Your Files

Now that you have selected an album to use, it is time to upload your media files to Zenphoto. To do so:

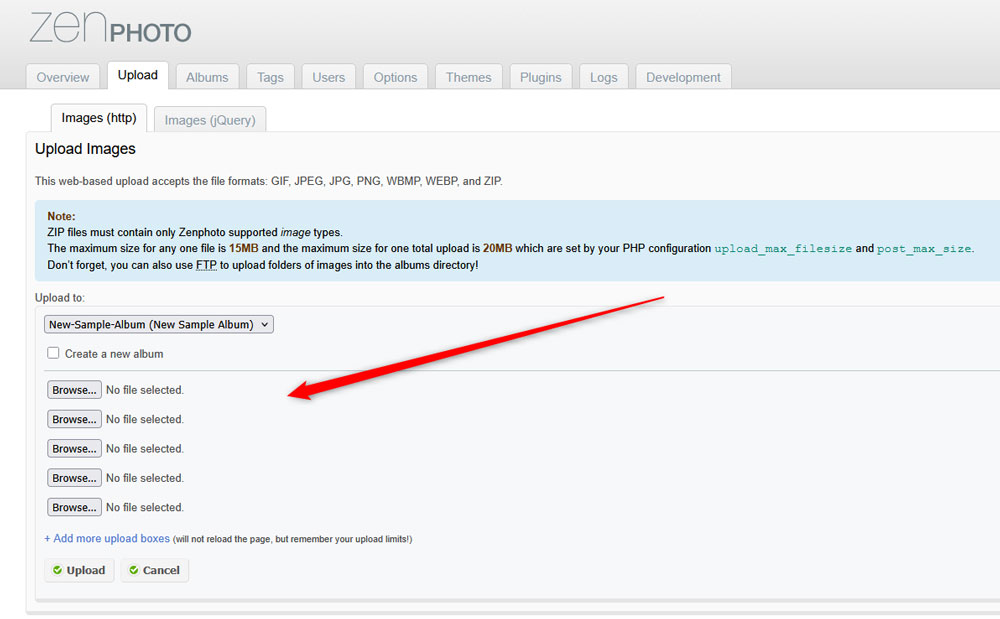
From the Upload tab, click Browse (or Choose Files, the name depends on your Internet browser):

Select a Zenphoto album


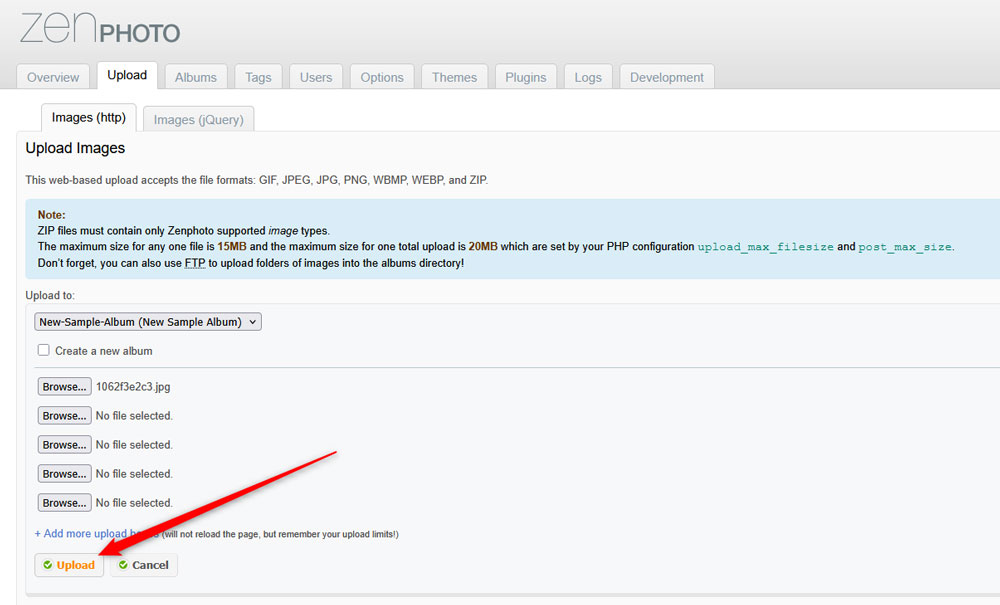
Now, select the images from your device, and then click on Upload:

Add a new Zencart files


Step 5: Add Image Details

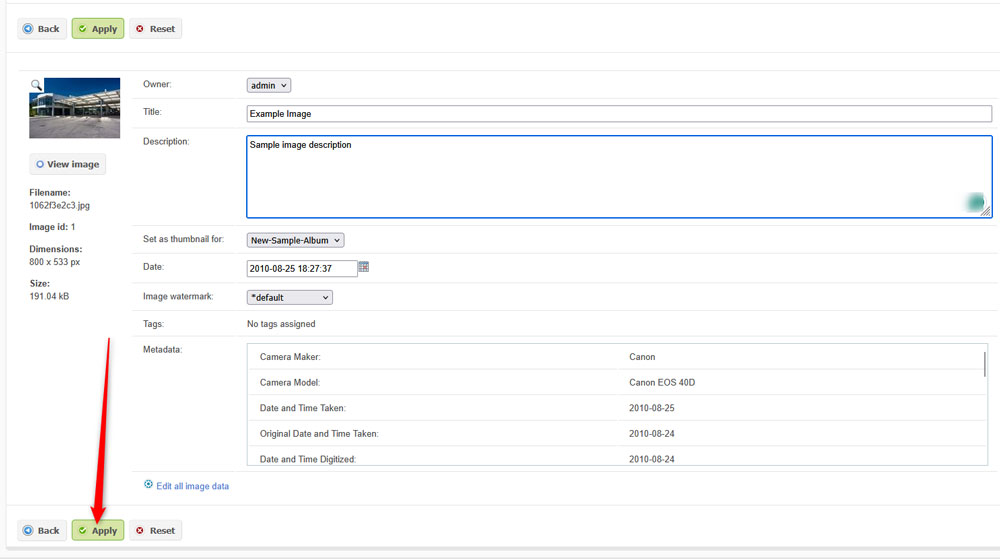
Now that your images are uploaded to Zenphoto, you can add details such as image title, description, select file owner, and others:

Zencart image details


After you are finished, click on the Apply button, so Zenphoto applies and saves your changes:

Apply the changes to your Zencart file


Now you have successfully uploaded images to Zenphoto.


Conclusion

Learning how to upload files in Zenphoto is important for your project. Whether you upload only a several images or numerous video files, Zenphoto makes it simple for you.

Was this post helpful?

i

Relevant tags:

Connect

Latest posts:

How to Customize Menus in SuiteCRM

SuiteCRM grants you the option to customise your website menus and control what modules appear in them, how they are grouped and in what categories. This customisation can help you improve user workflow and reduce clutter, especially if you are working on a large...

How to Add Charts to the Sidebar in SuiteCRM

Àlthough SuiteCRM doesn't support adding charts directly to the sidebar, there is a simple method that you can use to achieve the effect. In this guide, we share how to do so.   How to Add Charts to the Sidebar in SuiteCRM The process is comprised of a few...

How to Add Subpanel Filters in SuiteCRM

SuiteCRM's subpanels can be very useful in various situations, such as showing related records (like contacts under an account). However, as your database grows, so does the scrolling time through unfiltered subpanels. Fortunately, you can add filters to subpanels, so...

How to Display Fields in Different Modes in SuiteCRM

SuiteCRM allows for various customisations of fields. Such are the Detail View, Edit View and List View. Understanding how to customise these is important for tailoring your SuiteCRM project to your preferences. Whether you are streaming data entries or are trying to...

How to Add Grouped Fields to the Record View in SuiteCRM

SuiteCRM offers great versatility when it comes to customising modules, including how fields are displayed on record views. One powerful feature is grouping fields within sections for better layout and user experience. In this article, we share how to group fields in...


Create a website for free!


Free forever

Our Support Team is Here to Help


If you need any questions answered, don't hesitate and contact us. Click the button below and follow the instructions. You can expect an answer within an hour.


Contact AwardSpace


iNewest knowledge base articles

How to Customize Menus in SuiteCRM

SuiteCRM grants you the option to customise your website menus and control what modules appear in them, how they are grouped and in what categories. This customisation can help you improve user workflow and reduce clutter, especially if you are working on a large...

How to Add Charts to the Sidebar in SuiteCRM

Àlthough SuiteCRM doesn't support adding charts directly to the sidebar, there is a simple method that you can use to achieve the effect. In this guide, we share how to do so.   How to Add Charts to the Sidebar in SuiteCRM The process is comprised of a few...

How to Add Subpanel Filters in SuiteCRM

SuiteCRM's subpanels can be very useful in various situations, such as showing related records (like contacts under an account). However, as your database grows, so does the scrolling time through unfiltered subpanels. Fortunately, you can add filters to subpanels, so...

How to Display Fields in Different Modes in SuiteCRM

SuiteCRM allows for various customisations of fields. Such are the Detail View, Edit View and List View. Understanding how to customise these is important for tailoring your SuiteCRM project to your preferences. Whether you are streaming data entries or are trying to...

How to Add Grouped Fields to the Record View in SuiteCRM

SuiteCRM offers great versatility when it comes to customising modules, including how fields are displayed on record views. One powerful feature is grouping fields within sections for better layout and user experience. In this article, we share how to group fields in...

How to Back Up Your SuiteCRM Project

Making regular backups of your SuiteCRM project is crucial. Backups help keep any kind of data safe, and also provide a quick recovery after a crash, hacking attack, or any user error. Because of how important backups are for your SuiteCRM website, in this article, we...

Even more web tutorials

Check out our web hosting knowledge base and the WordPress tutorials to learn more, and be better prepared for your website creation and maintenance journey.