How to Install a Grav Theme

Home » Knowledge Base » Design Tools » Grav » How to Install a Grav Theme

When you start working on your website, you are most likely to stumble upon the Grav themes.

A standard feature of Grav CMS is the vast theme library that allows you to fully customize the look and feel of your website.

A Grav theme is a collection of templates, styles, and other files that determine the visual layout of your website. Themes control how your website looks and feels and include a wide range of options to arrange your website content, colors, fonts, media, and overall design.

In this article, we share how to install and activate a Grav theme, so you change the design of your site just the way you want.


How to Install a Grav Theme

To install a Grav theme, you should first log in to your admin panel.

After that, navigate to Themes from the sidebar:
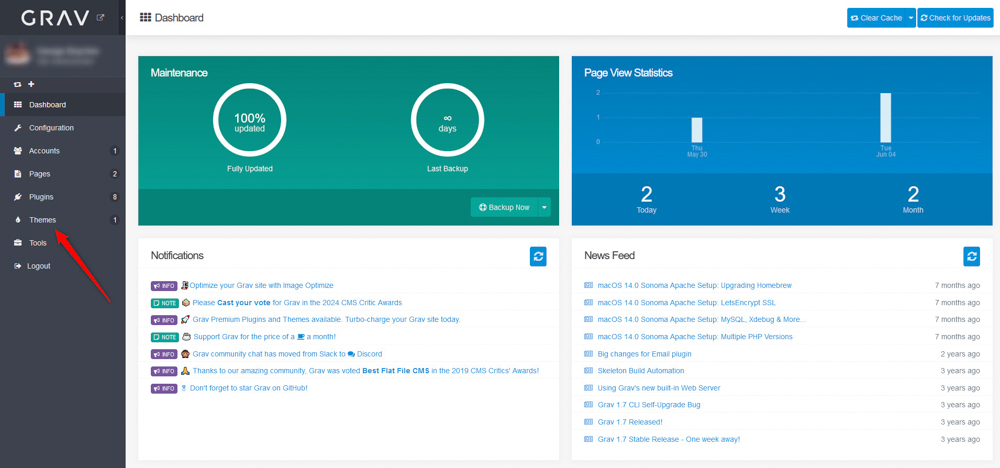
Install a Grav theme via the Admin Dasboard


Then, click on the blue +Add button at the top right corner of the new page that should open:
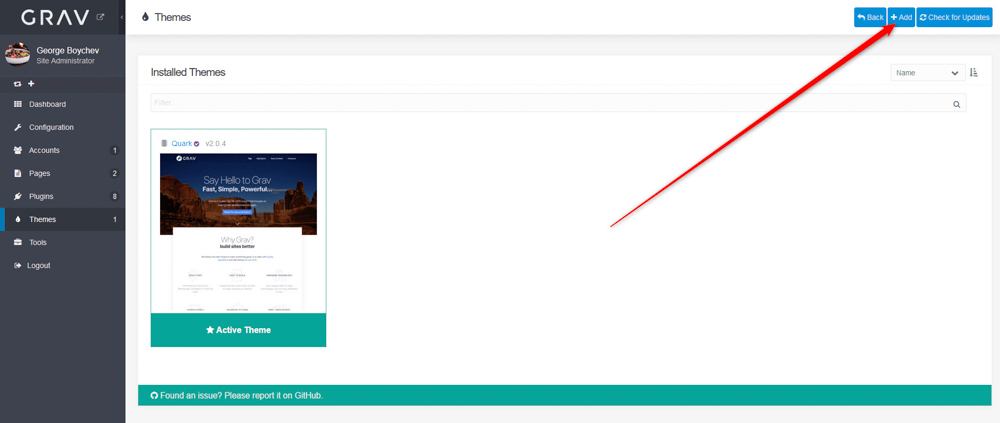
Install a new Grav Theme


A new page with a list of themes should open. It looks like this:
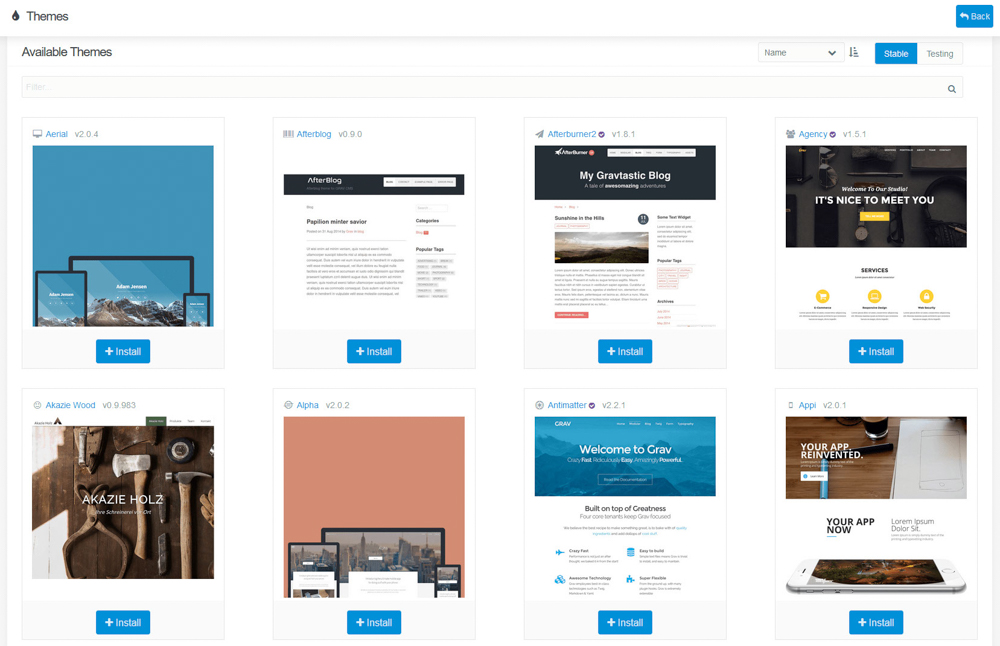
Grav Themes Library


From here, you can browse all the available Grav themes and select the one that best fits your layout requirements.

You can use the Filter option to find a specific theme or a collection of themes that can fit your requirements for a specific type of website you wish to create:
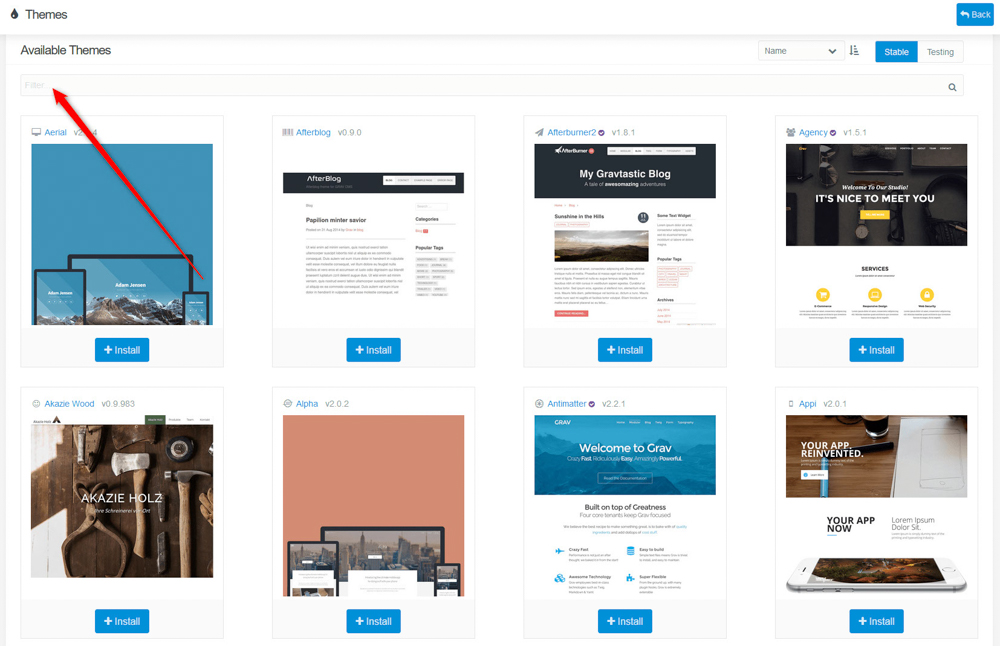
Grav Themes Library Filter Option


To know more about a certain theme, click on its featured image:
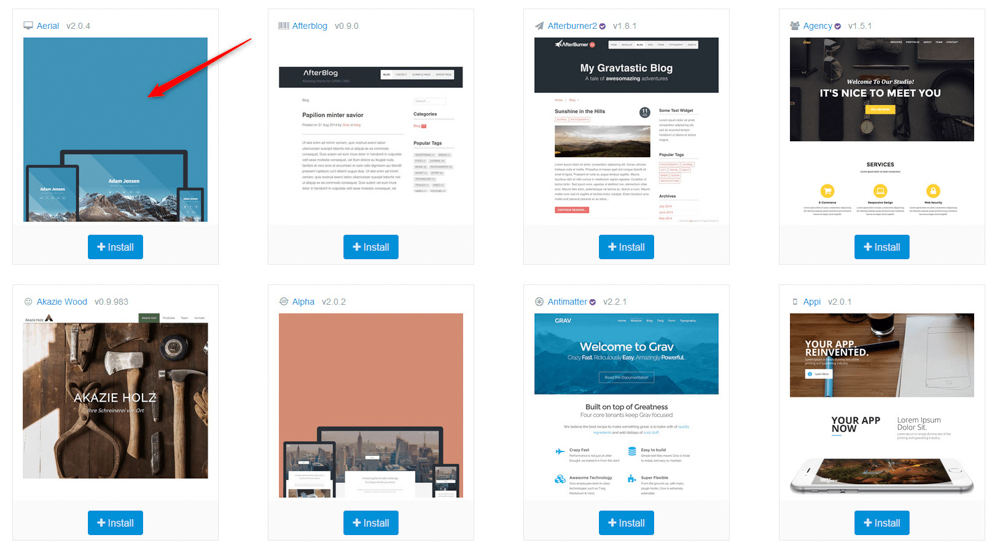
Grav Theme Featured Image


Clicking the featured image would open a new page with detailed information about the selected theme:
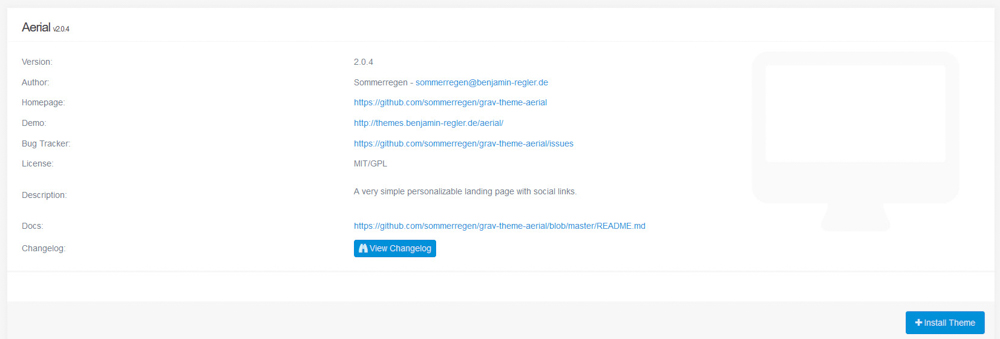
Grav Theme Details


When you find a suitable theme, you should install it. To do so, click on the +Install button right below the featured image of the given Grav theme:
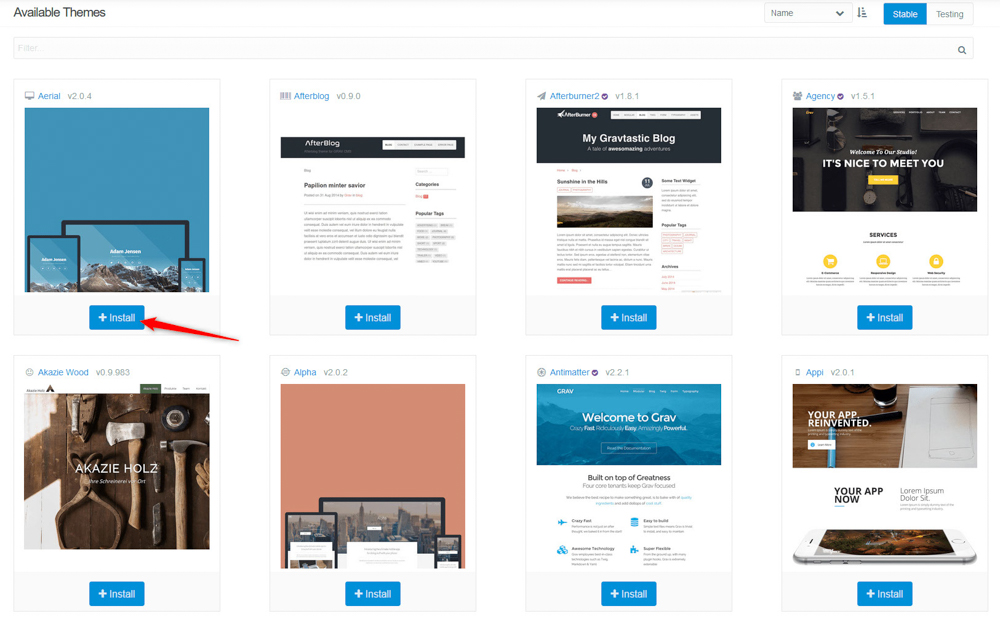
Grav Theme Install Button


If you have opened the information page about a given theme, you can click on the blue +Install Theme button at the bottom right corner of the page:
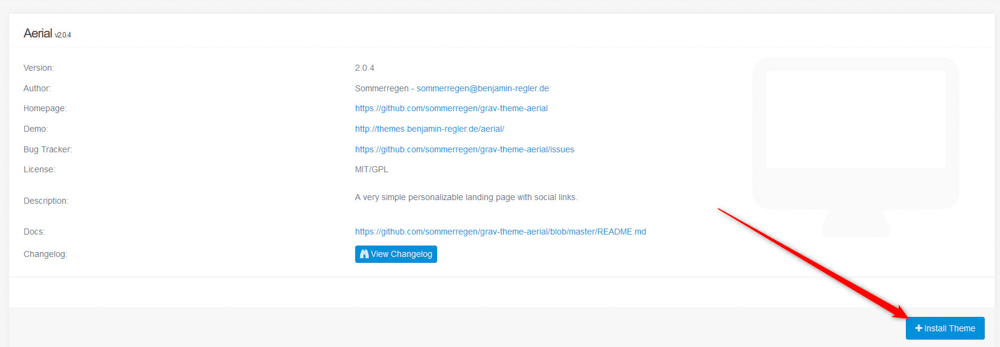
Grav Theme Information Page


Either way, you choose, a message box will appear. Once you see it, click on the blue Continue button:
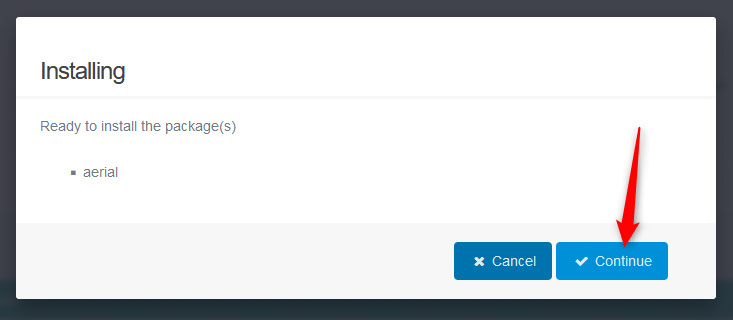
Grav Theme Details Page Install Button


After the installation process is finished, Grav will show a confirmation message such as this one:

Grav Theme Confirmation Message


Now your theme is installed, and you only need to activate it.


How to Activate a Grav Theme

To activate the Grav theme you installed, from the Grav admin dashboard click again on Themes from the sidebar:
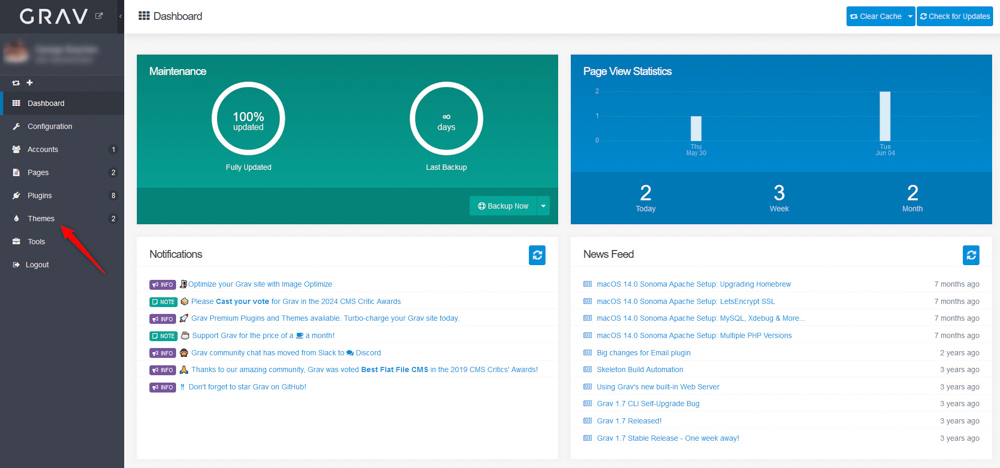
Grav Themes Menu


A new page with a list of your installed themes will appear. While on this page, click on the Activate button right below the newly installed Grav theme:
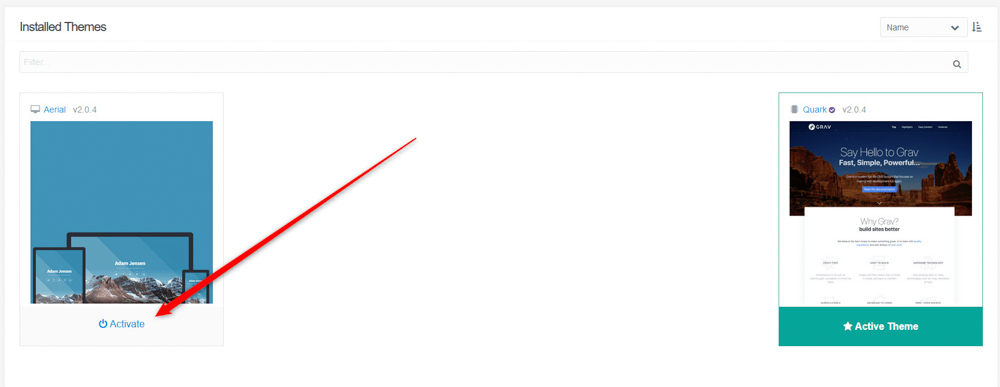
Activate an Installed Grav Theme


Once you click on Activate, a popup box should appear. Click on Continue:
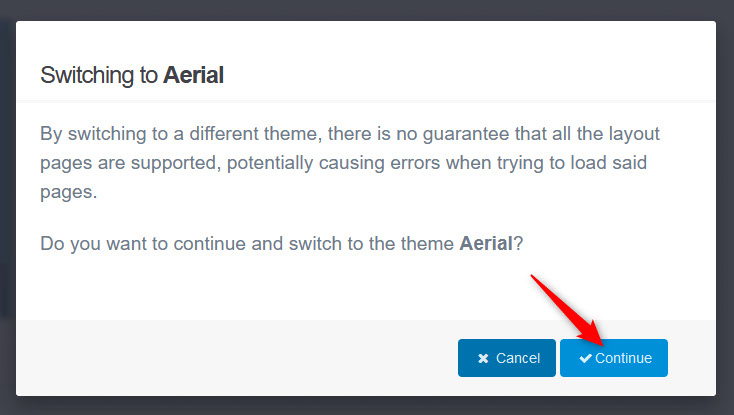
Grav Activation Theme Message


After you click on Continue, Grav will activate the theme and once it does, a page with a confirmation message and details about the activated theme should appear:
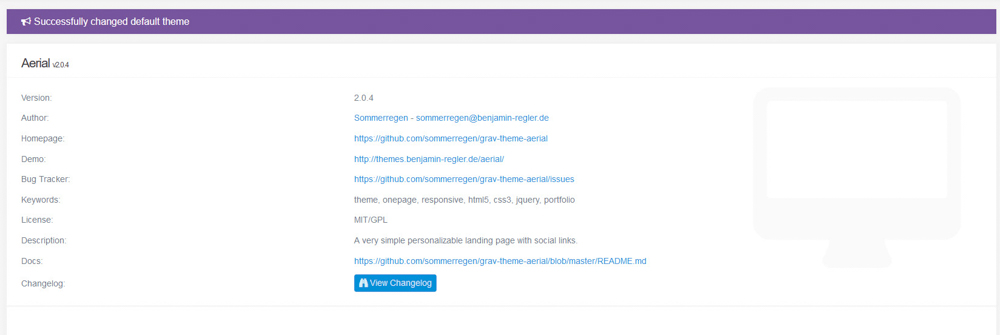
Grav Active Theme Details


After you see this page, click on the blue Save button, located at the top right corner of the screen:
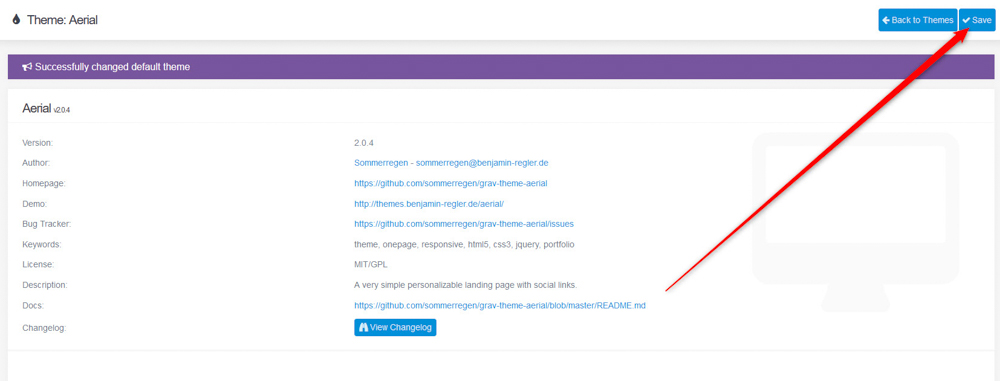
Grav Active Theme Save Changes


Now you have successfully installed and activated a new Grav theme.


Conclusion

Installing and activating a Grav theme is a simple process that can be done via the Grav admin dashboard. With your new theme installed, you can customize your website and create a unique look and feel for each of your web pages.


Was this post helpful?

i

Relevant tags:

Connect

Latest posts:

How to Log in to Vtiger

Vtiger is a versatile platform that allows you to manage your business processes from a single place. It helps you organize customer data, optimize workflows, and improve team collaboration from a handy dashboard that is instantly available once you install the...

How to Install Vtiger

Vtiget is a handy open-source CMS that can help you manage various business processes, including tracking sales, marketing campaign results, customer service, and more. Installing Vtiger with AwardSpace is simple, quick, and free. You can start working on your online...

How to Manage Global Record Actions in SuiteCRM

SuiteCRM is a handy and versatile CMS that allows you to manage customer relationships, leads, and business processes within a single platform. One of the many useful SuiteCRM features is the Global Record Actions - a tool that lets you take quick actions across...

How to make Bulk Actions in SuiteCRM

By using bulk actions in SuiteCRM, you can save time, effort, and deal faster with repetitive tasks. Whether you wish to update several plugins, assign records, or mass delete modules, bulk actions make everything faster and easier. In this article, we share how to...

How to Use Filters in SuiteCRM

Filters in SuiteCRM are a handy feature that helps you quickly organize your website data and easily find, sort, and analyze specific records across your modules. You can use filters to quickly find leads, organize your workflow, and access a specific class of data in...


Create a website for free!


Free forever

Our Support Team is Here to Help


If you need any questions answered, don't hesitate and contact us. Click the button below and follow the instructions. You can expect an answer within an hour.


Contact AwardSpace


iNewest knowledge base articles

How to Log in to Vtiger

Vtiger is a versatile platform that allows you to manage your business processes from a single place. It helps you organize customer data, optimize workflows, and improve team collaboration from a handy dashboard that is instantly available once you install the...

How to Install Vtiger

Vtiget is a handy open-source CMS that can help you manage various business processes, including tracking sales, marketing campaign results, customer service, and more. Installing Vtiger with AwardSpace is simple, quick, and free. You can start working on your online...

How to Manage Global Record Actions in SuiteCRM

SuiteCRM is a handy and versatile CMS that allows you to manage customer relationships, leads, and business processes within a single platform. One of the many useful SuiteCRM features is the Global Record Actions - a tool that lets you take quick actions across...

How to make Bulk Actions in SuiteCRM

By using bulk actions in SuiteCRM, you can save time, effort, and deal faster with repetitive tasks. Whether you wish to update several plugins, assign records, or mass delete modules, bulk actions make everything faster and easier. In this article, we share how to...

How to Use Filters in SuiteCRM

Filters in SuiteCRM are a handy feature that helps you quickly organize your website data and easily find, sort, and analyze specific records across your modules. You can use filters to quickly find leads, organize your workflow, and access a specific class of data in...

How to Customize Menus in SuiteCRM

SuiteCRM grants you the option to customise your website menus and control what modules appear in them, how they are grouped and in what categories. This customisation can help you improve user workflow and reduce clutter, especially if you are working on a large...

Even more web tutorials

Check out our web hosting knowledge base and the WordPress tutorials to learn more, and be better prepared for your website creation and maintenance journey.