How to Install and Activate a Concrete5 Theme

Home » Knowledge Base » Design Tools » Concrete5 » How to Install and Activate a Concrete5 Theme

Concrete5 themes control how your website looks and feels. With themes, you can display your website content most suitably, according to your needs and requirements.

Concrete5 themes comprise various files including HTML and CSS documents, and other elements that help a web browser render your website pages.

In the following paragraphs, we share how to install and activate a Concrete5 theme on your website.


How to Install and Activate a Concrete5 Theme

To install a Concrete5 Theme, you should download one on your computer device and then upload it to your website. Here’s how to do that step by step.

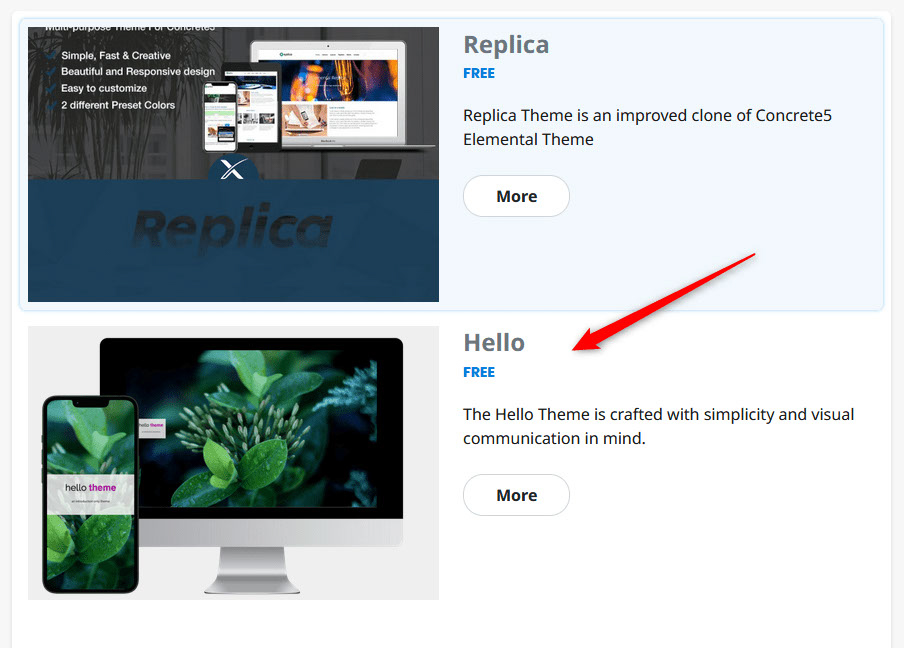
To download a theme, go to the official Concrete5 themes library and browse the available themes. You can filter themes based on various requirements – types of style, ratings, functionalities, and similar.

Once you find a suitable theme for your Concrete5 website, click on the theme’s featured image:

Note: we will use the free Hello theme for this presentation. Keep in mind that the installation process is similar for all available themes.

Browse the Concrete5 themes to select and install a theme that fits your needs


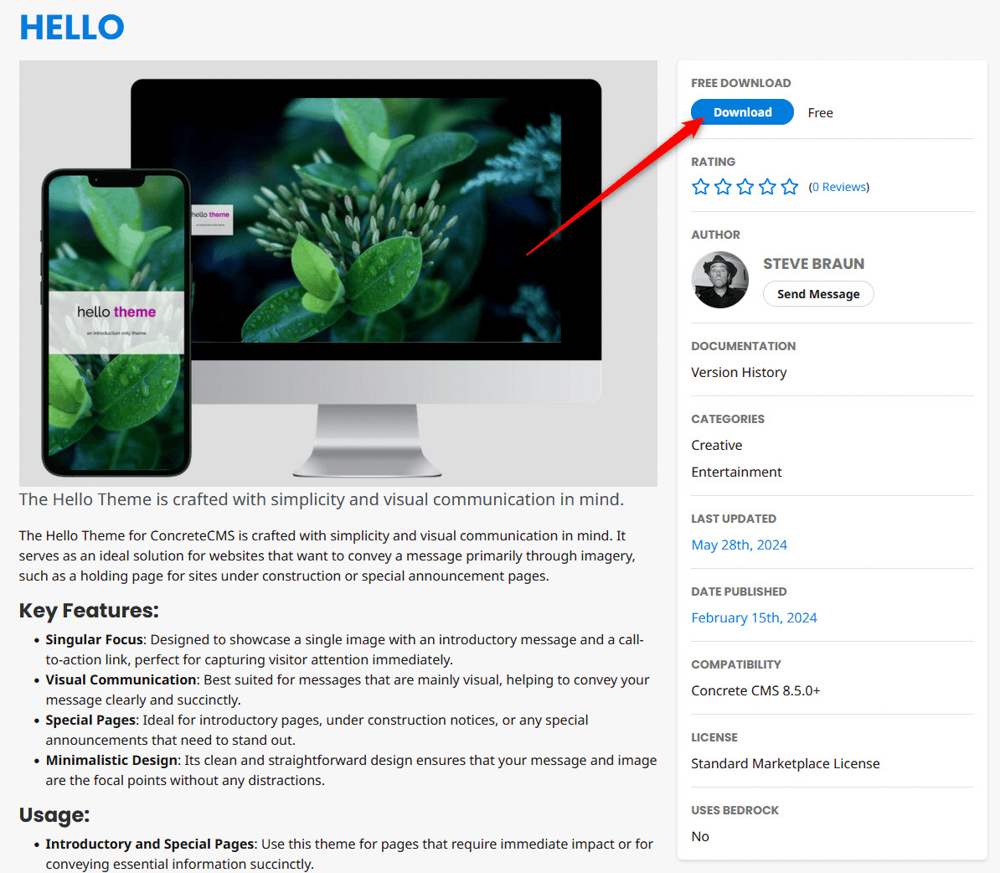
Once you click the featured image, a new page with theme details will appear. It looks like this:

Concrete5 theme page details


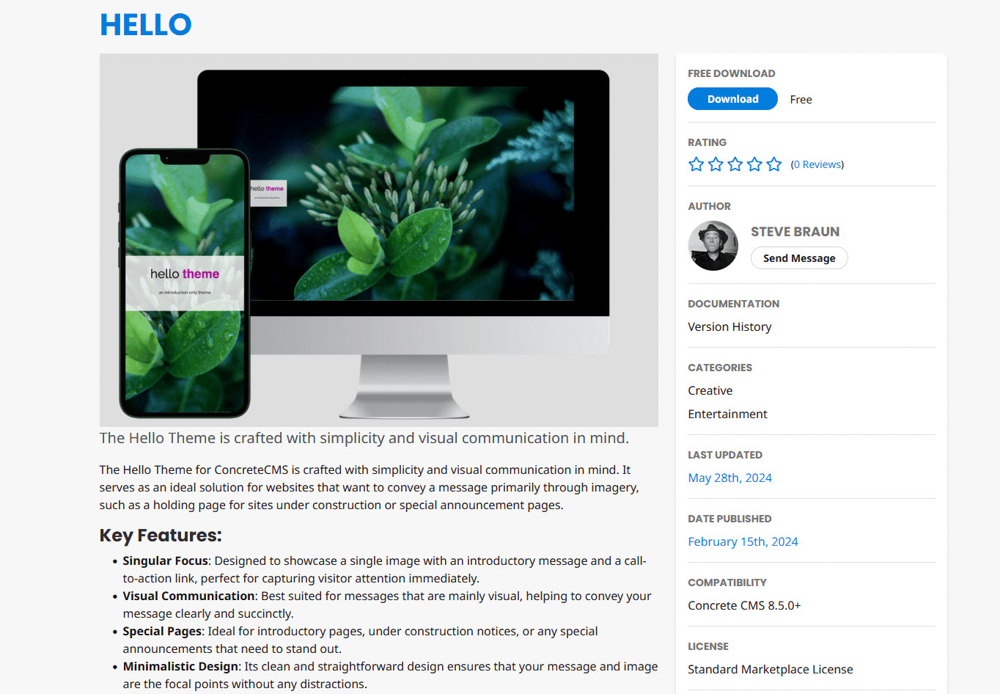
From this presentation page, click on the blue Download button, located at the top right corner of the screen:

Download a new Concrete5 theme


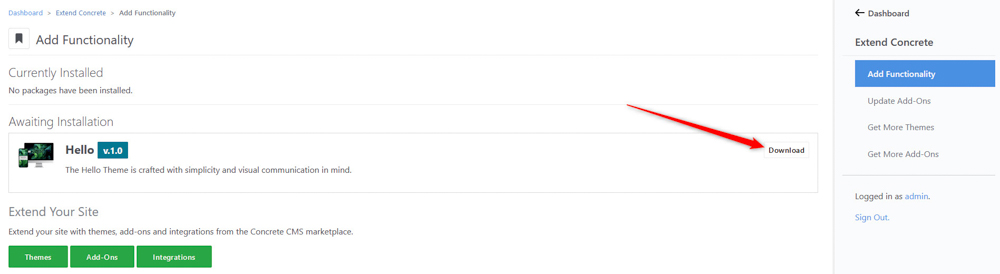
Once you click the button, a new page will appear. It looks like this:

Concrete5 download theme details page


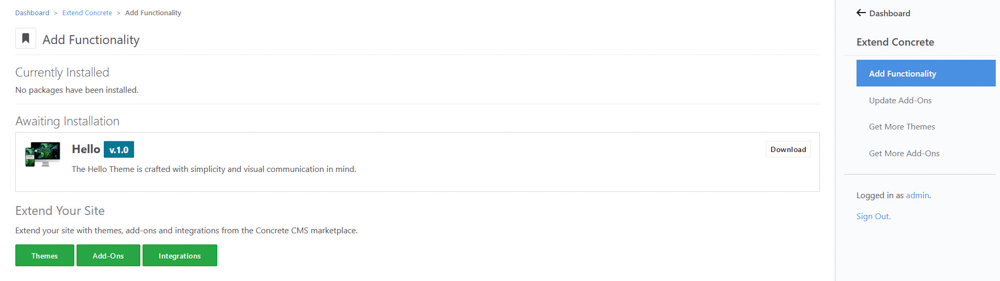
Once you see such a page, click on the white Download button at the right side of the Awaiting Installation box:

Download a Concrete5 theme


Once the installation process is finished, a new confirmation page will load:

Theme download confirmation page


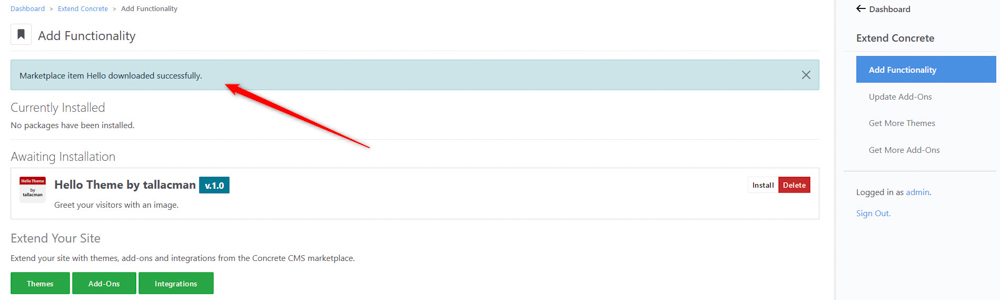
Now you have managed to download a Concrete5 theme.

In the next section, we share how to activate it.


How to Activate a Concrete5 Theme

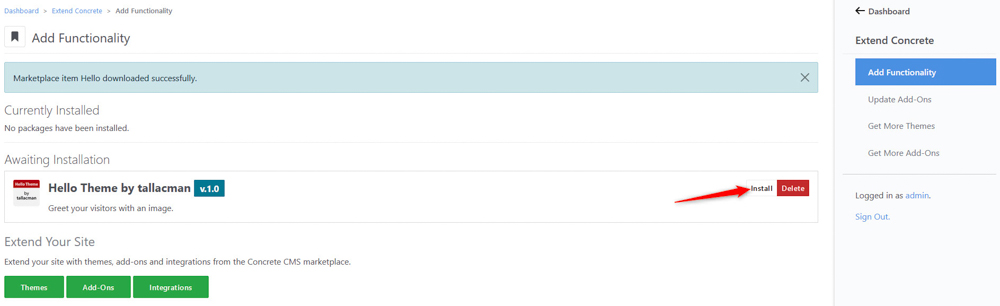
Once installed, the new Concrete5 theme can be instantly activated on your website. To do so, via the confirmation page that loaded once you downloaded the theme, click on the white Install button within the Awaiting Installation box:

Activate the downloaded Concrete5 theme


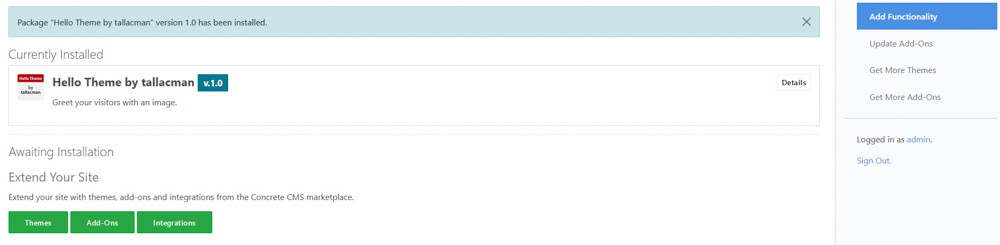
Once the activation process is finished, your browser will display a new page, informing you that the theme is being installed and activated:

Concrete5 theme activation confirmation message


(BONUS) How to Activate a Concrete5 Theme from the Admin Dashboard

In case you wish to activate a different theme, you can do so via the Concrete5 admin dashboard.

First, you should sign in to Concrete5.

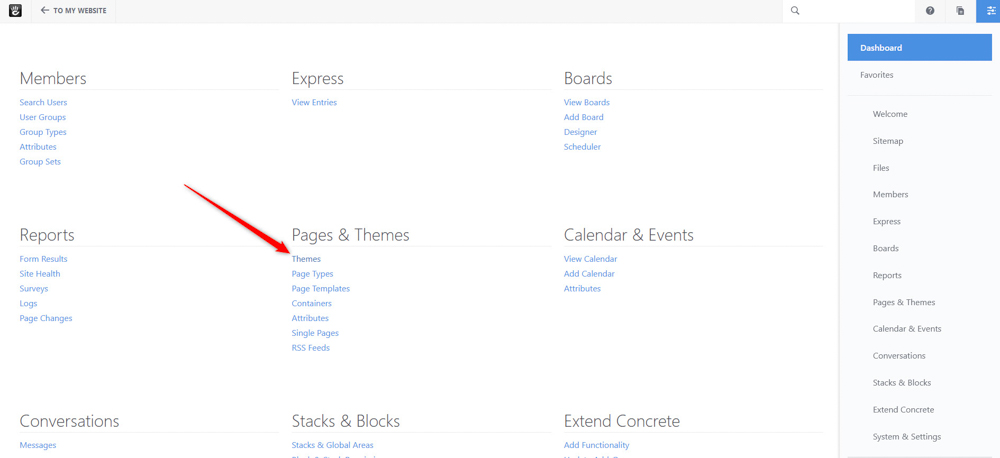
Then, via the dashboard, scroll down to Pages & Themes menu and click on Themes:

Concrete5 Themes & Pages dashboard menu


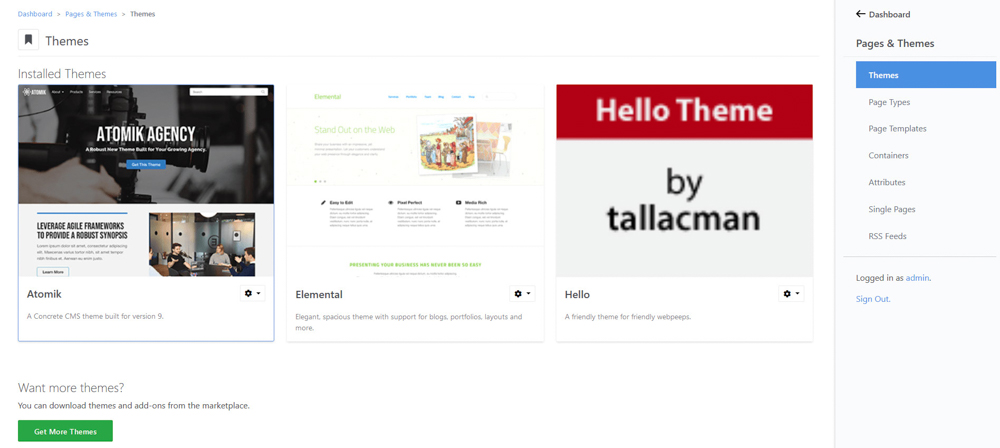
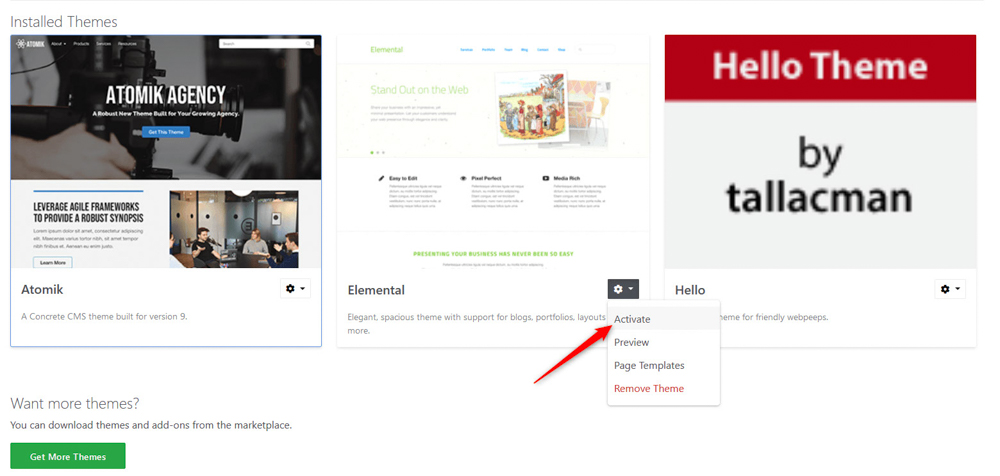
Clicking on the Themes button will open a new page containing a list of all your installed Concrete5 themes:

Concrete5 Installed Themes


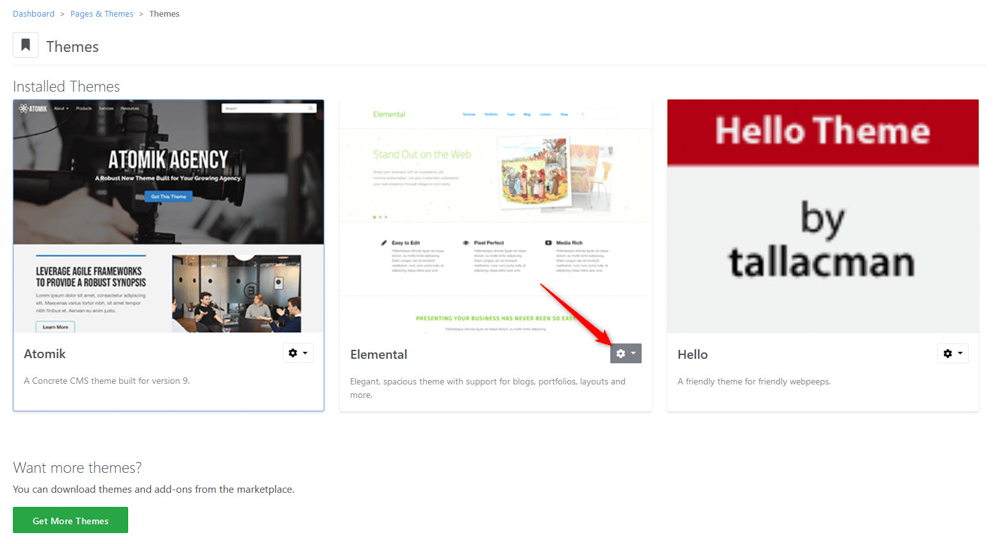
To activate a theme, simply click on the Options button on any of the inactive themes:

Installed Concrete5 Theme Options Menu


Once you click the button, a new menu will appear:

Concrete5 themes option menu


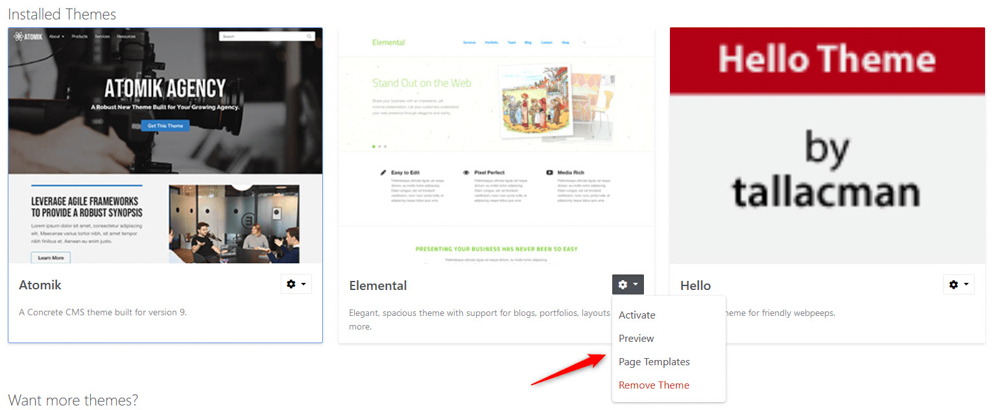
From this menu click on Activate:

Activate an installed Concrete5 theme


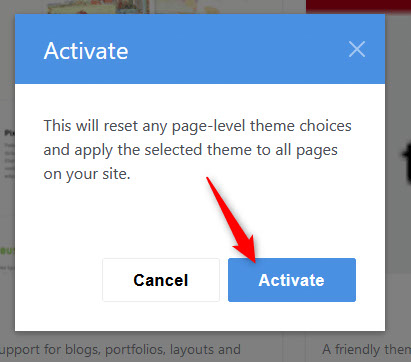
A dialogue box will appear. Once you see it, click on the blue Activate button:

Concrete5 theme activation confirmation message


Once you click the button, a new confirmation page will open:

Concrete5 theme activation confirmation page


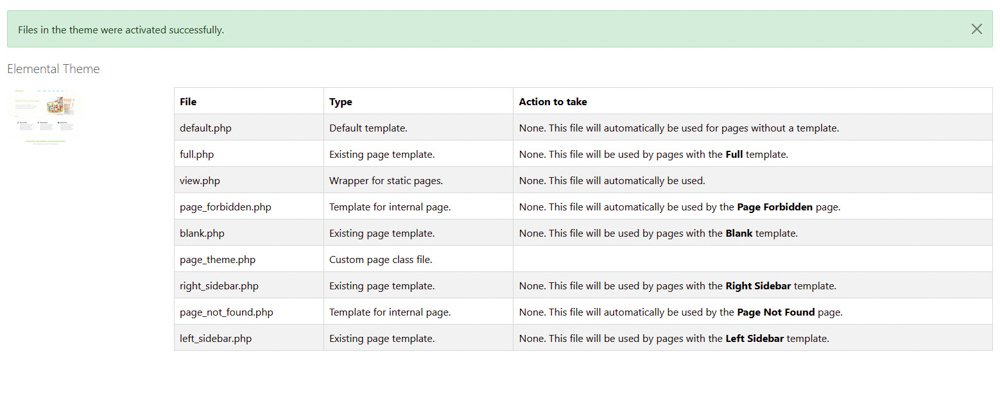
Now you have managed to activate a Concrete5 theme.


Conclusion

Installing and activating Concrete5 themes is simple – with only a few clicks you can install and activate the theme that best suits your needs and requirements.


Was this post helpful?

i

Relevant tags:

Connect

Latest posts:

How to Check My Hosting Limits

To check your hosting limits, follow these steps: First, log in to the hosting control panel. Then, via the dashboard, head to Hosting Settings:   After that, click the Hosting Limits tab:   Then, you will access the information about your account's hosting...

How to Access the Security Settings of My Domains

Accessing the security settings of your hosted domains is easy with AwardSpace. You can access the settings in just a few minutes by following the steps below. First, log in to the AwardSpace hosting panel. Then, head to the Domain Manager page by clicking the...

How to Access The Name Servers Settings of My Domain

Accessing the name server settings with AwardSpace is quite simple. Just follow the next steps. First, log in to the AwardSpace hosting panel. Then, head to Domain Manager:   After that, locate the domain whose Name Server settings you wish to access and click...

How to Access the DNS Settings of My Domains

Accessing the DNS settings of your domains is easy with AwardSpace. The process is comprised of a few simple steps and requires only a minute or two of your time. First, log in to the AwardSpace hosting panel. Then, head to the Domain Manager:   After that,...


Create a website for free!


Free forever

Our Support Team is Here to Help


If you need any questions answered, don't hesitate and contact us. Click the button below and follow the instructions. You can expect an answer within an hour.


Contact AwardSpace


iNewest knowledge base articles

How to Check My Hosting Limits

To check your hosting limits, follow these steps: First, log in to the hosting control panel. Then, via the dashboard, head to Hosting Settings:   After that, click the Hosting Limits tab:   Then, you will access the information about your account's hosting...

How to Access the Security Settings of My Domains

Accessing the security settings of your hosted domains is easy with AwardSpace. You can access the settings in just a few minutes by following the steps below. First, log in to the AwardSpace hosting panel. Then, head to the Domain Manager page by clicking the...

How to Access The Name Servers Settings of My Domain

Accessing the name server settings with AwardSpace is quite simple. Just follow the next steps. First, log in to the AwardSpace hosting panel. Then, head to Domain Manager:   After that, locate the domain whose Name Server settings you wish to access and click...

How to Access the DNS Settings of My Domains

Accessing the DNS settings of your domains is easy with AwardSpace. The process is comprised of a few simple steps and requires only a minute or two of your time. First, log in to the AwardSpace hosting panel. Then, head to the Domain Manager:   After that,...

How to Access The Settings for My Subdomains

Accessing the settings for your subdomain with AwardSpace is quite simple. First, log in to the AwardSpace hosting panel. Then, head to Domain Manager:   A new page should open. Once you see it, scroll down until you see your list of hosted subdomains:  ...

Even more web tutorials

Check out our web hosting knowledge base and the WordPress tutorials to learn more, and be better prepared for your website creation and maintenance journey.