
SuiteCRM is a flexible platform that allows you to customise all aspects of the system just the way they work best for you. One of the ways that this is made possible is by using the SuiteCRM modules – handy tools that help you customise the platform, so you get the most out of it.
In this article, we share how to manage modules in SuiteCRM.
What Are Modules in SuiteCRM
Modules in SuiteCRM are individual blocks that add different types of functionalities to the platform. Here’s a short list of different module types:
- Leads module: Helps you manage your leads list.
- Accounts: Helps you track the work of different departments of your business.
- Contacts: Helps you manage information about different individuals and firms.
- Tasks: Helps you manage and track a list of activities and to-dos.
Read also: How to Add Dashlets in SuiteCRM
How to Access Module Management
To manage modules in SuiteCRM, you must first access the management page. To do that, follow these steps:
- Log in to SuiteCRM.
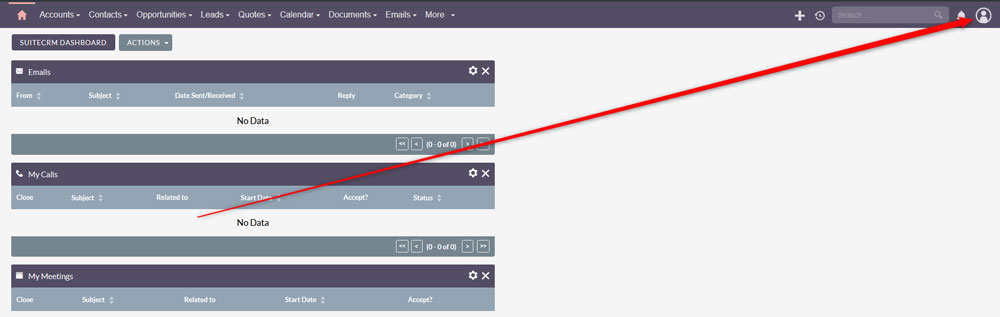
- Via the Admin Panel, click your user icon, located at the top right corner:
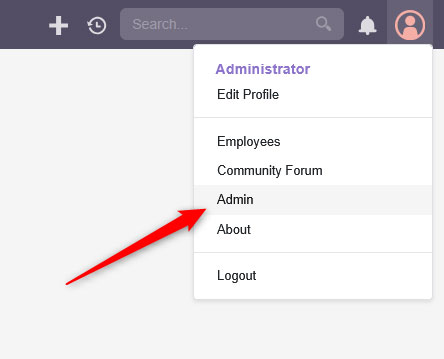
3. Once you click the user icon, a new menu will appear. Once you see it, click on Admin:
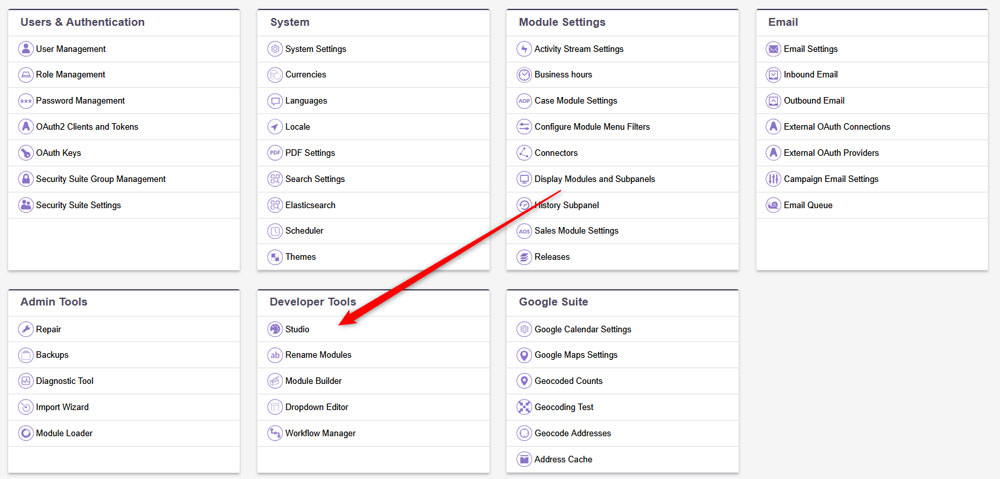
4. After you click on Admin, SuiteCRM will open a new page. From there, take a look at the Developer Tools section:
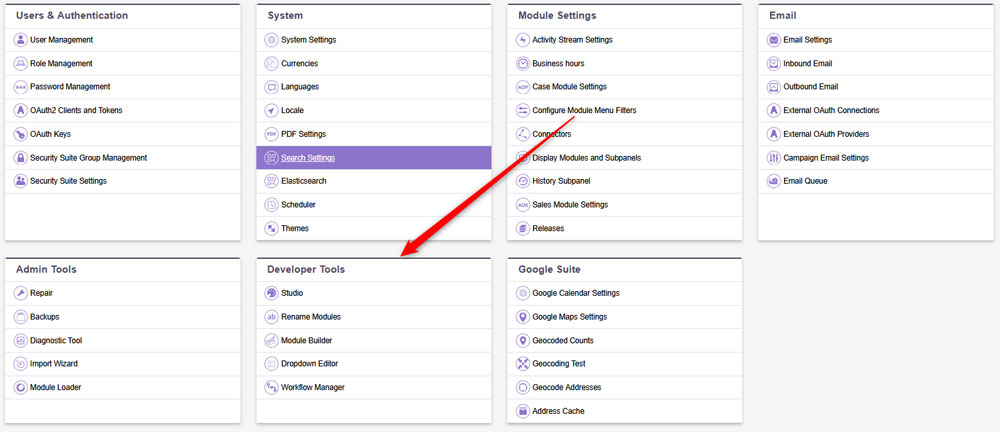
5. Each of the options in the Developer Tools section helps you manage modules in a certain way:
- Studio – Helps you customise your already existing modules.
- Rename Modules – Use this tool to change the names of your already existing models.
- Module Builder – Use this to create new modules.
- Dropdown Editor – Use this tool to create, edit and delete dropdown lists.
- Workflow Manager – Use this to streamline your repetitive business processes.
How to Enable and Disable Modules
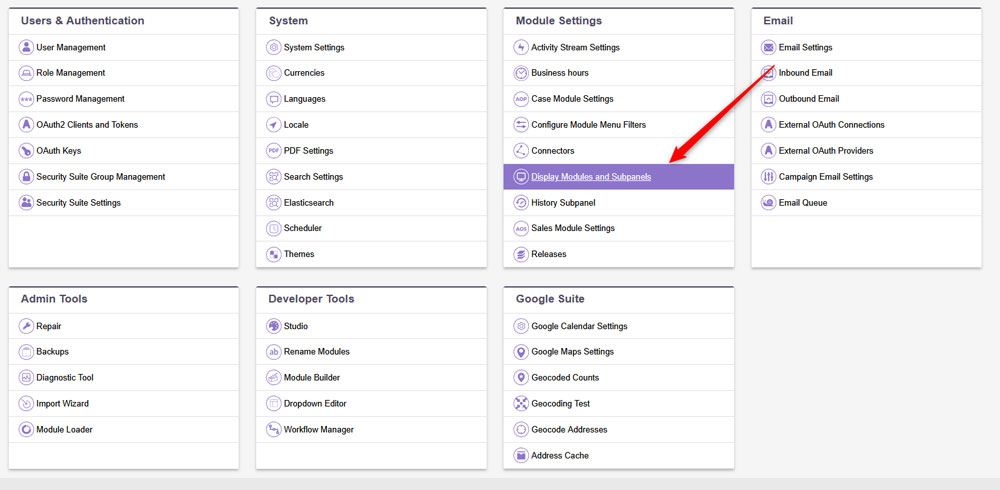
SuiteCRM allows you to enable and disable different modules, which means that you can select which modules are visible to users and which – not. To enable and disable modules, simply click on your user icon at the top right corner of the screen, and then go to Admin. Once there, click on Display Modules and Subpanels under Module Settings:
How to Customise Modules with Studio
SuiteCRM allows you to customize your modules in various ways. To access the customization settings, first go to Admin -> Studio, located under Developer Tools:
Then, choose a module such as Leads, Contacts, Accounts, and use the tools to add or remove fields, change field types, edit layouts, etc.
How to Create New Modules in SuiteCRM
SuiteCRM allows you to create new modules. To do so, you should use the Module Builder. To access the tool, do the following:
- Navigate to Admin->Module Builder, located under Developer Tools.
- Select New Package and give it a name and key.
- Within the package, click on New Module.
- Then, define the Fields, Layouts and Relationships of the new module.
- After that, you can either add the module to the CRM via the Deploy button, or Export it, which means to save it as an installable zip package.
How to Install Modules in SuiteCRM
You can istall your already saved modules, or third-party ones. To do so, follow these steps:
- Navigate to Admin -> Module Loader, located under Admin Tools.
- Once inside the module loader, upload a ZIP module packate.
- Once the package is uploaded, install it.
- Follow the on-screen instructions to complete the installation.
How to Uninstall a Module in SuiteCRM
If you need to uninstall a given module, follow these steps:
- Go to Admin->Module Loader, located under Admin Tools.
- Click on the Uninstall button next to the module you wish to remove.
- Choose whether to keep or delete data.
Conclusion
SuiteCRM gives you full control over managing the CMS modules, and with a few easy steps, you can quickly edit, upload, install and delete a module.
