Cannot access email account – Connection to Storage Server failed

Home » Knowledge Base » Email » Email Clients » Cannot access email account – Connection to Storage Server failed

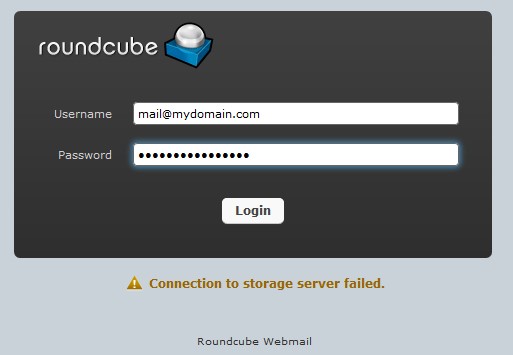
A common issue is the error “Connection to Storage Server failed” inside the webmail client. There are a couple of reasons for why you received this error. In this article we will find out how to solve the “Connection to Storage Server failed” error”.


What causes the error?

Most commonly the error is caused due to incorrect DNS records. For example, you have hosted the domain but you did not update your name servers and thus your domain was not pointed to us. You could also have this error if you have entered incorrect DNS records for our mail services.

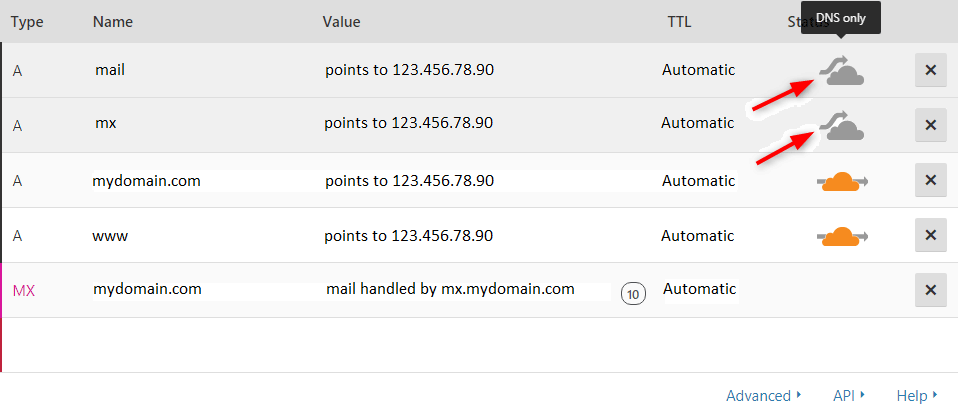
Another reason for this error is the use of Cloudflare. The way Cloudflare works is that it hides the real DNS records of the domain behind a proxy. If you do a DNS lookup of a domain that manages its DNS records from Cloudflare you will see only Cloudflare records.


How to fix the error?

Solving the above would take you just a couple of steps regardless if you are using Cloudflare or not.

First, let’s see how the issue is resolved when you are not using Cloudflare. Check if you have correctly changed your domain name servers. If you are not using name servers to point your domain to us then you need to make sure that your domain DNS records are using the correct records for our mail services. If you have recently pointed your domain to us you will have to wait 24-48 hours for the DNS changes to take effect.

If you are using Cloudflare for your domain management you will have to make a few changes to the mx.yourdomain.com and mail.yourdomain.com hostnames. As mentioned previously Cloudflare hides the DNS records behind a Proxy. Because of this, it is not possible to connect directly to the mail server. To resolve this all you need to do is log in to your Cloudflare panel and disable HTTP proxy for these hostnames and set it to DNS only.

If you need assistance with configuring Cloudflare you can refer to our Cloudflare article here.

Was this post helpful?

i

Relevant tags:

Connect

Latest posts:

How to Install a MediaWiki Skin

In MediaWiki, skins determine the visual appearance of your wiki website. Skins define how content is presented to users and include such settings for the overall website layout, typography, color scheme, and more. By default, when you install MediaWiki, the platform...

How to Create a Page in MediaWiki

Creating pages in MediaWiki is а core feature that allows you to add content to your MediaWiki website. Whether you are adding details for a project, contributing to a knowledge base, or anything else, learning how to create a page in MediaWiki is crucial for your...

How to Install MediaWiki Extensions

Now that you have installed MediaWiki and learned how to log in to the CMS, it is time to extend MediaWiki's functionality via extensions. MediaWiki extensions are sets of files that add various types of functionality to your MediaWiki website. You can use extensions...

How to Log In to MediaWiki

After you install MediaWiki, it is time to log in to the platform, so you can start working on your new MediaWiki website. To log in, you must open the MediaWiki login page and enter your credentials. Doing so will open the platform’s admin panel. In the following...

How to Install MediaWiki

You can quickly install MediaWiki on any of the AwardSpace web hosting plans. This includes our free web hosting, shared hosting, as well as advanced services such as semi-dedicated hosting and VPS hosting. You can install MediaWiki in a matter of minutes, whichever...


Create a website for free!


Free forever

Our Support Team is Here to Help


If you need any questions answered, don't hesitate and contact us. Click the button below and follow the instructions. You can expect an answer within an hour.


Contact AwardSpace


iNewest knowledge base articles

How to Install a MediaWiki Skin

In MediaWiki, skins determine the visual appearance of your wiki website. Skins define how content is presented to users and include such settings for the overall website layout, typography, color scheme, and more. By default, when you install MediaWiki, the platform...

How to Create a Page in MediaWiki

Creating pages in MediaWiki is а core feature that allows you to add content to your MediaWiki website. Whether you are adding details for a project, contributing to a knowledge base, or anything else, learning how to create a page in MediaWiki is crucial for your...

How to Install MediaWiki Extensions

Now that you have installed MediaWiki and learned how to log in to the CMS, it is time to extend MediaWiki's functionality via extensions. MediaWiki extensions are sets of files that add various types of functionality to your MediaWiki website. You can use extensions...

How to Log In to MediaWiki

After you install MediaWiki, it is time to log in to the platform, so you can start working on your new MediaWiki website. To log in, you must open the MediaWiki login page and enter your credentials. Doing so will open the platform’s admin panel. In the following...

How to Install MediaWiki

You can quickly install MediaWiki on any of the AwardSpace web hosting plans. This includes our free web hosting, shared hosting, as well as advanced services such as semi-dedicated hosting and VPS hosting. You can install MediaWiki in a matter of minutes, whichever...

How to Install an Elgg Theme

After you have installed Elgg core and logged in to the admin dashboard, you can search for themes that can help you customize your new website. Elgg themes are a set of files that help you customize the appearance of your website. Via themes, you can modify website...

Even more web tutorials

Check out our web hosting knowledge base and the WordPress tutorials to learn more, and be better prepared for your website creation and maintenance journey.