How to Add Dashlets to SuiteCRM

Home » Knowledge Base » Design Tools » SuiteCRM » How to Add Dashlets to SuiteCRM

SuiteCRM is a handy and versatile CRM that provides you with tons of customisation options that help you manage your business easily and effectively. One of CRM’s great features is the inclusion of dashlets, which are simple widgets that display specific data or functions from different modules.

In this article, we share how you can add dashlets in SuiteCRM and make your work with the CMS even easier and more effective.


What are Dashlets in SuiteCRM?

Dashlets are small default components that display data and other kinds of information from different parts of SuiteCRM on your admin dashboard. Example dashlets include:

  • My Leads
  • Upcoming Events
  • Activity Stream
  • Sales Pipelines

Dashlets can be very helpful for your work stream, as they can be customized in numerous ways and also come with the option to narrow down and distribute content via a given filter – display prospectful leads in alphabetical order, display phone numbers that are outside of the USA, or, for example, filter your meetings, so only the top-priority ones are visible to you at a given time.

Adding and organising dashlets allows you to personalise your SuiteCRM experience and get the most out of the platform.

In the following paragraphs, we share how you can add dashlets to SuiteCRM.


How to Add Dashlets to SuiteCRM

To add dashlets to SuiteCRM, follow these simple steps.

N.B! Keep in mind that you have to install SuiteCRM before you can work with the platform. If you are not sure how to do so, then take a look at our easy-to-follow installation guide:

How to Install SuiteCRM


Step 1: Log in to SuiteCRM

Once you install SuiteCRM, log in to the CMS so you can manage your admin dashboard.


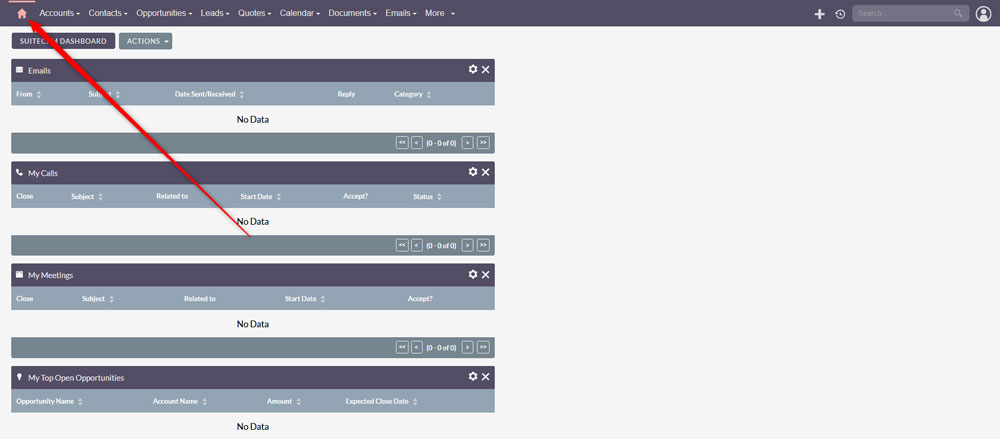
Step 2: Navigate to the Home Dashboard Screen

After you log in to SuiteCRM, go to the Home tab via the main navigation menu – simply click the House icon, located at the top left of the screen:

To add dashlets to SuiteCRM, go to the dashboard tab


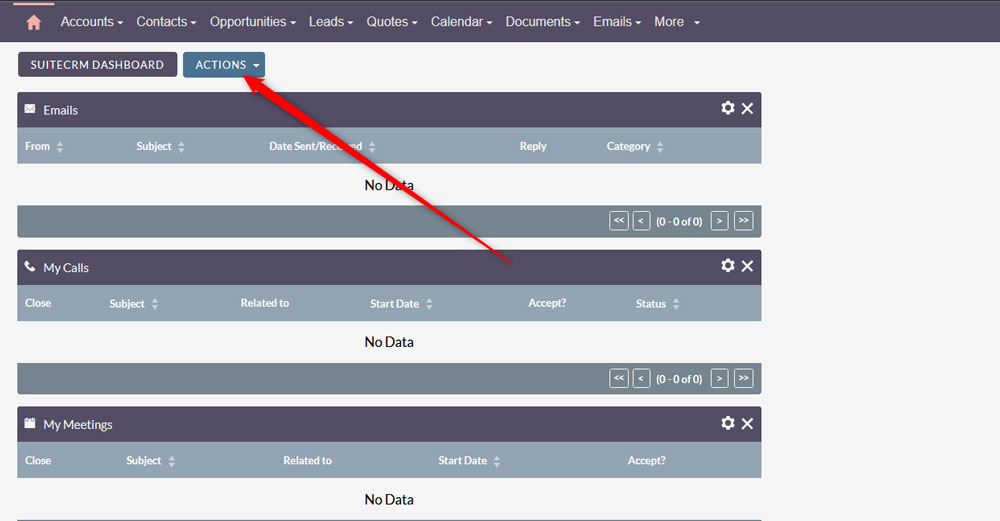
Step 3: Click on “Add Dashlets”

The next step in the process is to click on the “Add Dashlets” button. To do so, while in the Home tab, click the “Actions” button, located at the top left of the screen:

Click the Add Dashlets button


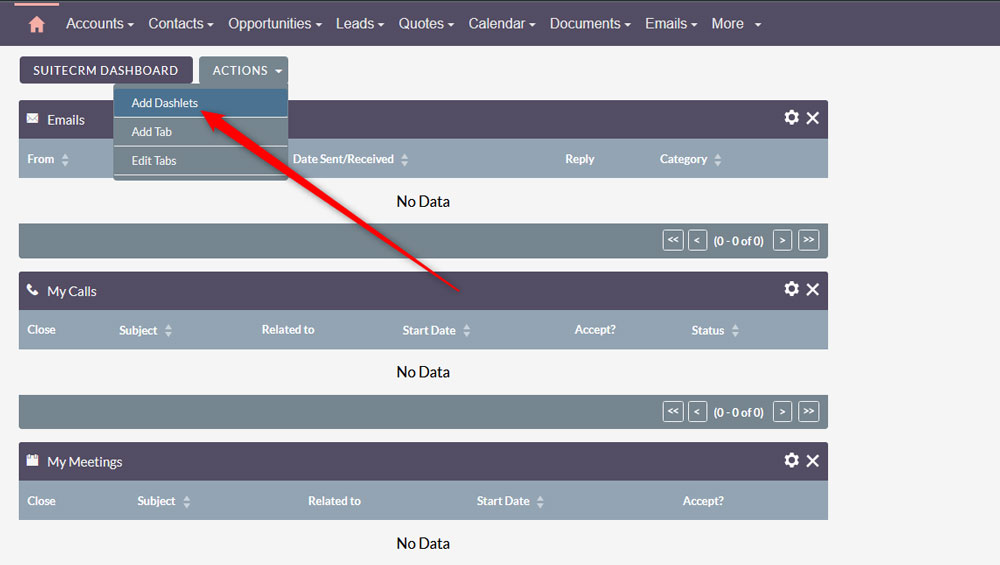
Once you click the “Actions” button, a new menu will appear. Once you see it, navigate to “Add Dashlets”:

in the SuiteCRM dashboard tab, click on Actions, so you open the dashlets menu


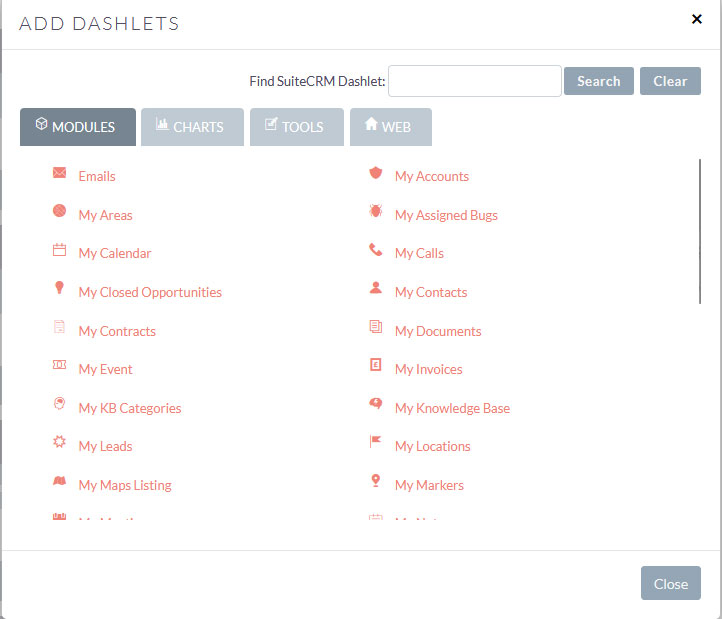
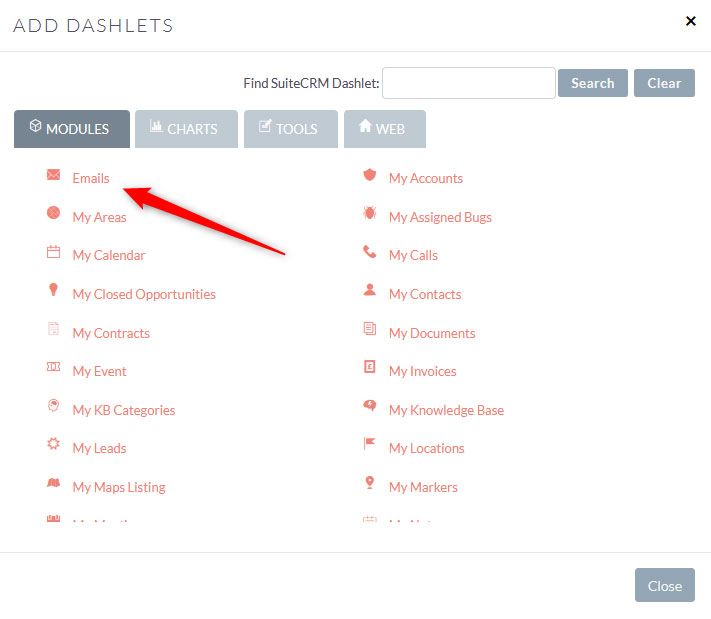
Step 4: Browse for Dashlets

After you click “Add Dashlets”, a new box will appear. It contains all available dashlets you can use: there are numerous of these, so browse the options thoroughly:

SuiteCRM Dashlets library box


Step 5: Add the Preferred Dashlet to the Admin Panel

Once you find the dashlet that best works for you, click its icon and SuiteCRM will automatically add it to your dashboard. You can continue adding dashlets before closing the dashlet box:

Click on a given dashlet, so SuiteCRM adds it to your admin tab


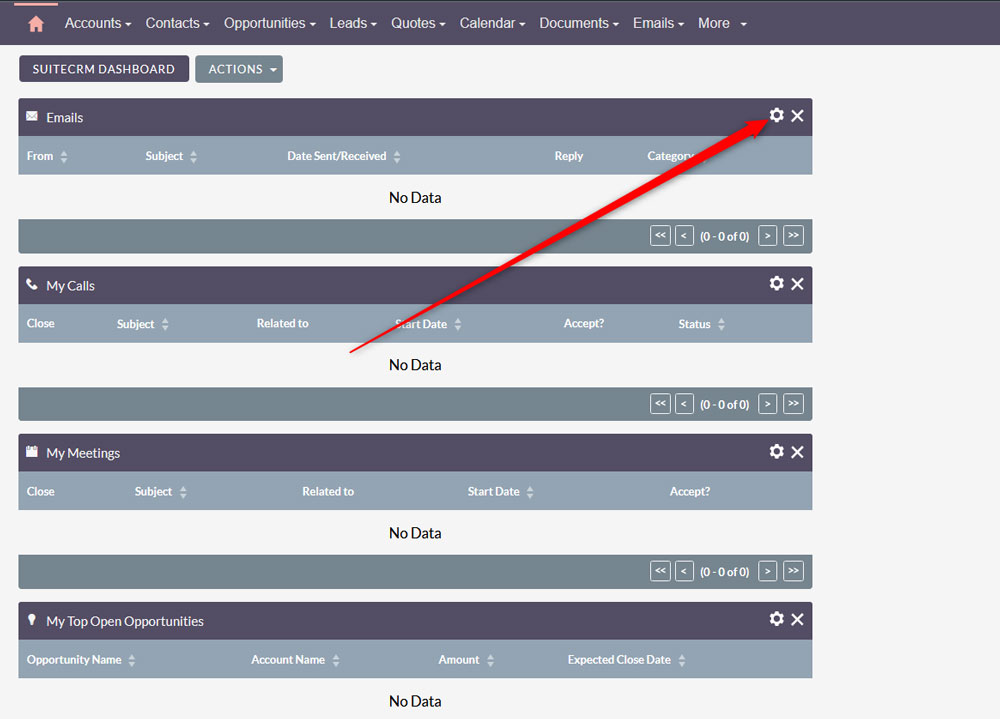
Step 6 (Optional): Set Up Dashlet Settings

Now that you have included the dashlets you wish to use to you admin panel, you can customize their functions, so they filter and display information in a way that is most useful to you.

To configure dashlet settings, simply click on the gear wheel icon in the top right corner of the dashlet you wish to customise:

Click the gear icon of a given dashlet, so you access the settings box


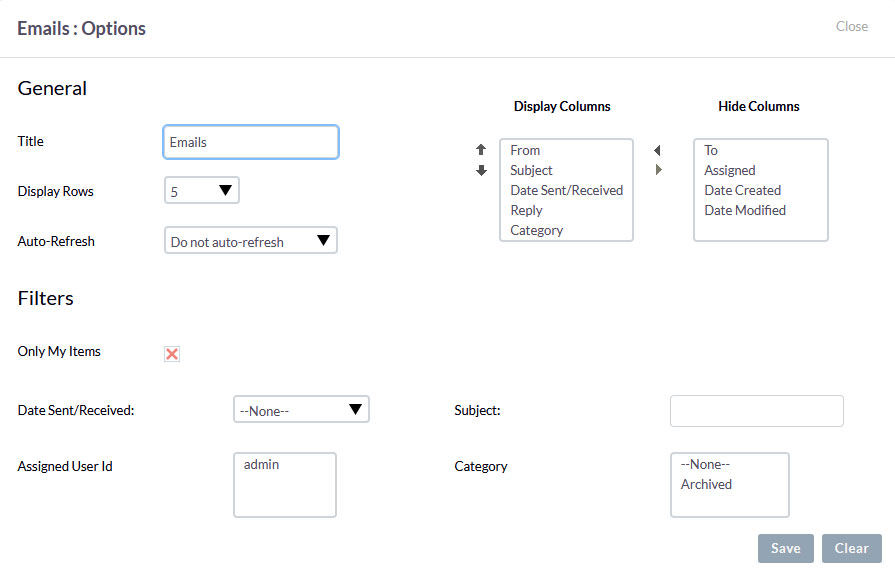
Once you click the icon, a new box with options will appear. Keep in mind that the settings this box displays vary, depending on the dashlet you want to configure:

SuiteCRM dashlet settings menu


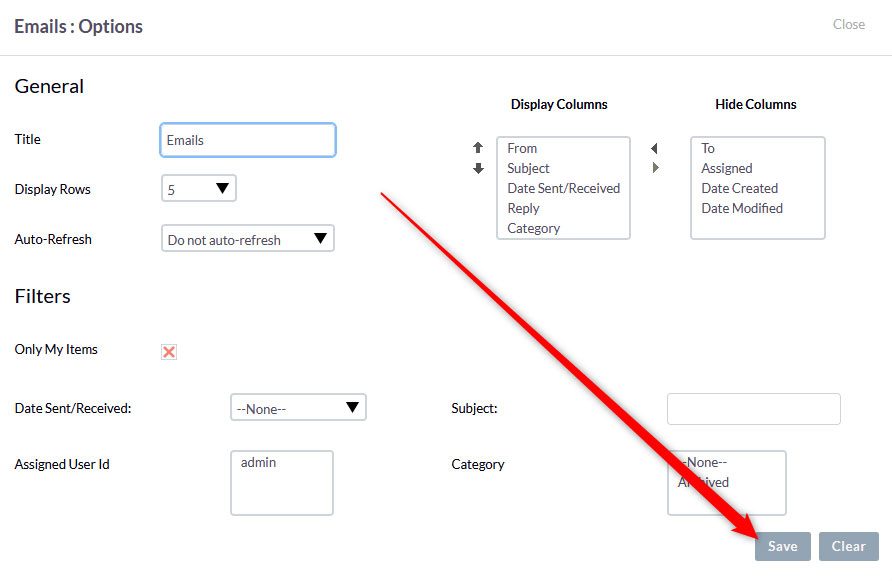
After you have set up the settings in a way that is suitable for you, click on the Save button right at the bottom right corner of the dashlet box:

Save dashlet settings by clicking the button at the bottom right of the box


Now, you have managed to add dashlets to SuiteCRM.


Read also:

Was this post helpful?

i

Relevant tags:

Connect

Latest posts:

How to Fix 308 Permanent Redirect

308 Permanent Redirect is an HTTPS status code indicating that the requested resource has been permanently moved to another location. Similar to 301 Moved Permanently, 308 informs the user of the movement of a given online resource, and unlike the 301 redirect, 308...

How to Fix 301 Error Moved Permanently

The 301 Moved Permanently is an HTTP status code that indicates a permanent relocation of an online resource from a given URL to a new one. More technically, the moved resource has been moved to the new URL specified in the Location header. The HTTP 301 status code is...

How to Fix 307 Temporary Redirect

307 Temporary Redirect is a response HTTP status code that indicates the requested resource has been moved to a different URL for a limited period of time. Unlike a 301 permanent redirect, the 307 Temporary Redirect message indicates that the change is temporary and...

How to Access Crontab Settings

To access the crontab settings, first, you need to log in to your AwardSpace hosting panel. After you have logged in, head to Crontab Settings, located within the Advanced Tools category:   After you click the Crontab Settings icon, a new page should load. Once...

How to Check My Auto Renewals

To check your AwardSpace hosting plan auto-renewals, first log in to the admin dashboard. Then, head to Wallet, within the Orders & Invoices section:   After that, click the Auto Renewals tab, where you can check any relevant information about your hosting...


Create a website for free!


Free forever

Our Support Team is Here to Help


If you need any questions answered, don't hesitate and contact us. Click the button below and follow the instructions. You can expect an answer within an hour.


Contact AwardSpace


iNewest knowledge base articles

How to Fix 308 Permanent Redirect

308 Permanent Redirect is an HTTPS status code indicating that the requested resource has been permanently moved to another location. Similar to 301 Moved Permanently, 308 informs the user of the movement of a given online resource, and unlike the 301 redirect, 308...

How to Fix 301 Error Moved Permanently

The 301 Moved Permanently is an HTTP status code that indicates a permanent relocation of an online resource from a given URL to a new one. More technically, the moved resource has been moved to the new URL specified in the Location header. The HTTP 301 status code is...

How to Fix 307 Temporary Redirect

307 Temporary Redirect is a response HTTP status code that indicates the requested resource has been moved to a different URL for a limited period of time. Unlike a 301 permanent redirect, the 307 Temporary Redirect message indicates that the change is temporary and...

How to Access Crontab Settings

To access the crontab settings, first, you need to log in to your AwardSpace hosting panel. After you have logged in, head to Crontab Settings, located within the Advanced Tools category:   After you click the Crontab Settings icon, a new page should load. Once...

How to Check My Auto Renewals

To check your AwardSpace hosting plan auto-renewals, first log in to the admin dashboard. Then, head to Wallet, within the Orders & Invoices section:   After that, click the Auto Renewals tab, where you can check any relevant information about your hosting...

How to Check My Payment Requests

To check your payment requests, first log in to the AwardSpace hosting panel. Then, head to Wallet within the Orders & Invoices category:   Then, click the Payment Requests tab. There, you can browse all the information you need about your...

Even more web tutorials

Check out our web hosting knowledge base and the WordPress tutorials to learn more, and be better prepared for your website creation and maintenance journey.