
The most important element in your OpenCart project is the products you will offer your site visitors.
In the following paragraphs, we share how to add products to your OpenCart website.
How to Create Products in Opencart
The process of adding new products in OpenCart is simple and is comprised of only a few steps and a few minutes of your time. Here’s how to proceed.
Step 1: Create a New Product
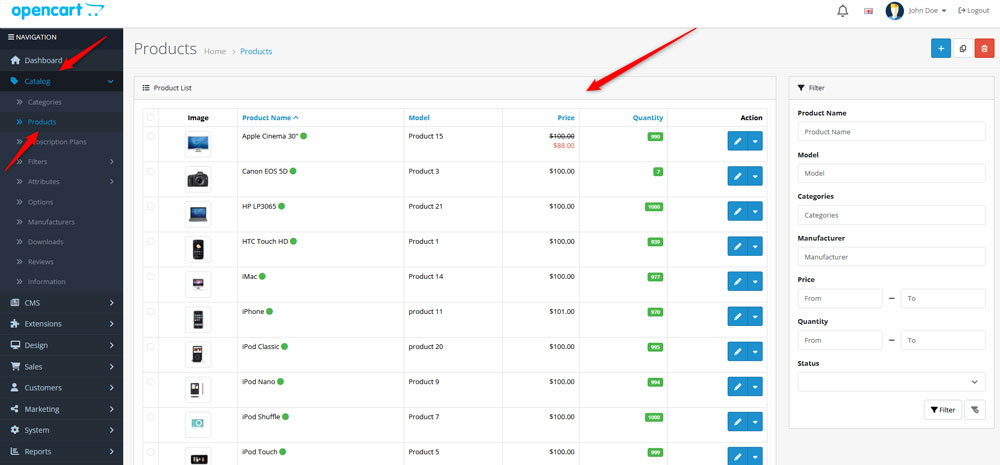
To add a new product to your OpenCart portfolio, the first step is to log in to OpenCart and from the admin panel go to the list of all your products. To do so, navigate to Catalog -> Products:
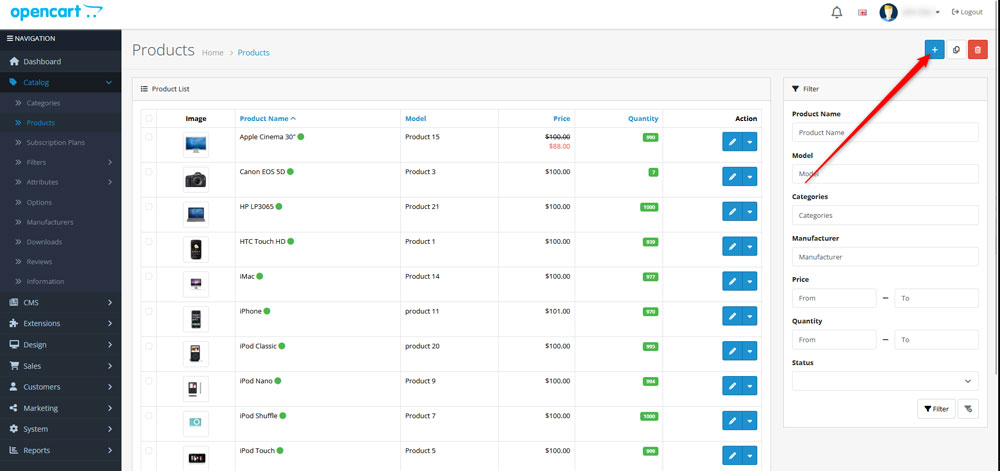
To add a new product, click on the blue + icon at the top right of the screen:
This will open a new page that should look like this:
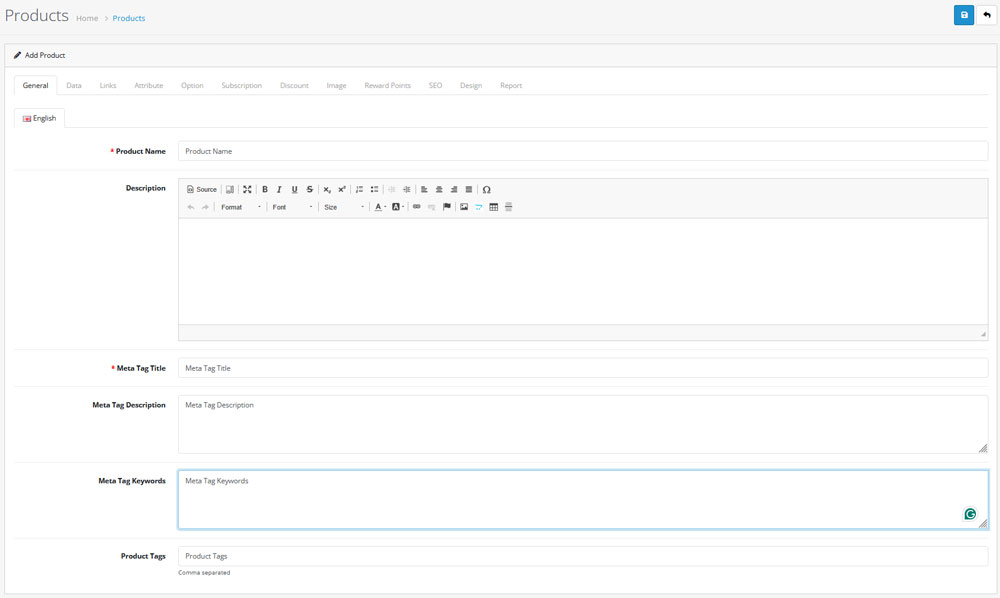
While on this page, start adding content to each box:
- Product Name: The name of the product you want to add.
- Description: Add details about the product.
- Meta Tag Title: Add a title that would appear in search results.
- Meta Tag Description: Add a description that would appear in search results.
- Meta Tag Keywords: Add the most important keywords related to the product.
- Product Tags: Add tags, so you distribute the product in a category.
Step 2: Configure Product Data
Once you have added all the important information about the new product you want to add to your OpenCart portfolio, it is time to add some additional data such as product quantities, prices and other retail information.
To do so, while on the Products page, navigate to the Data tab, located at the top of the page:
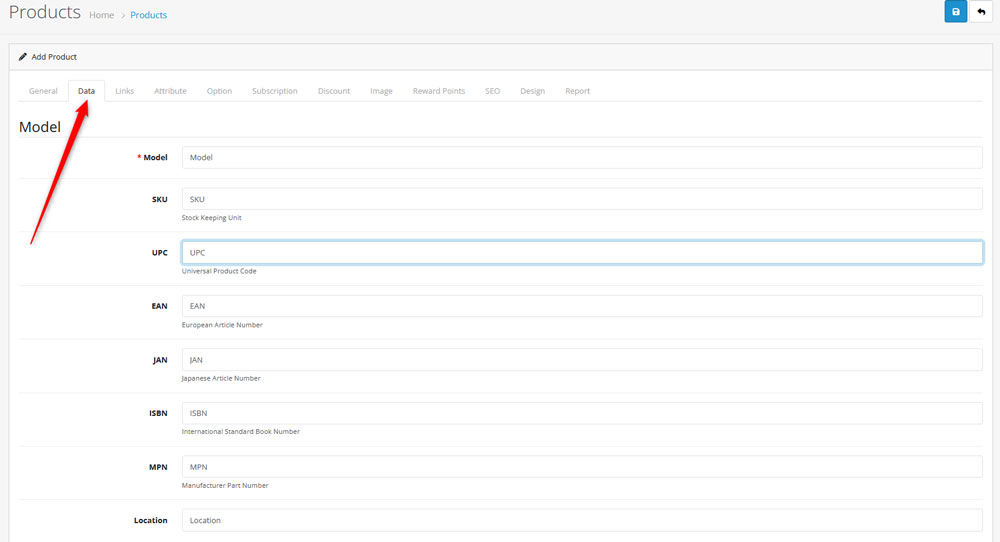
Now, fill the boxes with relevant information. Here’s what these terms mean:
- Model: Add a model number of the product. You should add letters and/or numbers for this field.
- SKU; UPC; EAN; JAN; ISBN; MPN: These are the various tracking numbers for the product. You may need to fill all of the fields, or only the ones that are important for your business.
- Location: The physical location of the product.
- Price: How much does the product cost.
- Tax Class: Configure the product’s tax class.
- Quantity; Minimum Quantity: How many units of the given product are available and how many your customers must buy at least.
- Dimensions: The size of the product
- Length Class: Add length class for your new product.
- Weight: The overall weight of the new product.
- Weight Class: The class of the product.
- Sort Order: The priority of the product when showing in a list.
Step 3: Set Up Links
Now that you have added data, it is time to set up the links for the page of your new products. To access the link settings, from the tabs at the top of the page, go to Links:
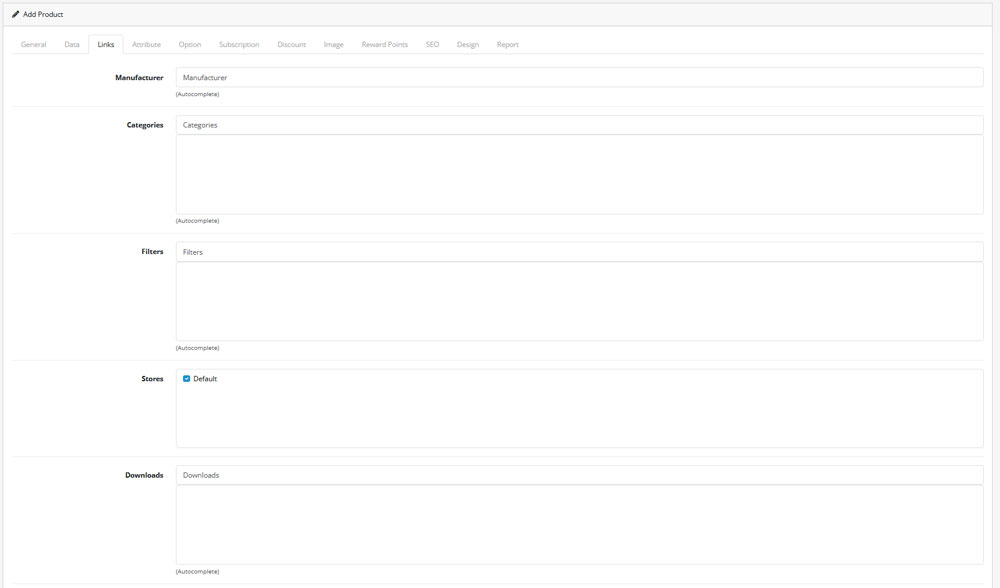
Fill in the fields as follows:
- Manufacturer: Add the manufacturer of the product.
- Categories: Add the product category, as this makes product sorting and finding easier.
- Filters: Add various filters, so your site visitors can filter out product categories, price ranges, etc.
- Stores: If your business has a few stores, you can determine which one has the product available.
- Downloads: If there are some downloadable files, here’s where you add the file that customers receive after they complete a purchase.
- Related Products: Add related products, which will show up on this product’s page.
Step 4: Add Attributes
The next step in the process is to add product attributes – these are details such as screen size, type of processor, software type and other similar details.
To add product attributes, head to the Attributes tab from the top menu of the Product page:

To add an attribute, click the blue + icon at the right of the screen:

Once you click it, new fields will appear. Add the product details there:

Step 5: Add Options
OpenCart allows you to add options for the new product. Such can be different sizes, colors, or configurations.
To add an option, navigate to the Option tab from the menu at the top of the page:

Step 6: Manage Subscriptions
Should you apply a subscription model for any of your products, you can manage the subscription settings via the Subscription tab. To do so, simply navigate to Subscription from the top menu and add your settings there:

Step 7: Add Discounts
Should you wish to add promotions and discounts for any of your products, the place to manage these settings is the Discount tab located on the Products page:
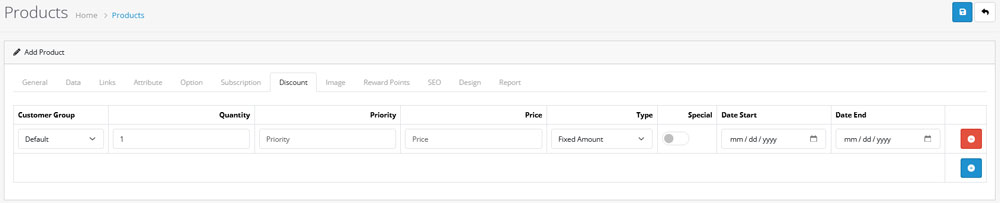
While this tab is active, click on the blue + icon, choose a product, discount amount and other settings:

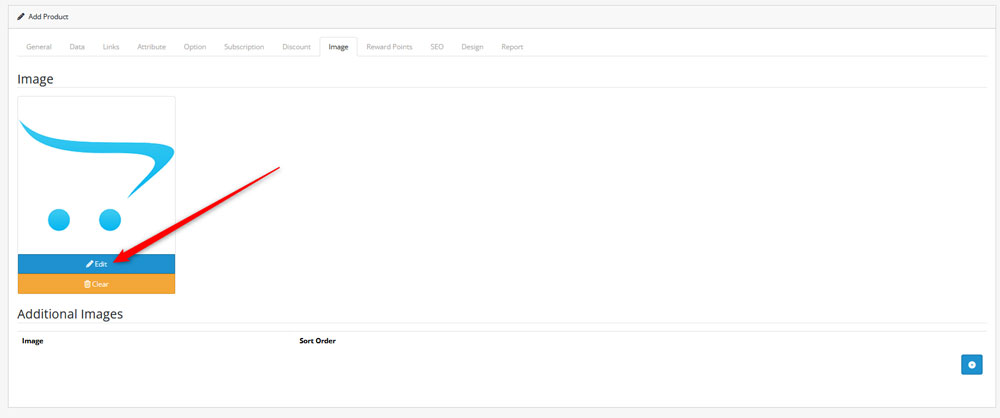
Step 8: Add Product Images
Adding images can help you define the visuals of your image, so customers have a better idea about what they are browsing and eventually purchasing:
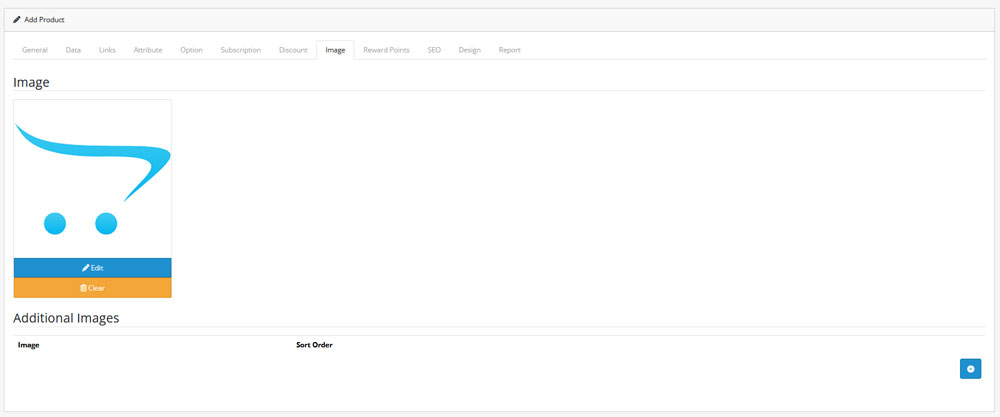
To add/change the product image, simply click the blue Edit button within this tab, search for an image and include it in the Product page:
Step 9: Add Reward Points
If you are considering adding reward points to your customers, browse these settings via the Reward Points tab:
How to add a new product to OpenCart Image Tab Edit Settings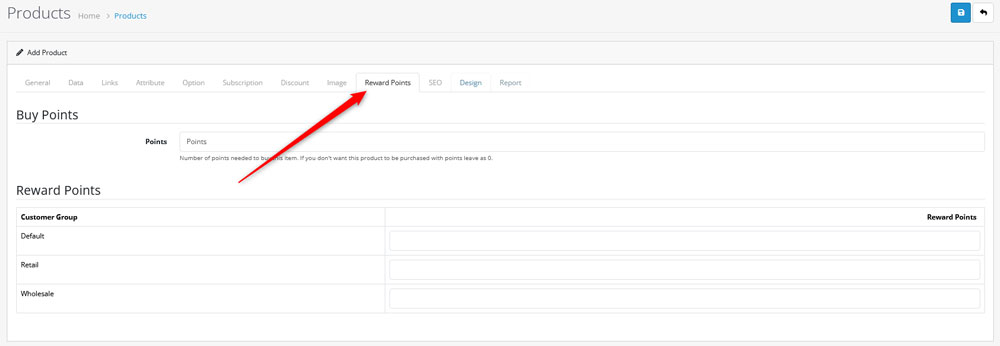
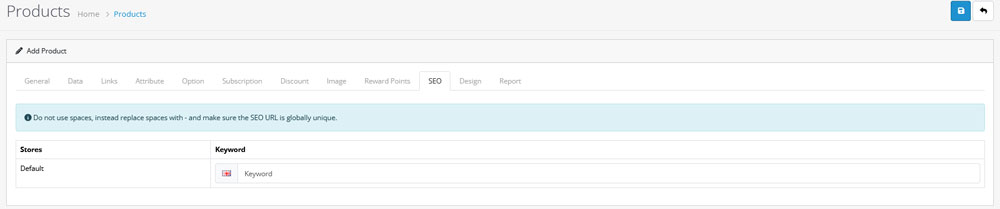
Step 10: Manage SEO Settings
SEO helps your website appear in higher positions in search results. This is important, as the higher your pages rank in search results, the greater the chance for opening and browsing your website is.
To manage SEO settings, navigate to SEO via the Products tab menu:
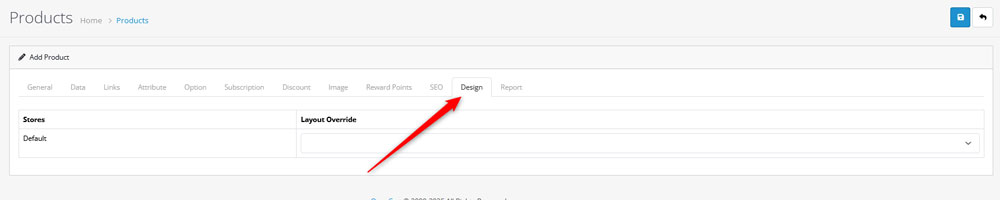
Step 11: Select Design Layout
You can select various page designs for your product. To access these settings, head to the Design tab on the Products page and browse the design list, to choose the layout that best fits your product:
Step 12: Save Changes
Once you are finished with the setup of your new product, it is time to save the changes. To do so, simply click on the blue Save icon, located at the top right of the screen. This will make OpenCart apply and save all the changes you made when adding the new product:

Now you have successfully added a new product to OpenCart.
Conclusion
Adding new products to OpenCart is simple, as the platform grants you everything you need to set up a product page quickly and easily.
Read Also:
