How to Customize the Dashboard in SuiteCRM

Home » Knowledge Base » Design Tools » SuiteCRM » How to Customize the Dashboard in SuiteCRM

SuiteCRM is a versatile CMS that allows you to customise the dashboard in numerous ways. The platform lets you tailor your workspace, so you can see relevatnt data and tools for your role and the role of your colleagues.

In this article, we share how to customise the dashboard in SuiteCRM in a few simple steps.


Step 1: Access the SuiteCRM Dashboard

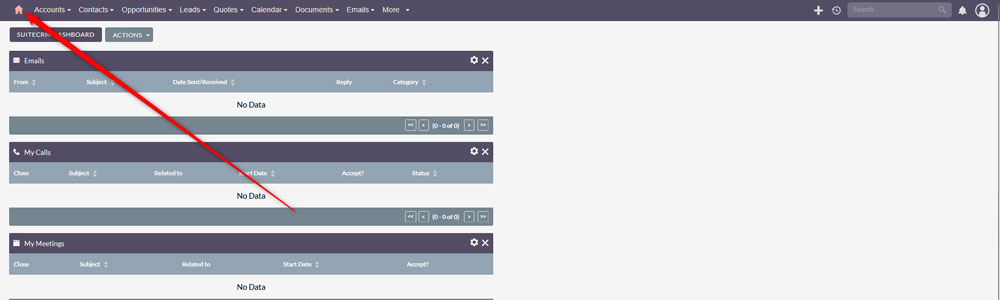
The first step in the process is to log in to SuiteCRM. Once you are logged in, click on the Home button at the top left corner, so you open the default dashboard page:

Enter the SuiteCRM dashboard to start customizing it

Step 2: Add Dashlets

Once you are logged in SuiteCRM, it is time to start customizing the dashboard. A good start is to add some dashlets, so to manage data that is most important for your work.

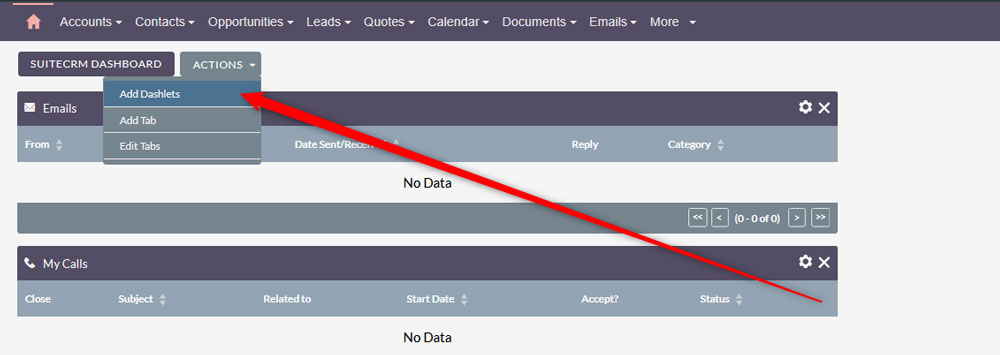
To add a dashlet, via the SuiteCRM dashboard, click on the Actions button located at the top left corner of the screen and then select Add Dashlets from the dropdown menu:

Add dashlets button in SuiteCRM


If you are interested in the topic, then have a look at our comprehensive article on how to work with dashlets:

How to Add Dashlets to SuiteCRM


Step 3: Rearrange the Dashlets

Once you have added the dashlets that are important for your workflow, you can rearrange them in a preferred layout. To do so, simply click and drag any of the dashlets you have added to the dashboard and drop them wherever you prefer.

Step 4: Customise the Dashlets Settings

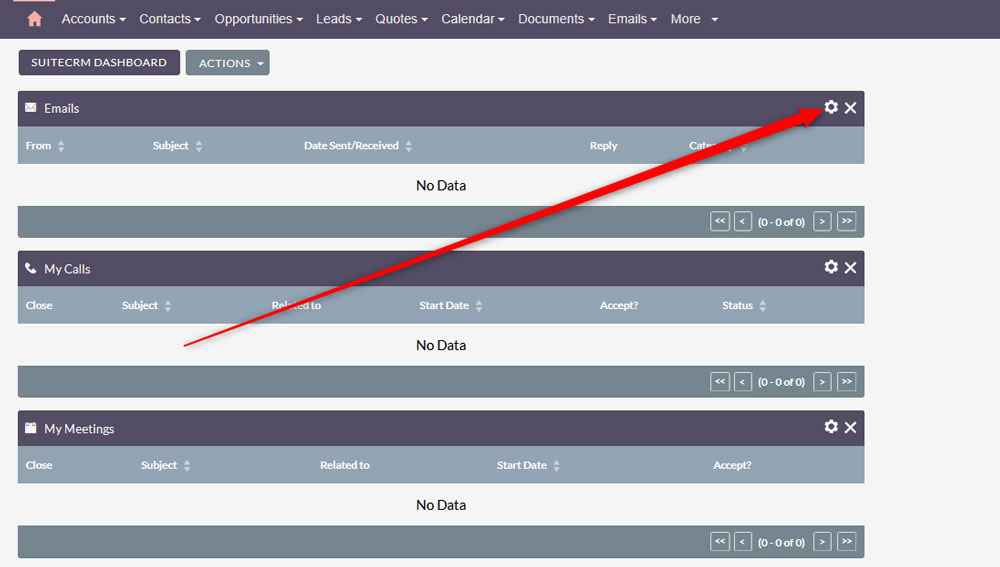
After you have added and rearranged the dashlets, you can start customising their settings. To customise the settings of a given dashlet, simply click on the Edit Dashlet button at the right corner of each dashlet, so you open the options for each unit on the dashboard:

Add dashlets to SuiteCRM by clicking the options menu


Step 5: Add or Remove Dashboard Tabs

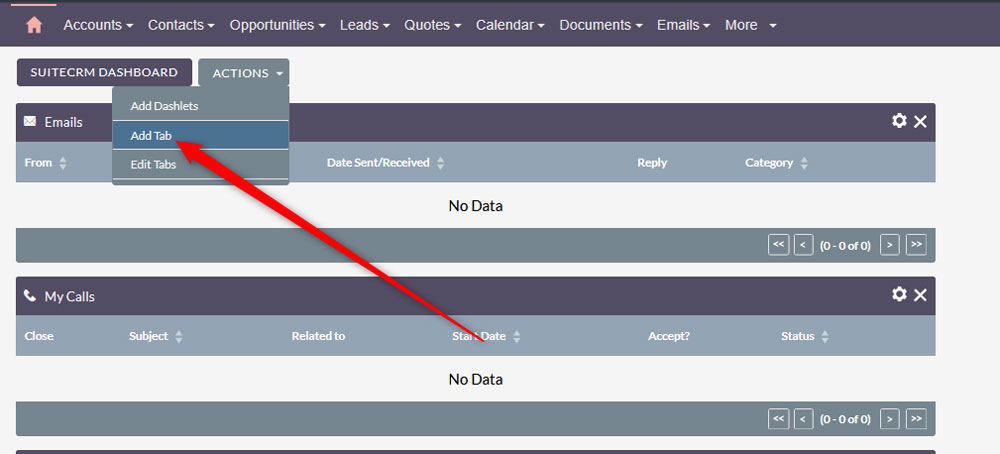
You can manage your dashboard tabs in numerous ways. For example, you can add and remove tabs that are relevant for your work. To add a tab, click the Actions button in the dashboard and select Add Tab:

Add tabs in SuiteCRM


Then, follow the instructions in the pop-up window.


Conclusion – How to Customize the Dashboard in SuiteCRM

Customising the dashboard in SuiteCRM is an effective way to increase efficiency and easily track important data changes.

Was this post helpful?

i

Relevant tags:

Connect

Latest posts:

How to Install Themes in Zenphoto

Zenphoto allows you to customize the look of your online gallery by incorporating various themes. If you are interested in learning how to install themes in Zenphoto, then this article will guide you through the entire process - from browsing and downloading, through...

How to Add Tags in Zenphoto

Tags are a handy feature for organizing your Zenphoto images and albums. Tags not only help you and your visitors navigate more easily and quickly through your website, but also improve its discoverability in search engines, and can also help you generate more organic...

How to Upload Files in Zenphoto

Knowing how to upload files in Zenphoto is a fundamental skill. In this guide, we share how to go through the process and manage your project and media library quickly and easily.   Step 1: Log in to Zenphoto The first step in the process is to log in to...

How to Back Up your TYPO3 Project

In this article, we outline the step-by-step process for backing up your TYPO3 project, ensuring that all your data, settings, and other essential information are safely stored. Regardless of your level of expertise, this method is simple to follow and provides...

How to Install Themes in TYPO3

Learning how to install themes in TYPO3 is essential, as it enables you to personalize your website fully. Whether you are working on a personal blog or a complex business website, the process of installing a theme in TYPO3 is the same. In this article, we share how...


Create a website for free!


Free forever

Our Support Team is Here to Help


If you need any questions answered, don't hesitate and contact us. Click the button below and follow the instructions. You can expect an answer within an hour.


Contact AwardSpace


iNewest knowledge base articles

How to Install Themes in Zenphoto

Zenphoto allows you to customize the look of your online gallery by incorporating various themes. If you are interested in learning how to install themes in Zenphoto, then this article will guide you through the entire process - from browsing and downloading, through...

How to Add Tags in Zenphoto

Tags are a handy feature for organizing your Zenphoto images and albums. Tags not only help you and your visitors navigate more easily and quickly through your website, but also improve its discoverability in search engines, and can also help you generate more organic...

How to Upload Files in Zenphoto

Knowing how to upload files in Zenphoto is a fundamental skill. In this guide, we share how to go through the process and manage your project and media library quickly and easily.   Step 1: Log in to Zenphoto The first step in the process is to log in to...

How to Back Up your TYPO3 Project

In this article, we outline the step-by-step process for backing up your TYPO3 project, ensuring that all your data, settings, and other essential information are safely stored. Regardless of your level of expertise, this method is simple to follow and provides...

How to Install Themes in TYPO3

Learning how to install themes in TYPO3 is essential, as it enables you to personalize your website fully. Whether you are working on a personal blog or a complex business website, the process of installing a theme in TYPO3 is the same. In this article, we share how...

How to Add Extensions to TYPO3

TYPO3 is a versatile platform that allows you to customize it any way you wish. One of TYPO3's strengths is the so-called extensions that enable you to add any kind of functionality to your website. In this article, we share how to add extensions to TYPO3. What are...

Even more web tutorials

Check out our web hosting knowledge base and the WordPress tutorials to learn more, and be better prepared for your website creation and maintenance journey.