Remove WordPress Plugin

Home » Knowledge Base » Design Tools » WordPress » Remove WordPress Plugin

There are multiple reasons you might want to remove a plugin from your website. Sometimes they don’t do what you’ve expected them to, and other times, they are no longer necessary. Either way, once you’ve installed a plugin, it is best to know how to remove it.

Removing a WordPress plugin from your site is a straightforward process. You are just two steps away from your goal:


Step 1: Deactivate the Plugin

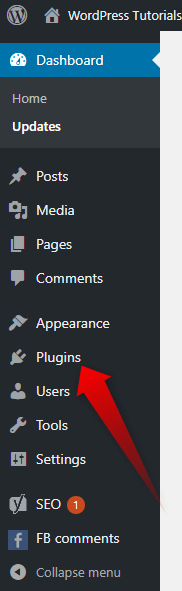
To deactivate the plugin that you want to, first, you need to log in to your WordPress Dashboard. Go to to the Plugins page.


Locate the plugin you want to remove from your WordPress installation. Depending on the number of previously installed plugins, you might need to scroll down the list to find the one you no longer need.

Now that you’ve found the plugin you are looking for deactivate it, by clicking the Deactivate button below its name.

how to uninstall a plugin in wordpress 1

The page will reload to show you the server’s response. You should see “Plugin deactivated.” Meaning, you can proceed to its deletion.

how to uninstall a plugin in wordpress 2


Step 2: Delete the Plugin

Now that the plugin is deactivated, you will be allowed to proceed to its deletion. Scroll down (if needed) to find it once again. Below it, you will see different options. On the left side the button says “Activate” and on the right side, in red color, you should see “Delete”. Click the red button to remove the plugin from your site.

WordPress will ask you to confirm that you wish to delete the plugin and its data. Click Yes, and WordPress will permanently delete the plugin.

If you need more in-depth directions, check our previously published article on How to Uninstall a Plugin in WordPress

If you feel like you are ready to go further in the CMS, feel free to browse our WordPress Tutorials section.

Was this post helpful?

i

Relevant tags:

Connect

Latest posts:

How to Delete Product Categories in Zen Cart

Sometimes, your online store needs a bit of cleaning. Whether you have discontinued a given product or reorganized your goods, it is always important to know how to delete product categories in Zen Cart. This article showcases the process step by step.   When You...

How to Add Product Categories in Zen Cart

When configuring your online store in Zen Cart, it is essential to organize your products into different categories. Product categories not only help you with navigation and setting up the main menu, but also improve the overall shopping experience for your customers....

How to Manage the Main Menu in Zen Cart

The main menu in your Zen Cart store plays an important role in guiding your site visitors through your products. Whether you wish to add a new link to a new product, remove an existing product and the links that lead to it, or fully customize your store navigation,...

How to Set Up Your HomePage in Zen Cart

Given that your Zen Cart homepage is often the first page your customers see, it is important to make it functional and aesthetically pleasing so you can make a good first impression. This guide showcases how to set up your homepage in Zen Cart and showcases how to...

How to Configure Your Online Store in Zen Cart

Configuring your online store with Zen Cart is quite simple, and in this article, we share the steps you can take to get the most out of the platform.   1. Install Zen Cart The first step is to install Zen Cart. The platform is free to use with all AwardSpace...


Create a website for free!


Free forever

Our Support Team is Here to Help


If you need any questions answered, don't hesitate and contact us. Click the button below and follow the instructions. You can expect an answer within an hour.


Contact AwardSpace


iNewest knowledge base articles

How to Delete Product Categories in Zen Cart

Sometimes, your online store needs a bit of cleaning. Whether you have discontinued a given product or reorganized your goods, it is always important to know how to delete product categories in Zen Cart. This article showcases the process step by step.   When You...

How to Add Product Categories in Zen Cart

When configuring your online store in Zen Cart, it is essential to organize your products into different categories. Product categories not only help you with navigation and setting up the main menu, but also improve the overall shopping experience for your customers....

How to Manage the Main Menu in Zen Cart

The main menu in your Zen Cart store plays an important role in guiding your site visitors through your products. Whether you wish to add a new link to a new product, remove an existing product and the links that lead to it, or fully customize your store navigation,...

How to Set Up Your HomePage in Zen Cart

Given that your Zen Cart homepage is often the first page your customers see, it is important to make it functional and aesthetically pleasing so you can make a good first impression. This guide showcases how to set up your homepage in Zen Cart and showcases how to...

How to Configure Your Online Store in Zen Cart

Configuring your online store with Zen Cart is quite simple, and in this article, we share the steps you can take to get the most out of the platform.   1. Install Zen Cart The first step is to install Zen Cart. The platform is free to use with all AwardSpace...

How to Customize the Dashboard in SuiteCRM

SuiteCRM is a versatile CMS that allows you to customise the dashboard in numerous ways. The platform lets you tailor your workspace, so you can see relevatnt data and tools for your role and the role of your colleagues. In this article, we share how to customise the...

Even more web tutorials

Check out our web hosting knowledge base and the WordPress tutorials to learn more, and be better prepared for your website creation and maintenance journey.