
Google Analytics is a handy tool that conveniently tracks visitors’ behaviour on your website. It not only does that, but it can also help you segment your visitors on different criteria – demographics, purchase preferences, geographical location, and many more. To benefit from such a tool, you need to set it up. We have covered the entire process in a dedicated article, and if you are a complete beginner in the field of setting up analytics on your website, then definitely check it out:
How to Set Up Google Analytics 4 On Your Website
Also read: How to Navigate Google Analytics 4
In this article, we share where to set Google Analytics 4 code. Keep reading!
What is the Google Analytics 4 Code
The Google Analytics code is a small JavaScript snippet that you add to your website, so Google can collect and present data about how website visitors interact with your website and its content.
In short, this code connects your website to your Google Analytics account and therefore allows you to monitor different analytics metrics such as page views, bounce rate, session duration, traffic sources, user demographics, purchases, and many more. If you are interested in the topic, then find out more about the most important website metrics.
The Google Analytics code includes a unique measurement ID that identifies your own Google account and the particular website you are working on, so GA4 knows to which account to send the specific data gathered from a specific website.
Where to Get the Google Analytics 4 Code From
When you are setting up your Google Analytics account, you will stumble upon your unique code. If you have already set up your account, then you can access the code by doing the following:
First, log in to your GA4 account.
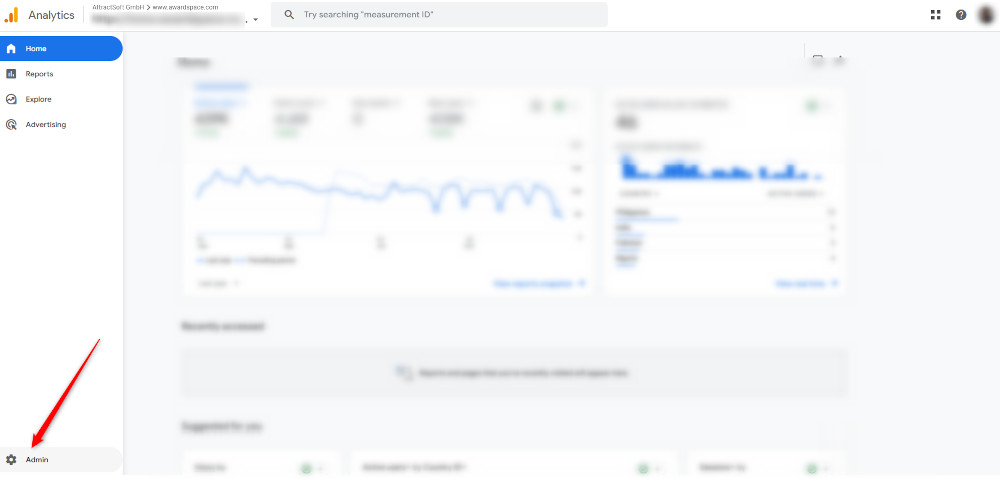
Then, within the GA4 dashboard, head to the Admin button (the gear icon) at the bottom right of the screen:
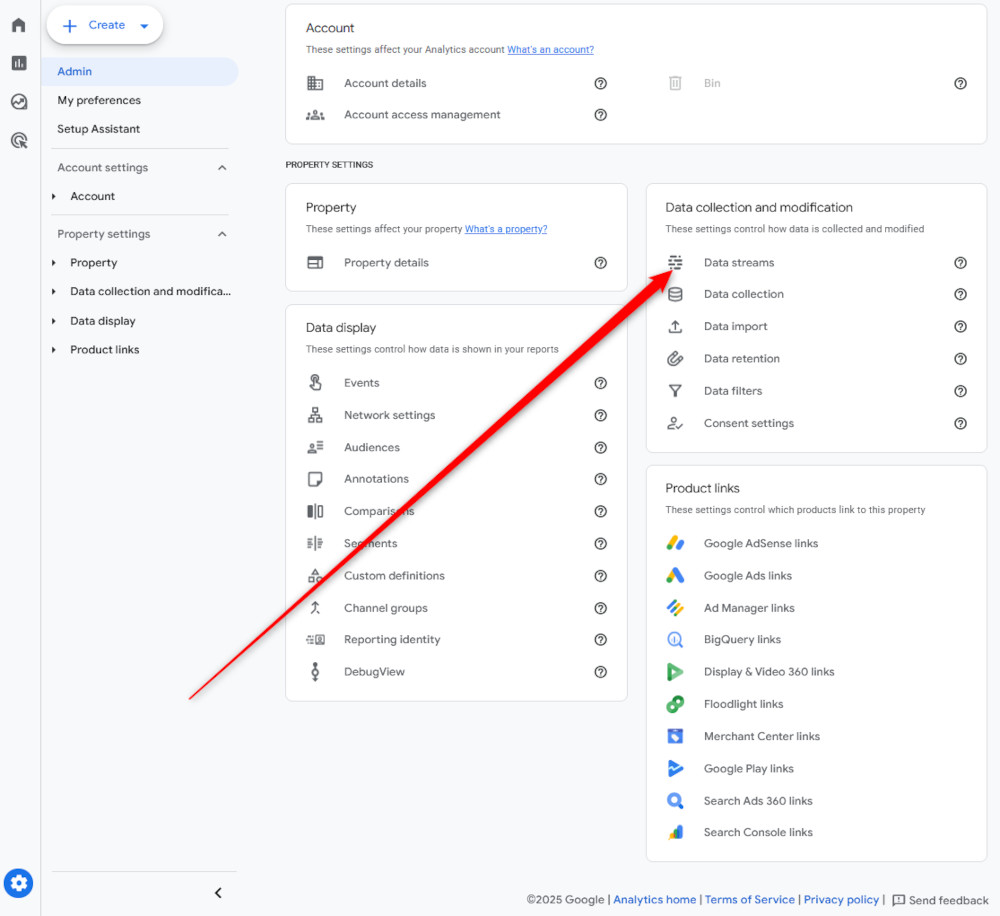
After that, via the Admin page, head to Data Streams:
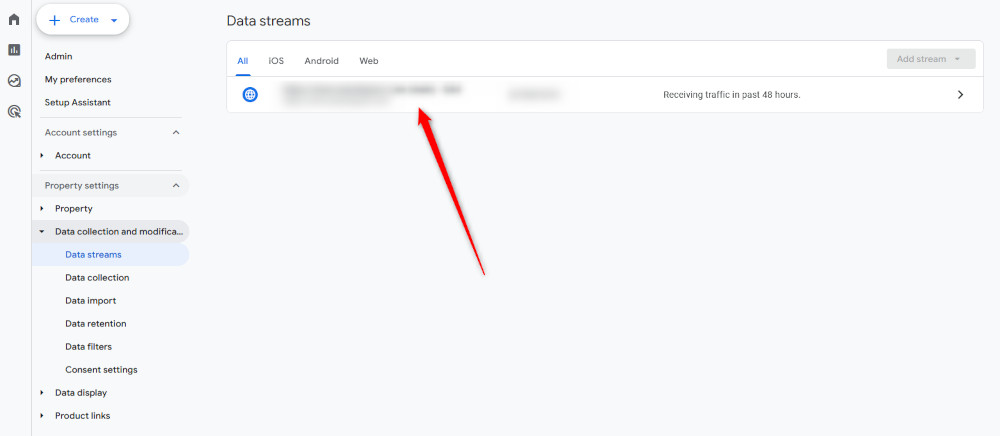
Once you access the Data Streams page, click on the GA4 property for which you wish to get the link:
Then, head to the View tag instructions at the bottom of the new window that opened:
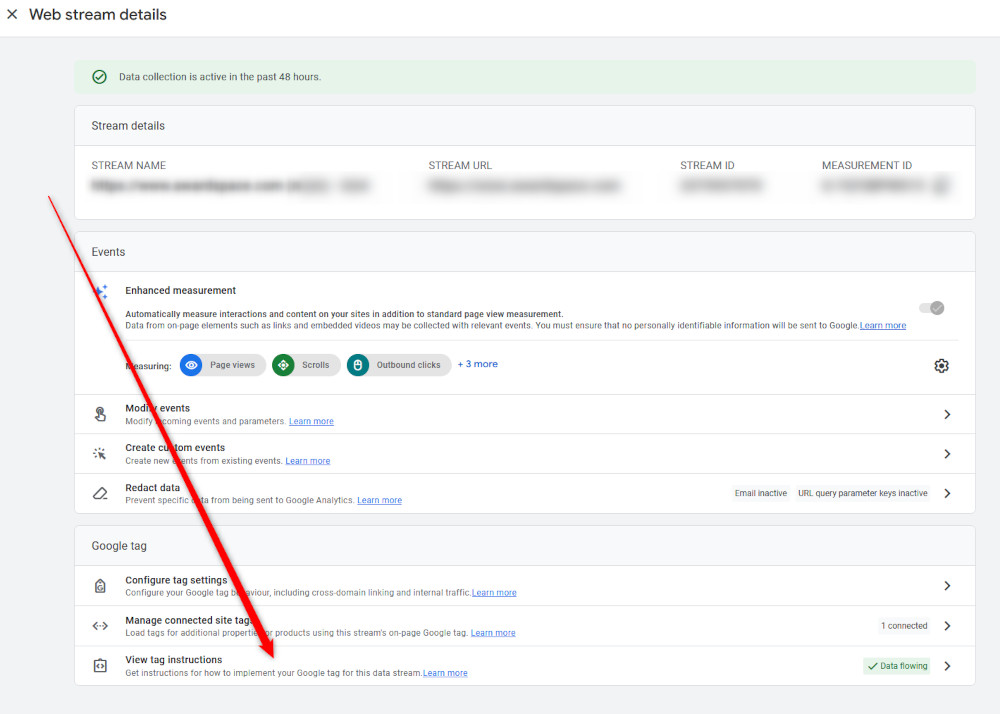
From there, click on Install Manually to see the Google code:
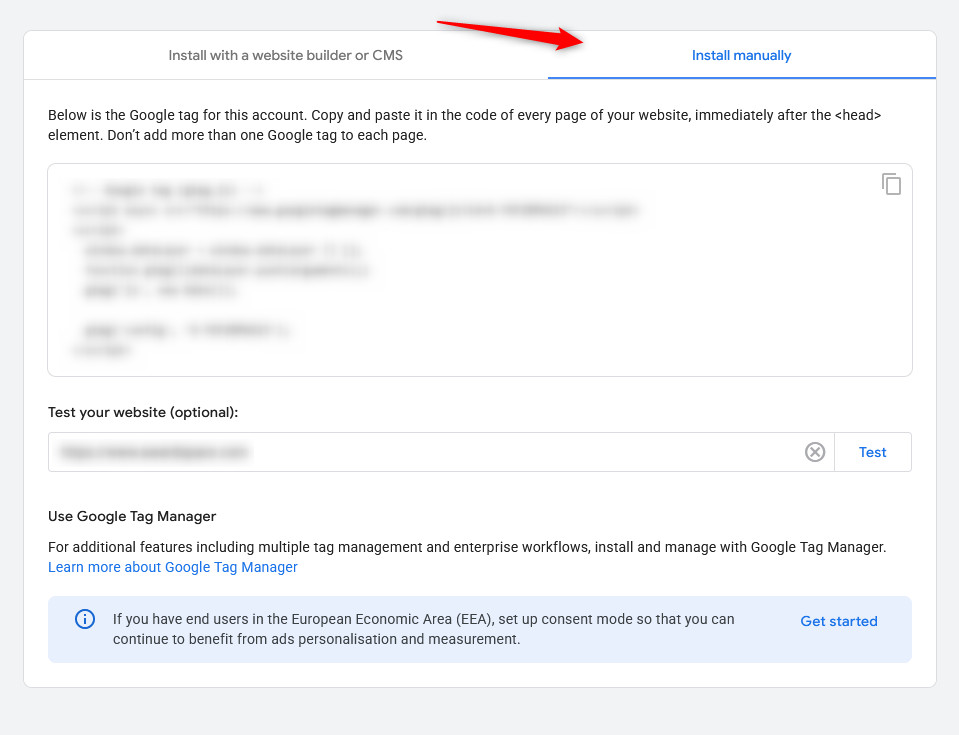
Now, copy this code. In the next paragraphs, we share where to set it, so you can gather data from Google Analytics 4.
Where to Set Google Analytics 4 Code
In short, regardless of whether you are using a CMS such as WordPress, Joomla, MediaWiki, or another platform, or you are building a website completely on HTML, in all cases, you should place the Google Analytics code within the <Head> section of your website. This is due to the fact that this particular section is present on all your web pages, and therefore, the code will be present on all of them. This is important because doing so allows Google Analytics to gain data from the entirety of your website, and not only from specific pages.
If you are interested in more technical details, then check out how do websites work.
How to Set the Google Analytics Code
There are various ways you can use to set the Google Analytics code, depending on how you built your website. In the following paragraphs, we share the two most common ways you can add the code to your website:
- Using an HTML code.
- Using a WordPress plugin.
Keep in mind that other CMS platforms also support plugin installation, so in many cases, the process is similar to the WordPress one.
Set Google Analytics Code via HTML Code
The first approach is more technical and revolves around the idea to manually add the GA4 tracking code to your website pages. The process is simple and comprises only a few steps:
Step 1: Copy the GA4 Code from the GA4 Property
Log in to your Google Analytics account and head to Admin -> Data Streams -> Your Website property -> Install Manually, where you will see the tracking code. Once you do, copy it.
Step 2: Paste the Code in the HTML Head Section
Now that the code is copied, it is time to place it within the HTML string of your website. To do so, access your website’s source HTML code and add the GA4 snippet within the <head section. Adding it precisely there is important, as this will help GA4 track visitor behaviour on all of your pages:
<html>
<head>
<title>Your Website</title>
<!– Google Analytics code goes here –>
</head>
<body>
…
</body>
</html>
Now, save the file, so the changes take place.
Set Google Analytics Code via a Plugin
The second most popular way of setting your GA4 tracking code is by installing a plugin that adds the GA4 code to your website. This method works when you use a CMS such as WordPress and Joomla for your website.
For this example, we will be using WordPress. Keep in mind that the process is similar to all CMS platforms.
First, log in to the WordPress dashboard.
Then, download and install a WordPress plugin such as Google Site Kit, Insert Headers and Footers, and GA Google Analytics, or any other that fits your needs.
Conclusion
Understanding where to set Google Analytics code can help you gain more detailed tracking data and therefore, help you understand your site visitors and buyers even better, so as to make your website even more engaging.
