How to Add Grouped Fields to the Record View in SuiteCRM

Home » Knowledge Base » Design Tools » SuiteCRM » How to Add Grouped Fields to the Record View in SuiteCRM

SuiteCRM offers great versatility when it comes to customising modules, including how fields are displayed on record views. One powerful feature is grouping fields within sections for better layout and user experience. In this article, we share how to group fields in a custom panel on the record view for each model.


How to Add Grouped Fields to the Record View in SuiteCRM

SuiteCRM doesn’t support real grouping, such as tabs within panels, but you can simulate this effect by organising fields in a custom panel with rows. In the following sections, we share how to do so.


Step 1: Navigate to the Studio Page

The first step in the process is to open your SuiteCRM  Studio page. To do so, first log in to the CMS.

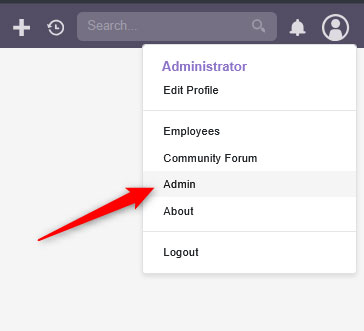
Then, hover your mouse above the Profile icon located at the top right of the page and click Admin:

Access your SuiteCRM admin panel


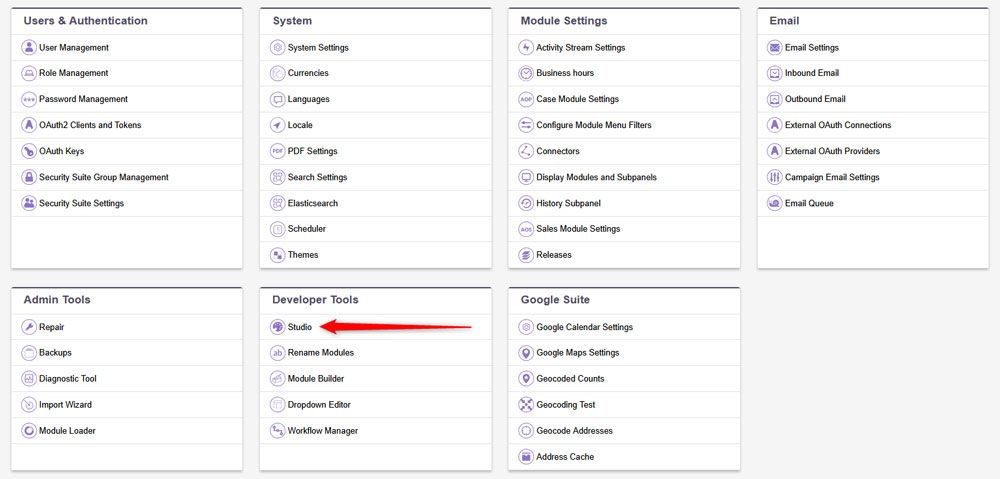
After you click on Admin, a new page should load. Once it does, click on Studio within the Developer Tools box:

Click the Studio button to open the group field settings in SuiteCRM


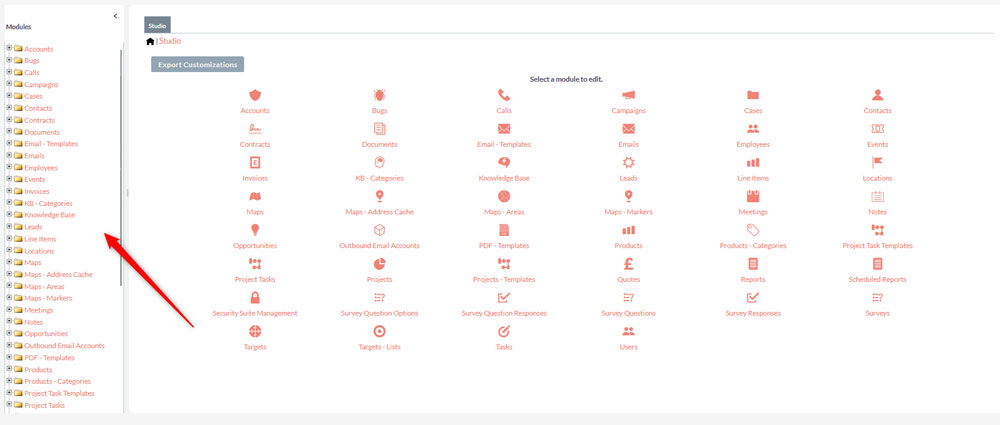
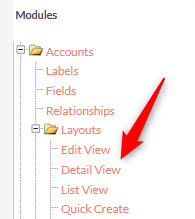
Once in the SuiteCRM Studio, you will notice various modules on the left of the screen (e.g. Accounts, Contacts, Leads). Click on the module you wish to modify:

Modules in the Studio page in SuiteCRM


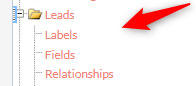
After you have selected a module, a sub-menu with various options such as Fields, Labels, Layouts and similar will appear. Once you see it, click on Layouts:

Options in the Module menu


Under Layouts, click on Detail View:

Find Detail View so you can modify fields in SuiteCRM


A new page with options for the give module will appear:

Edit Grouped Fields in SuiteCRM


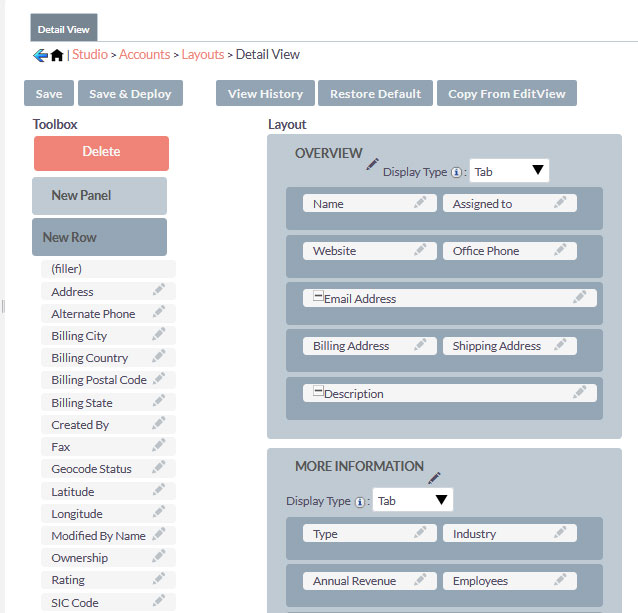
From this place, you can add, remove and edit panels as well as add names to the new panels you insert. You can also add rows via the Add Rows button – simply click it, drag it wherever you wish to add a new row and start working on the details.

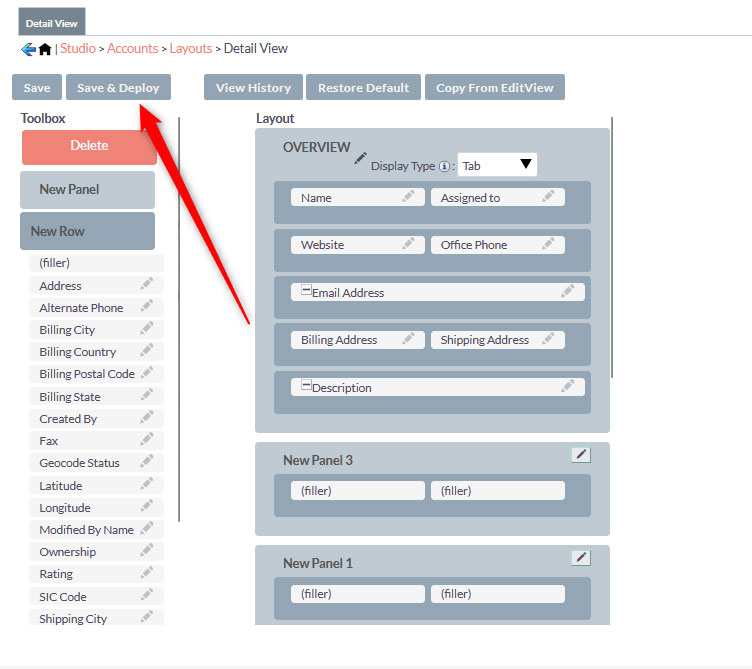
Once you are finished with editing, click the Save & Deploy button, so SuiteCRM can apply and save the changes you’ve just made:

Save & Deploy button to make SuiteCRM apply and save your settings

Now you have managed to add grouped fields to the record view in SuiteCRM.


Was this post helpful?

i

Relevant tags:

Connect

Latest posts:

How to Check My Hosting Limits

To check your hosting limits, follow these steps: First, log in to the hosting control panel. Then, via the dashboard, head to Hosting Settings:   After that, click the Hosting Limits tab:   Then, you will access the information about your account's hosting...

How to Access the Security Settings of My Domains

Accessing the security settings of your hosted domains is easy with AwardSpace. You can access the settings in just a few minutes by following the steps below. First, log in to the AwardSpace hosting panel. Then, head to the Domain Manager page by clicking the...

How to Access The Name Servers Settings of My Domain

Accessing the name server settings with AwardSpace is quite simple. Just follow the next steps. First, log in to the AwardSpace hosting panel. Then, head to Domain Manager:   After that, locate the domain whose Name Server settings you wish to access and click...

How to Access the DNS Settings of My Domains

Accessing the DNS settings of your domains is easy with AwardSpace. The process is comprised of a few simple steps and requires only a minute or two of your time. First, log in to the AwardSpace hosting panel. Then, head to the Domain Manager:   After that,...


Create a website for free!


Free forever

Our Support Team is Here to Help


If you need any questions answered, don't hesitate and contact us. Click the button below and follow the instructions. You can expect an answer within an hour.


Contact AwardSpace


iNewest knowledge base articles

How to Check My Hosting Limits

To check your hosting limits, follow these steps: First, log in to the hosting control panel. Then, via the dashboard, head to Hosting Settings:   After that, click the Hosting Limits tab:   Then, you will access the information about your account's hosting...

How to Access the Security Settings of My Domains

Accessing the security settings of your hosted domains is easy with AwardSpace. You can access the settings in just a few minutes by following the steps below. First, log in to the AwardSpace hosting panel. Then, head to the Domain Manager page by clicking the...

How to Access The Name Servers Settings of My Domain

Accessing the name server settings with AwardSpace is quite simple. Just follow the next steps. First, log in to the AwardSpace hosting panel. Then, head to Domain Manager:   After that, locate the domain whose Name Server settings you wish to access and click...

How to Access the DNS Settings of My Domains

Accessing the DNS settings of your domains is easy with AwardSpace. The process is comprised of a few simple steps and requires only a minute or two of your time. First, log in to the AwardSpace hosting panel. Then, head to the Domain Manager:   After that,...

How to Access The Settings for My Subdomains

Accessing the settings for your subdomain with AwardSpace is quite simple. First, log in to the AwardSpace hosting panel. Then, head to Domain Manager:   A new page should open. Once you see it, scroll down until you see your list of hosted subdomains:  ...

Even more web tutorials

Check out our web hosting knowledge base and the WordPress tutorials to learn more, and be better prepared for your website creation and maintenance journey.