You have created an account, and registered a domain but you still don’t have a website. Although we cannot provide you with a comprehensive guide on web development, in this article we would like to actually guide you through the options and tools available in our hosting control panel for you to create your website.
Available tools
We offer a couple of tools for our users to start building their websites:
- Zacky App Installer
- Zacky Website Builder
- File Manager
Each of them is easily accessible through the Hosting Tools menu in the Hosting Control Panel.
Zacky Installer vs Website Builder vs File Manager
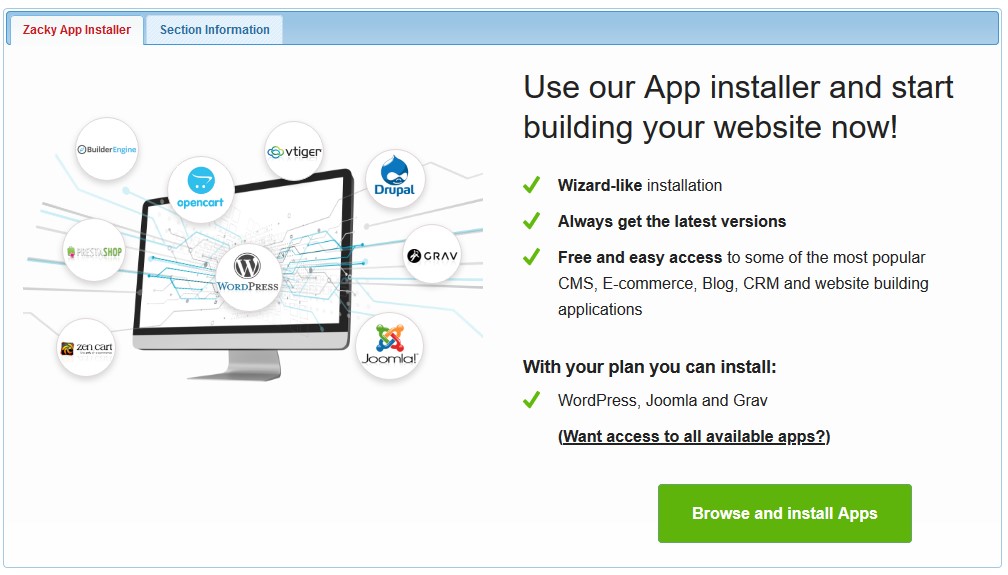
Let’s start with the Zacky Installer. The Zacky Installer App is a tool that will allow you to install various Content Management Systems or CMS (such as blogs, forums, online shops, and galleries) automatically. A similar CMS would be WordPress. When you choose the CMS of your choice the Zacky Installer all you need to do is to enter the details for the account which you will be using to manage your CMS and within a few steps, the CMS will be automatically uploaded to your hosting account, a database will be created for your website and the CMS will be installed. Once your CMS is installed you are left to log in to your CMS backend and start creating your website.
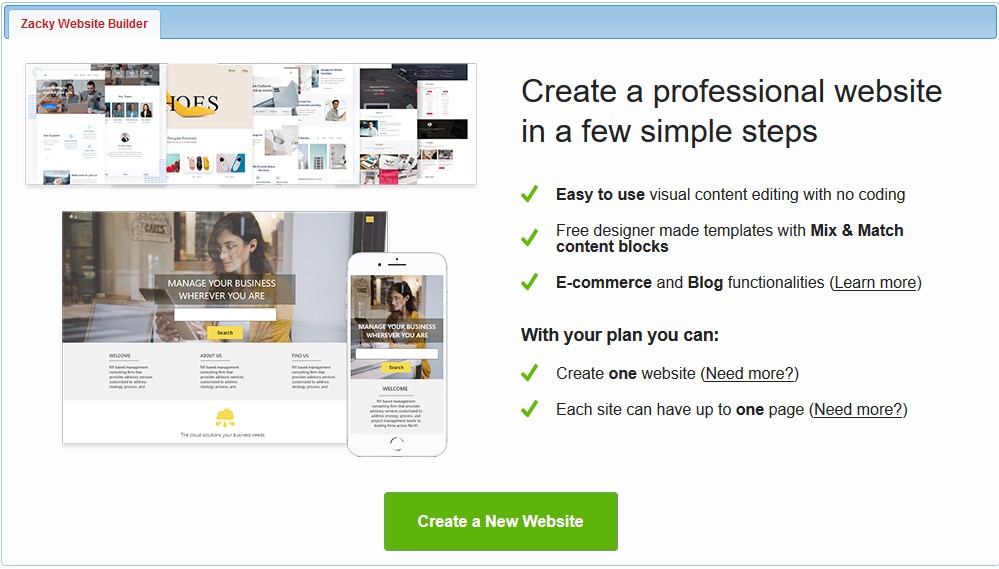
Unlike the Zacky Installer which is used to install various CMS that you use to build your website, the Zacky Website Builder is an application that you can directly use to start building your website. The Website Builder offers a drag-and-drop interface where you simply choose the elements/tools which you would like to use and position them on your page directly with your mouse. No coding is required in order to build a website with the Zacky Website Builder.
Although the File Manager is not exactly a tool for website creation but a tool to manage your files, it can still be used to create your website. You can create with ease your HTML, PHP, and CSS files for your website via our File Manager and you can code your website directly there. You can even upload a template and make the changes for your website directly through the File Manager. This way you can save the time of re-uploading your website every time you make a change on your device.
How to use the Zacky Installer?
Installing a CMS manually could sometimes be very overwhelming. The Zacky Installer can install various CMS for you just with a few small steps. Here is what you need to do:
- Log in to your hosting control panel
- Navigate to the Zacky Installer
- Click on Browse and install Apps

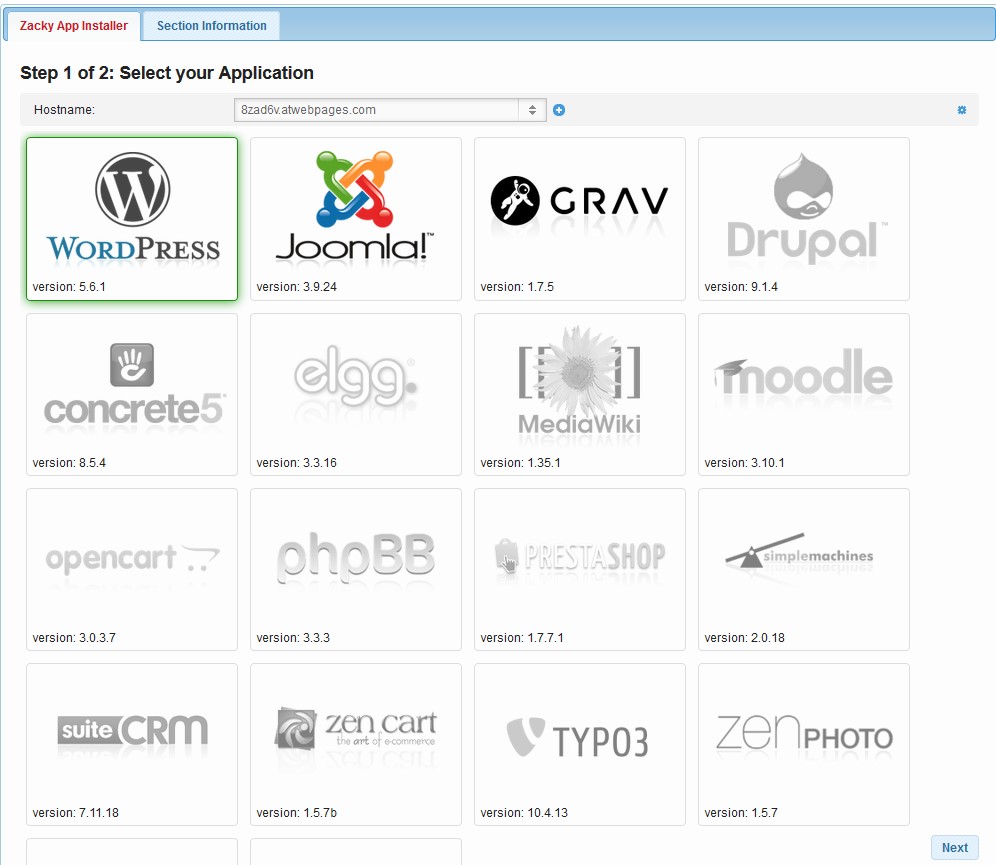
- From there you need to choose the CMS which you would like to install and the hostname for which you would like to install it.

- Once the hostname and the CMS are selected you need to enter the details for your admin account which you will be using to manage your website

- Finally, click Install Application and the CMS will be automatically installed
Be advised that in order for the Zacky Installer to install a CMS the directory in which you would like to install it must be empty.
How to create a website with the Zacky Website Builder?
Just like the Zacky Installer the Zacky Website Builder also needs a few steps to start building your website. To create a website with the website builder simply follow the steps:
- Log in to your hosting control panel
- Navigate to the Zacky Website Builder
- Click the Create a New Website button

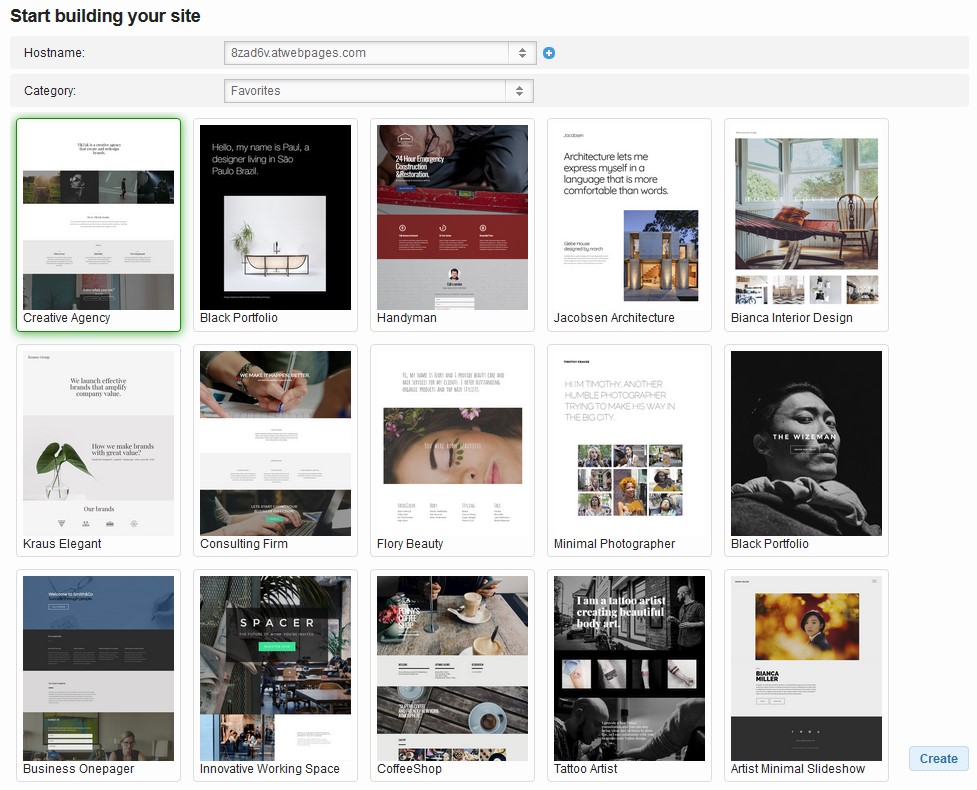
- From there choose the hostname which you would like and select a template for your website

- Once done click Create
Same as the Zacky Installer the directory in which you would like to create your website must be empty.
File Manager
Unlike the previous two options that are used to create a website, the File Manager is here to help you manage your files. However, it can still be used to create your website or even to start learning. You have all the necessary options available to you, from creating files and directories to extracting archive files.
We have covered everything in our article How to Use File Manager.
Conclusion
All the above options are available to you both on the free and the paid hosting plans. They all come with their advantages and disadvantages. It is up to you to choose which one to use. To help you decide we can advise you to just try all three of them.
