

What you need to know:
If you have a basic website that you have coded by hand, you can place a special .htaccess file in your website’s root directory that will redirect your HTTP traffic to HTTPS. Alternatively, if you use a CMS as the basis for your website, you should check its security settings for an option to force HTTPS rather than using the .htaccess file method.
Thanks to free and low-cost SSL certificates, the use of HTTPS has skyrocketed in recent years. By choosing to redirect all HTTP traffic to HTTPS, website owners can gain multiple benefits afforded by SSL. Most importantly, the use of SSL can ensure the safety and security of your site visitors. Moreover, search engines like Google are rewarding websites that force HTTPS connections by giving them a boost in SERPs. In this article, we will show how you can gain these benefits by redirecting your HTTP traffic to HTTPS.
Table of Contents
Requirements
The only requirement to force an HTTPS connection is for your domain to have a valid SSL certificate. In case you are not sure if there is a valid SSL certificate installed, you can use the SSL Manager to check whether a domain is SSL-protected. If you discover that your domain is not SSL-protected, you should obtain an SSL certificate and then install the SSL on the domain in order to secure it.

It should be noted that all SSL-related functionality is considered an advanced hosting feature. As such, the SSL Manager will only be available to you if you are using one of our premium shared hosting plans or one of our Semi-Dedicated web servers. At this time, the free web hosting package does not come with SSL support.
Why Doesn’t My Website Load Using HTTPS Now That I Have SSL Installed?
So, you have gone ahead and purchased an SSL certificate for your domain name or installed an SSL that you already had available. Then, you tried visiting your website only to find that it is still showing a Not Secure warning.

The reason for this apparent bug is probably that your website is not set up to force a secure HTTPS connection yet. In other words, if a site visitor makes an HTTP request, they will get an HTTP response. Conversely, in this scenario, you would get an HTTPS response only if you have made an HTTPS request, to begin with.
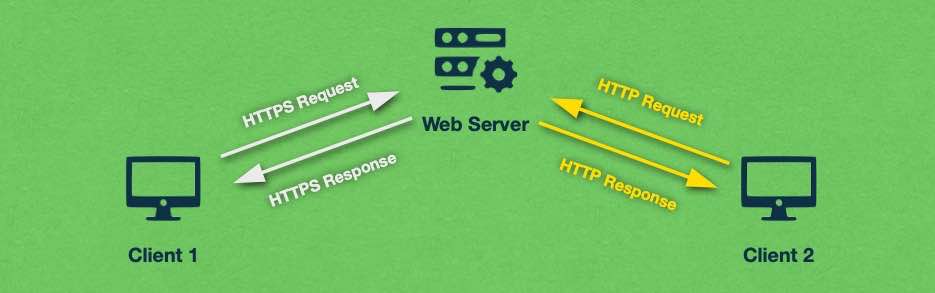
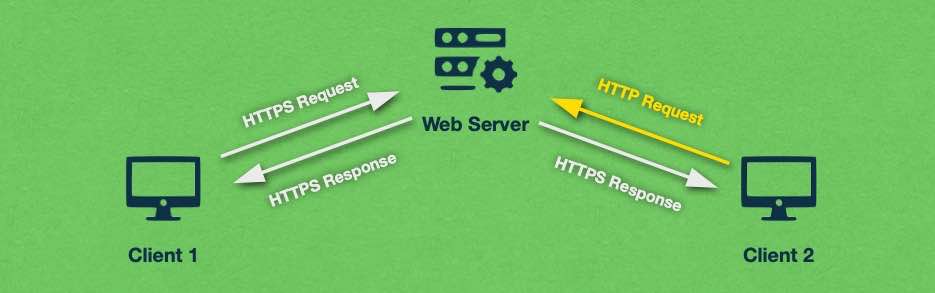
With that in mind, it is possible to configure your web server so that all HTTP traffic gets redirected to HTTPS automatically. We will explore how to achieve this in the next section.
How Do I Redirect HTTP Traffic to HTTPS?
There are two main ways you can configure your website to redirect HTTP traffic to HTTPS:
- you can use an .htaccess file to force an HTTPS connection. This option is best suited for basic websites or if you wish to have more control over the traffic redirection.
- you can use the tools built into your website’s back-end to redirect site visitors to HTTPS. This option is available only if you are using a sophisticated content management system (CMS) such as WordPress, Drupal, Joomla, or similar.
We will examine both approaches in greater detail below.
How Do I Use an .htaccess File to Force HTTPS on My Website?
The .htaccess file is used to issue directives to the server. These directives govern URL redirection, URL shortening, access control, and more. In this specific case, we will show you how to use an .htaccess file to ensure that all site visitors are redirected to the HTTPS version of your website.
To create your .htaccess file, follow the steps below:
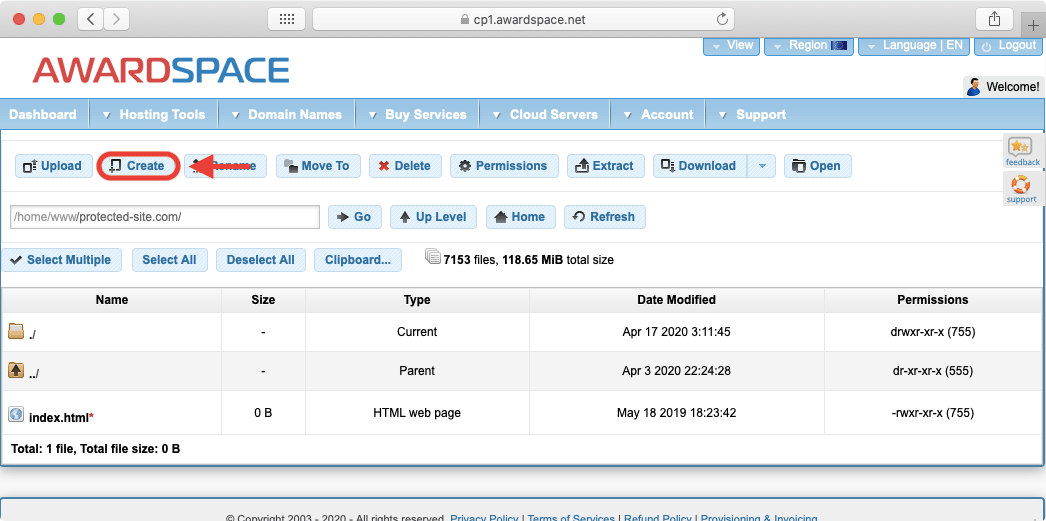
- Open the File Manager section of the Control Panel.
- Double-click on the website where you wish to force HTTPS.
- From the toolbar, choose the Create button.
Tip
Curious about what else the File Manager is capable of? Find out in our guide to the AwardSpace File Manager!
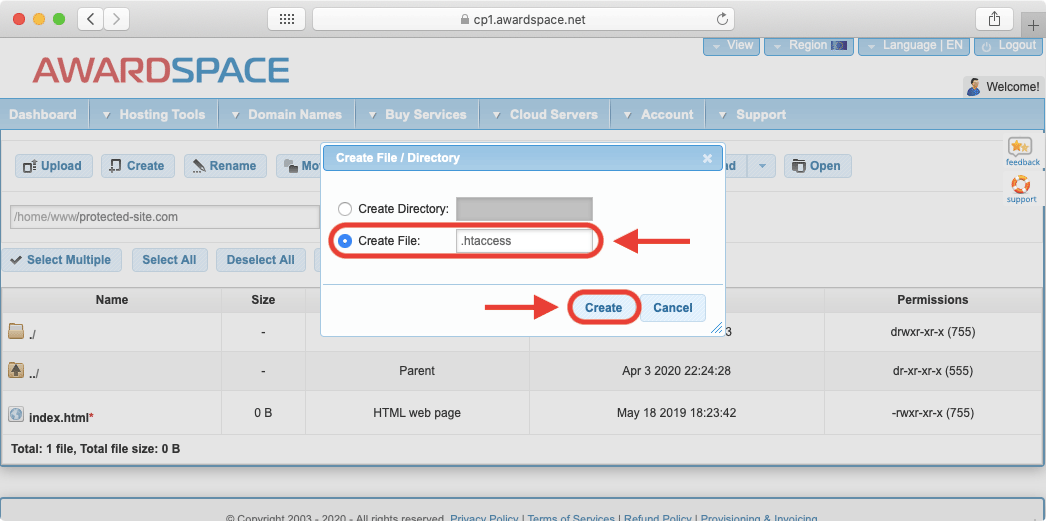
- In the popup window that appears, choose the option to Create File and name your file .htaccess.
Important
Do not forget to include the leading dot in the file name!
- Press the Create button.
Tip
If your website already has an .htaccess file in its root directory, you should not create a new .htaccess file. Instead, you should use the file that is already present by following the steps below.
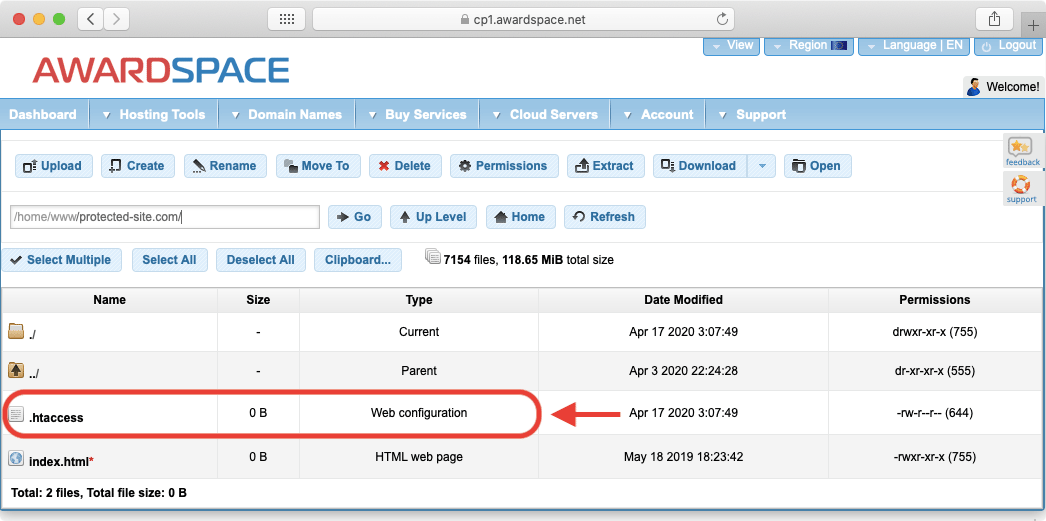
- The end result should be a brand new file called .htaccess. If the file is properly named, the server should automatically detect it as a Web configuration file. You can verify this in the Type column of the File Manager.
- Once you have verified that the server recognizes the .htaccess file as a proper web configuration, you can double-click the .htaccess file to start editing it.
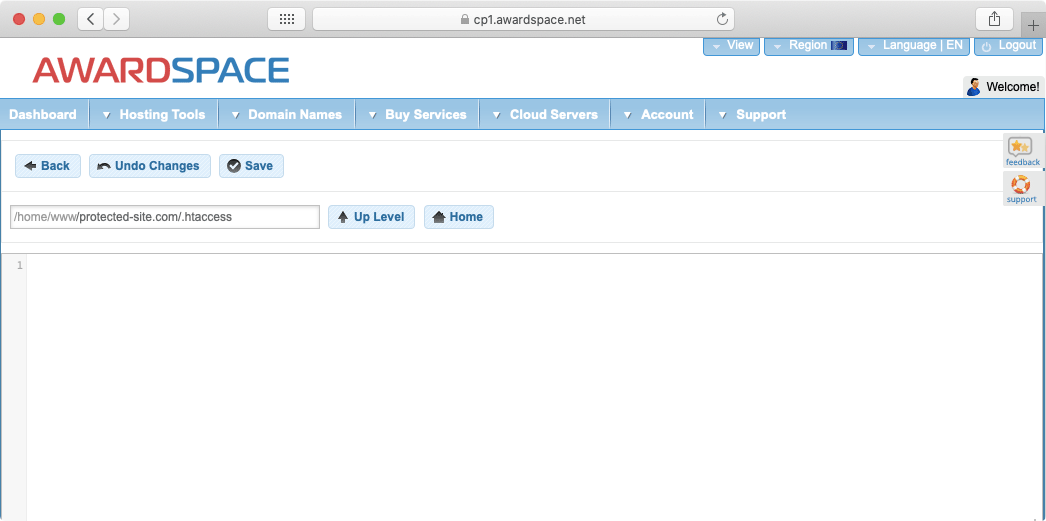
- At this stage, you should have the .htaccess file open in the File Manager. Since you have just created the file, it is normal for it to be empty, as is shown below:
Tip
If your website was using an .htaccess file already, then in most cases it would not be empty. In such scenarios, you should still follow the instructions below, just keep in mind that you need to append your changes to the end of the file.
- Now it’s time to decide what rules the .htaccess file should contain. Below, we will use
protected-site.comas our example domain and we will list three sets of rules. All of these rules will allow your .htaccess file to force an HTTPS connection, so picking a set comes down to your personal preference. Choose one of the following sets of rules: - force “www”. With this ruleset, all of your HTTP traffic will be redirected to HTTPS and will land on the “www” version of your domain name. So if a visitor enters
http://protected-site.com/orhttp://www.protected-site.com/into their web browser, they will end up onhttps://www.protected-site.com/. The code for this ruleset is:
RewriteEngine On
RewriteBase /
RewriteCond %{HTTPS} off
RewriteRule ^(.*)$ https://www.protected-site.com%{REQUEST_URI} [L,R=301]
- force “non-www”. With this ruleset, all of your HTTP traffic will be redirected to HTTPS and will land on the “non-www” version of your domain name. So if a visitor enters
http://protected-site.com/orhttp://www.protected-site.com/into their web browser, they will end up onhttps://protected-site.com/. The code for this rule set is:
RewriteEngine On
RewriteBase /
RewriteCond %{HTTPS} off
RewriteRule ^(.*)$ https://protected-site.com%{REQUEST_URI} [L,R=301]
- allow both “www” and “non-www”. With this rule set, all of your HTTP traffic will just be redirected to HTTPS with no other alterations. So if a visitor goes to
http://protected-site.com/they will arrive athttps://protected-site.com/. Similarly, if a visitor entershttp://www.protected-site.com/into their web browser, they will end up onhttps://www.protected-site.com/. The code for this rule set is:
RewriteEngine On
RewriteBase /
RewriteCond %{HTTPS} off
RewriteRule ^(.*)$ https://%{HTTP_HOST}%{REQUEST_URI} [L,R=301]
Warning
Allowing both “www” and “non-www” on your domain can harm your SEO.
- Copy the code of your preferred ruleset.
- Paste the code into your .htaccess file.
- If you have chosen the force “www” or the force “non-www” rule set, update the domain name on line 4 from
protected-site.comto your actual domain name. - Save your changes by clicking on the Save button.
At this point, your .htaccess file will start forcing an HTTPS connection. If you are still taken to an unsecured version of your website, try clearing your browser’s cache and cookies. In the unlikely event that the issue persists, you can contact the 24/7 Technical Support Team and they will assist you further.
How Do I Set up My CMS to Redirect HTTP to HTTPS?
Many popular content management systems out there offer settings that enable you to redirect all HTTP traffic to HTTPS. These settings are usually found in the CMS back-end.
If you are using WordPress, you can check our dedicated tutorial on how to force HTTPS on a WordPress site. And in case you are using a different CMS, you can check the official CMS documentation or you can post a question on the community support forums for your CMS.
Your CMS of choice will not always have an option to redirect HTTP to HTTPS. If you find yourself in this situation, you can try our .htaccess solution to force HTTPS. The only difference is that in many cases your CMS will already be using an .htaccess file, so you will not need to create one from scratch. Instead, just add the redirection code to the end of the already existing .htaccess file.
Conclusion
Forcing a secure HTTPS connection is quickly becoming table stakes when it comes to launching and maintaining a successful website. The great thing about redirecting all HTTP traffic to HTTPS is that it does not come with any drawbacks. As such, site owners are highly recommended to start using secure connections and reap the benefits that come with a secure website.
