
Our Control Panel comes equipped with a full-fledged Database Manager where you can create, delete, and edit your databases. The Database Manager offers the tools necessary to work with both MySQL and PostgreSQL databases. In this article, we will go over all the features that the Database Manager has to offer.
How Do I Create a MySQL Database?
Setting up a new MySQL database can be achieved in a few easy steps:
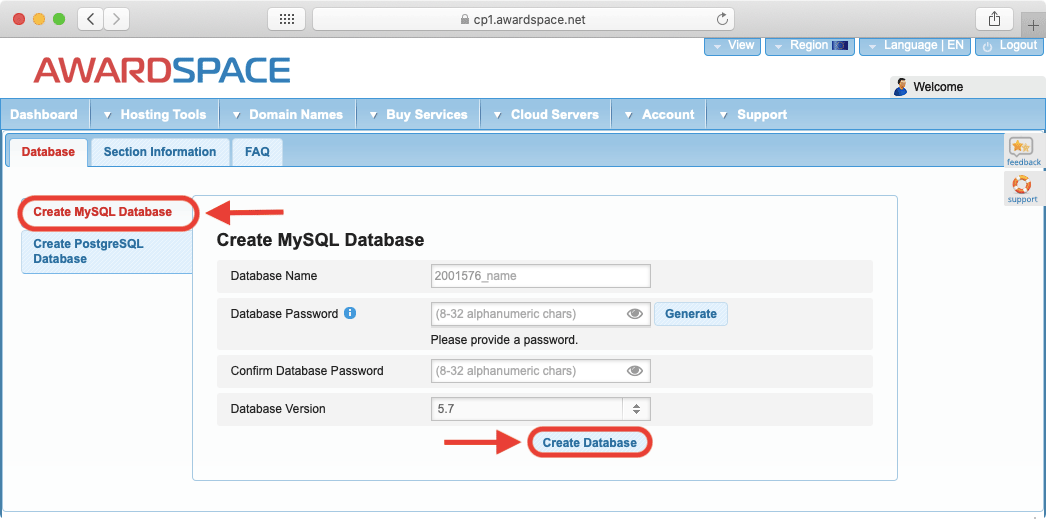
- Log into the Database Manager section of the Control Panel.
- Make sure that the Create MySQL Database option is active on the left-hand side.
- Assign a name for your database. For best results, do not use overly long names and also avoid using any special symbols.
- Choose a password for the database. We highly recommend using the Generate button as it will provide you with a random password for maximum security.
- Confirm your password by entering it into the second password field.
- Select your preferred database version.
- Complete the process by pressing the Create Database button.
MySQL databases have become an integral part of many content management systems over the years. As such, MySQL database creation is allowed on all of our hosting plans, including the free website hosting package.
It is also possible to have multiple MySQL databases at the same time. This feature, however, is reserved for clients using our premium shared hosting and Semi-Dedicated server plans.
Where Can I View All Existing MySQL Databases?
Once you have created your MySQL database, you can see it listed right below the database creation form:
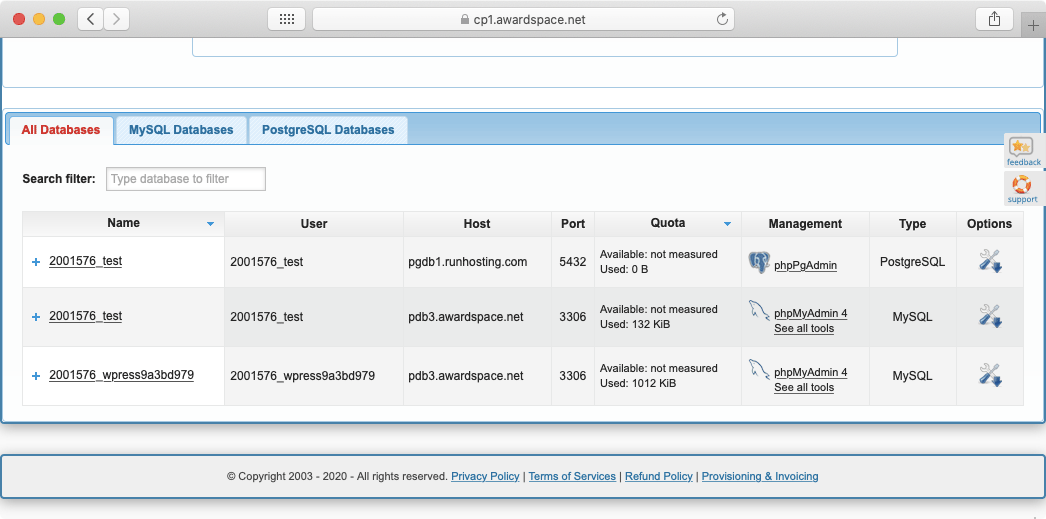
You will notice three tabs at the very top of this section: All Databases, MySQL Databases, and PostgreSQL Databases. Using these tabs you can choose which type of databases you wish to view.
In the table itself, you are presented with the following information organized into columns:
- Name is the name that you have selected while creating the database. On our shared hosting platform, all database names start with your Client ID number.
- User is the username that you can use to access and work with your database. On our shared hosting platform, all database names and database usernames are identical.
- Host is the address of the server that is powering your database. It is important to use this address as the database host/server while setting up your website, otherwise, you can run into error messages such as “Can’t Connect to Local MySQL Server Through Socket”.
- Port is the port that is used to access the database.
- Quota is the size limit for your database. This field lists both your current usage as well as your total allowance. If you happen to reach your quota, your website may start showing errors like “INSERT Command Denied to User”. As such, it is a good idea to keep an eye on your quota and to reduce the database size from time to time.
- Management holds quick links to the phpMyAdmin utility and our other database-related management tools.
- Type lists the type of your database. Currently, we support MySQL and PostgreSQL.
- Options is a button that allows you to reveal additional options for each database. You can also access these options by clicking on the name of your database in the first column.
How Do I Manage an Existing MySQL Database?
You can manage your MySQL database by clicking on its name or by clicking the Options icon. Doing so will reveal four additional tabs through which you can get additional information about the database, change the database password, carry out simple database maintenance, and delete the database.
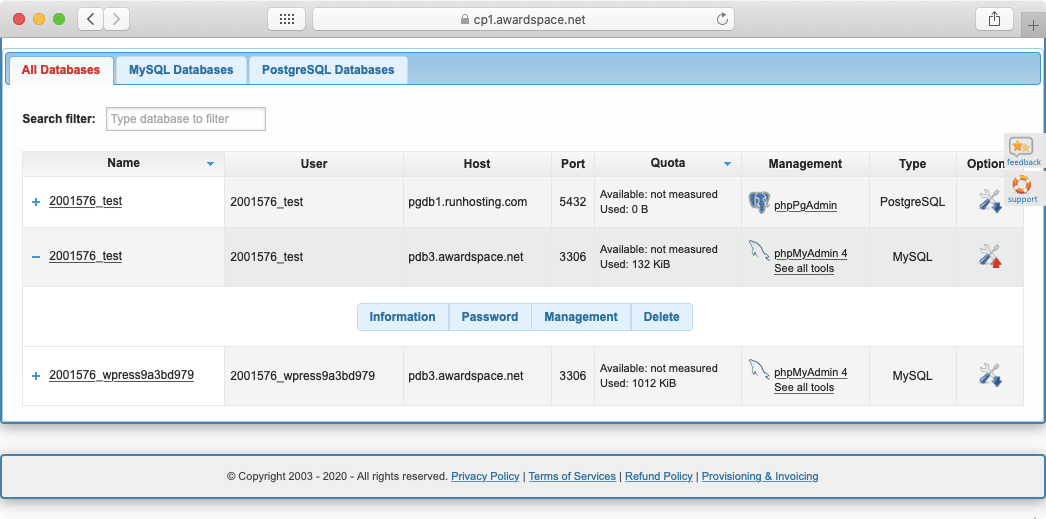
Below, we will explore each tab in greater detail.
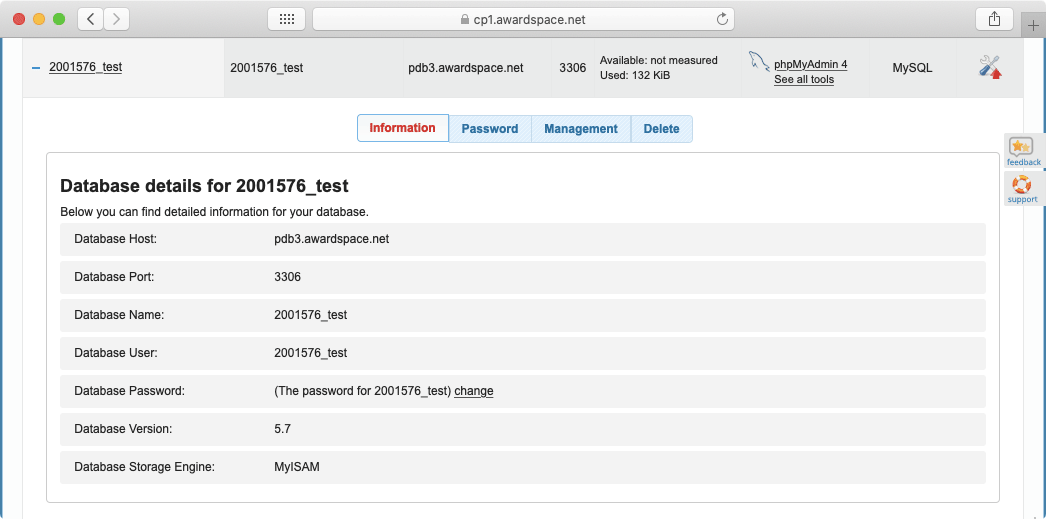
The Information Tab
The Information tab presents you with all of the basic information for your database. You should reference this tab whenever you are connecting your website to the database.
The Password Tab
The Password tab allows you to change your database password at any time. There is no need to enter your current database password, just set your new preferred one and you are good to go.
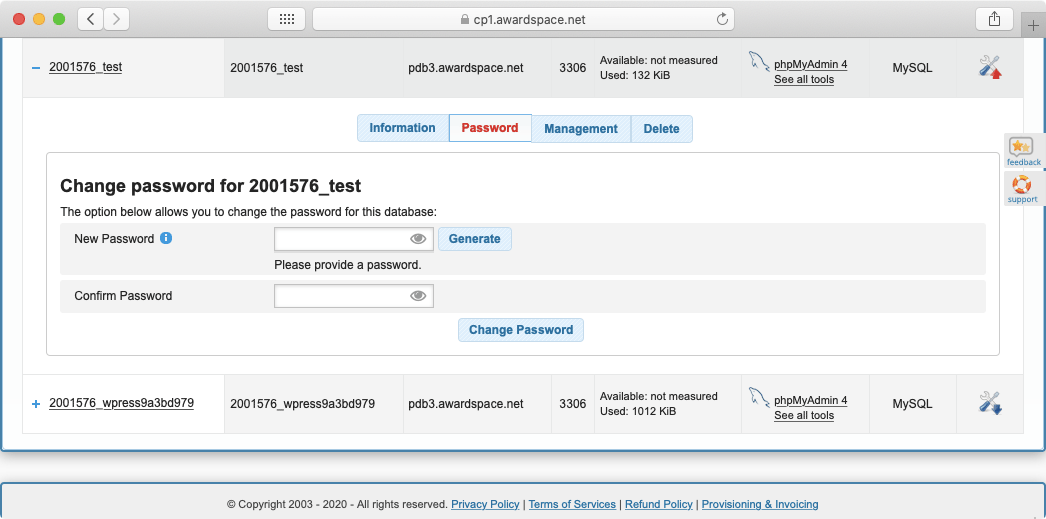
A word of warning: most content management systems keep a record of your database credentials so the website can communicate with the database when needed. If you change your database password, be sure to also update the configuration of your CMS, otherwise, it will not function properly!
The Management Tab
The Management tab contains various options that allow you to repair, maintain, back up, and edit your database.
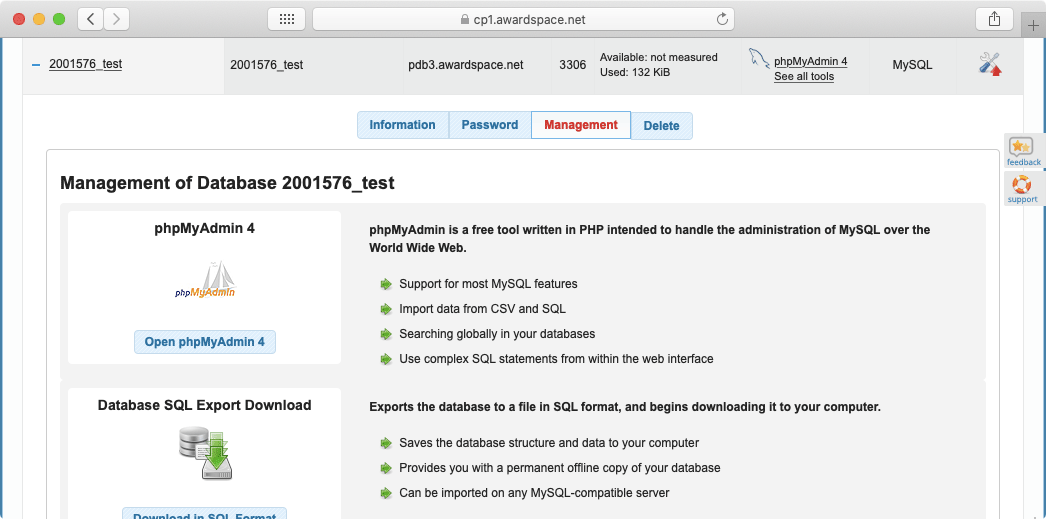
Below, we will examine each option in greater detail:
- phpMyAdmin 4 is a web-based utility for managing your database. Through it, you can add new data, edit existing records, and delete unnecessary information. There are also more advanced features as well as import/export functionality. For more details on phpMyAdmin and how to use it, you can refer to the official phpMyAdmin User Guide.
- Database SQL Export Download is a very handy feature that allows you to download a copy of your database for offline use or backup purposes. The database backup uses the .SQL extension and is compressed as a .GZ archive in order to minimize the download time.
- Database SQL Import is the counterpart to the download option. Through this feature, you can import a copy of your database as long as it is in SQL format. As a bonus, you can upload your backup as an archive and our server will automatically extract it and import your data.
- Database Optimization is a handy feature that restructures the tables in your database for optimal performance. As a result, you should see a decrease in used storage and a speed increase. You can learn more about the optimization tool and what it does in our article on how to reduce the size of a database.
- Database Repair lets you repair the physical structure of your database if it is corrupted or you suspect that it is corrupted.
- Database Permissions Reset is used whenever you no longer have read/write permissions for your database or your website shows an error message such as “INSERT Command Denied to User”. If you exceed your storage limit, for example, you can use this option to temporarily restore access to your database.
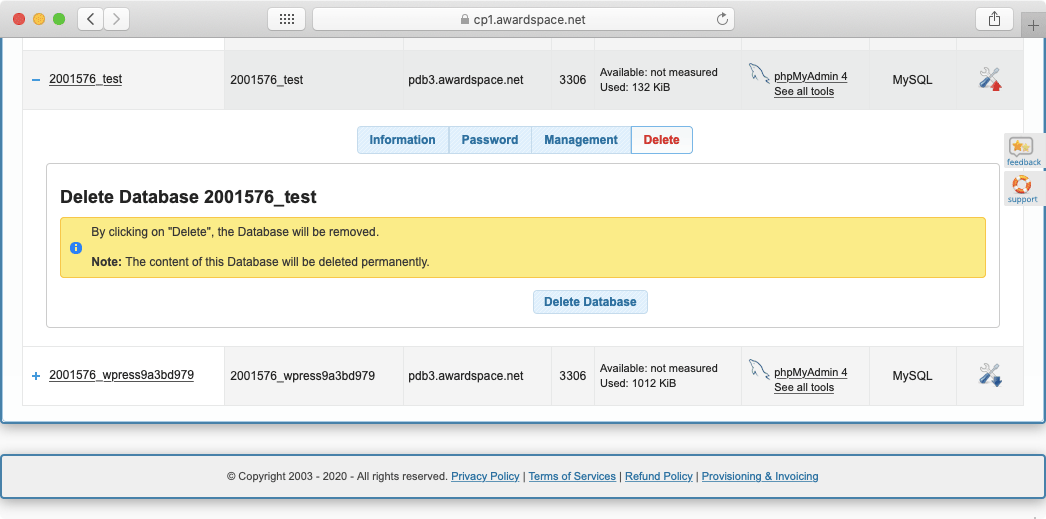
The Delete Tab
The Delete tab allows you to delete the selected database. Be extra careful when using this option as there is no undo button!
How Do I Create a PostgreSQL Database?
Creating a PostgreSQL database using the Database Manager is very similar to creating a MySQL database. The same form is used, only this time you need to make sure that the Create PostgreSQL Database option is enabled:
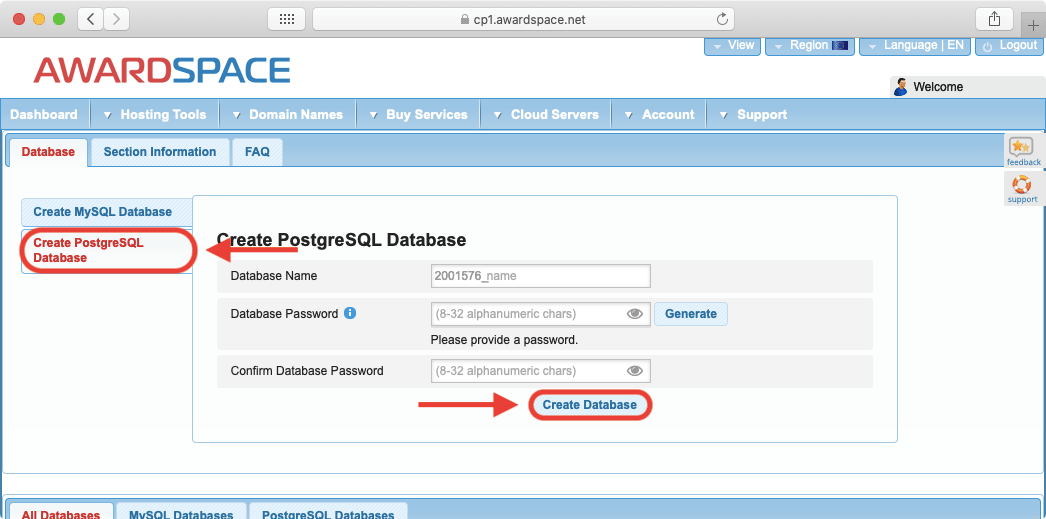
To create a PostgreSQL database, follow these steps:
- Log in to the Database Manager section of the Control Panel.
- Make sure that the Create PostgreSQL Database option is active on the left-hand side.
- Assign a name for your database. For best results, do not use overly long names and also avoid using any special symbols.
- Choose a password for the database. We highly recommend using the Generate button as it will provide you with a random password for maximum security.
- Confirm your password by entering it into the second password field.
- Complete the process by pressing the Create Database button.
Where Can I View All Existing PostgreSQL Databases?
The same table that holds your MySQL databases also lists any PostgreSQL databases that you may have. As we have previously mentioned, you can use the three buttons at the top of the table to choose which type of database you wish to view:
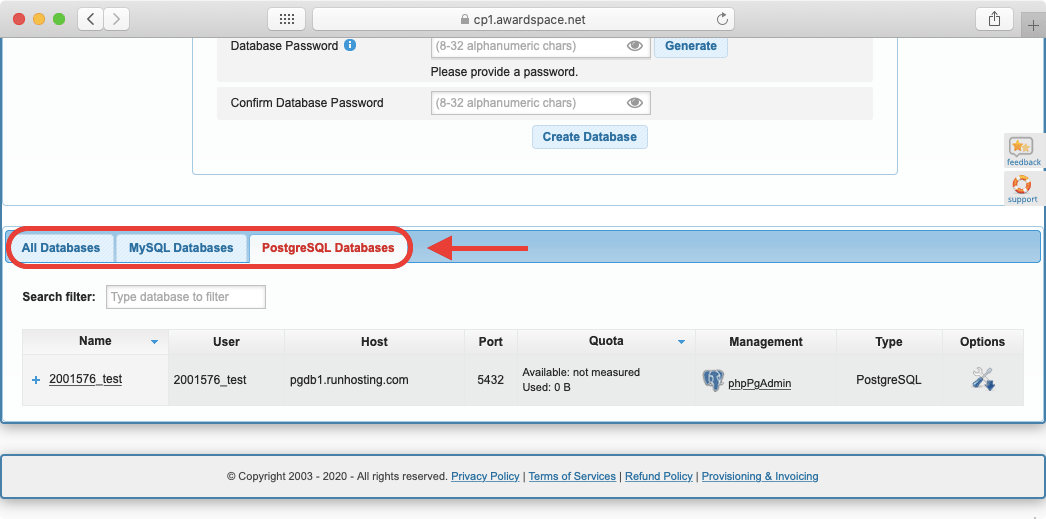
In the table itself, you are presented with the following information organized into columns:
- Name is the name that you have selected while creating the database. On our shared hosting platform, all database names start with your Client ID number.
- User is the username that you can use to access and work with your database. On our shared hosting platform, all database names and database usernames are identical.
- The host is the address of the server that is powering your database. It is important to use this address as the database host/server while setting up your website, otherwise, you are likely to run into issues.
- Port is the port that is used to access the database.
- Quota is the size limit for your database. This field lists both your current usage as well as your total allowance.
- Management holds a quick link to the phpPgAdmin utility.
- Type lists the type of your database. Currently, we support MySQL and PostgreSQL.
- The option is a button that allows you to reveal additional options for each database. You can also access these options by clicking on the name of your database in the first column.
How Do I Manage an Existing PostgreSQL Database?
You can manage your PostgreSQL database by clicking on its name or by clicking the Options icon. Doing so will reveal an additional row of tabs through which you can get additional information about the database, change the database password, access phpPgAdmin, and delete the database.
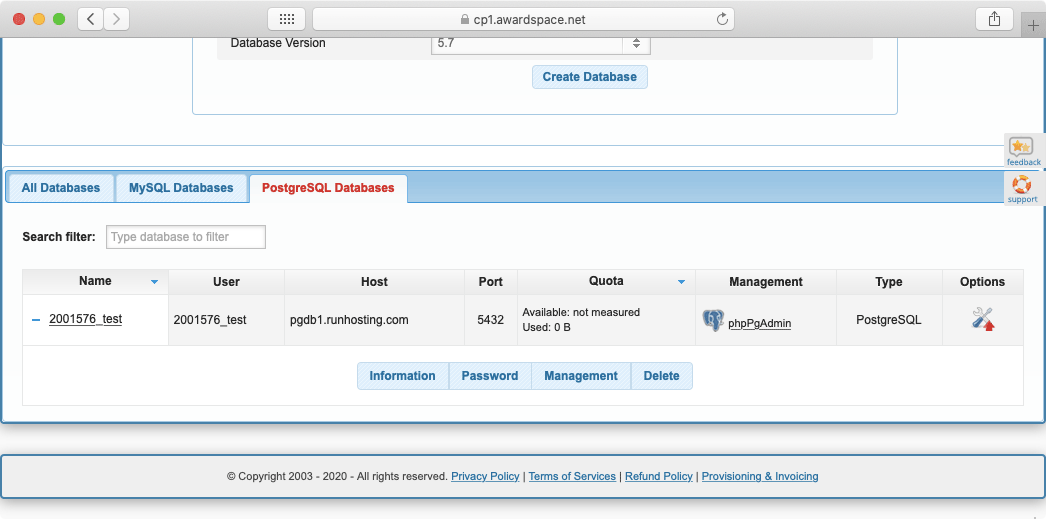
Below, we will explore each tab in greater detail.
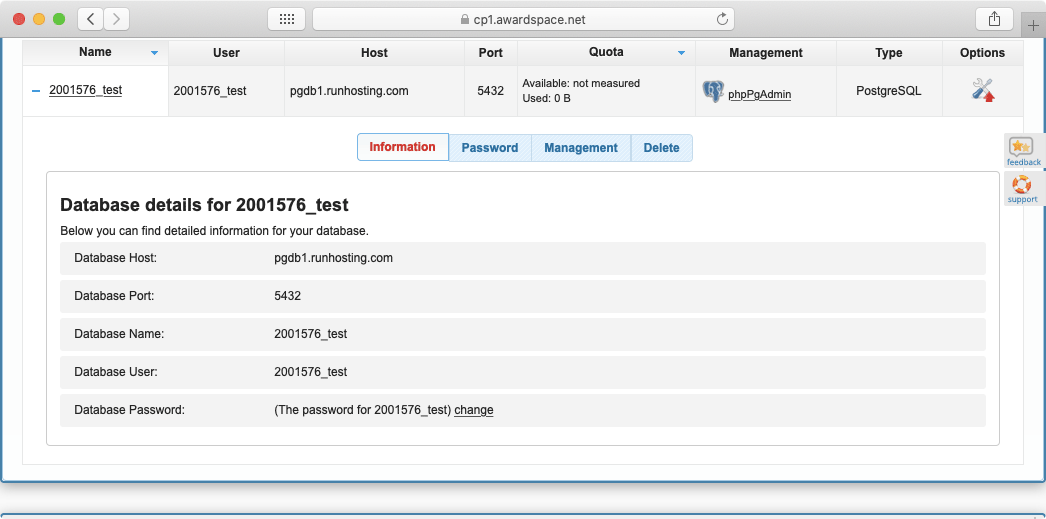
The Information Tab
The Information tab presents you with all of the basic information for your database. You should reference this tab whenever you are connecting your website to the database.
The Password Tab
The Password tab allows you to change your database password at any time. There is no need to enter your current database password, just set your new preferred one and you are good to go.
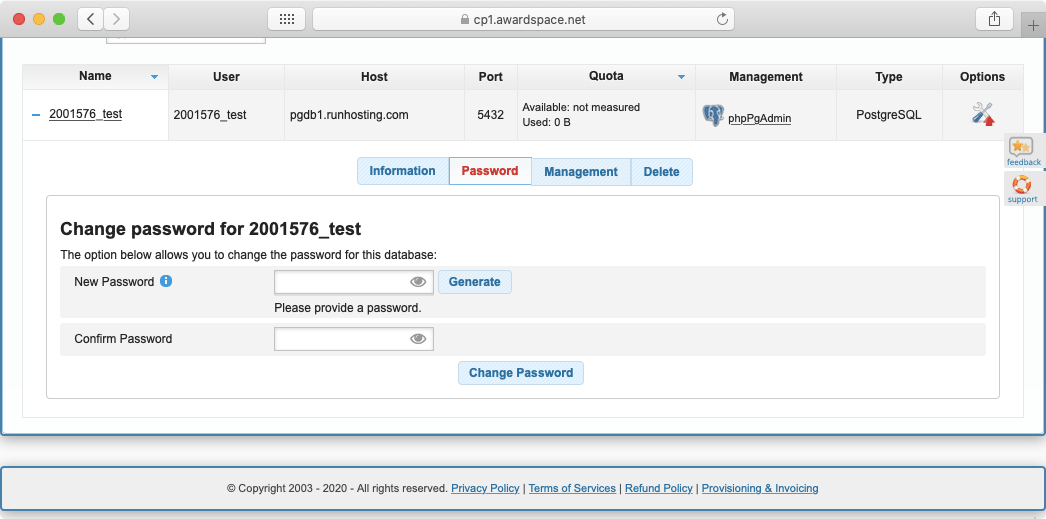
A word of warning: most content management systems keep a record of your database credentials so the website can communicate with the database when needed. If you change your database password, be sure to also update the configuration of your CMS, otherwise, it will not function properly!
The Management Tab
Currently, the Management tab holds a single option that provides access to phpPgAdmin. phpPgAdmin is a tool that is very similar to phpMyAdmin, but it is designed to be used with PostgreSQL databases instead of MySQL.
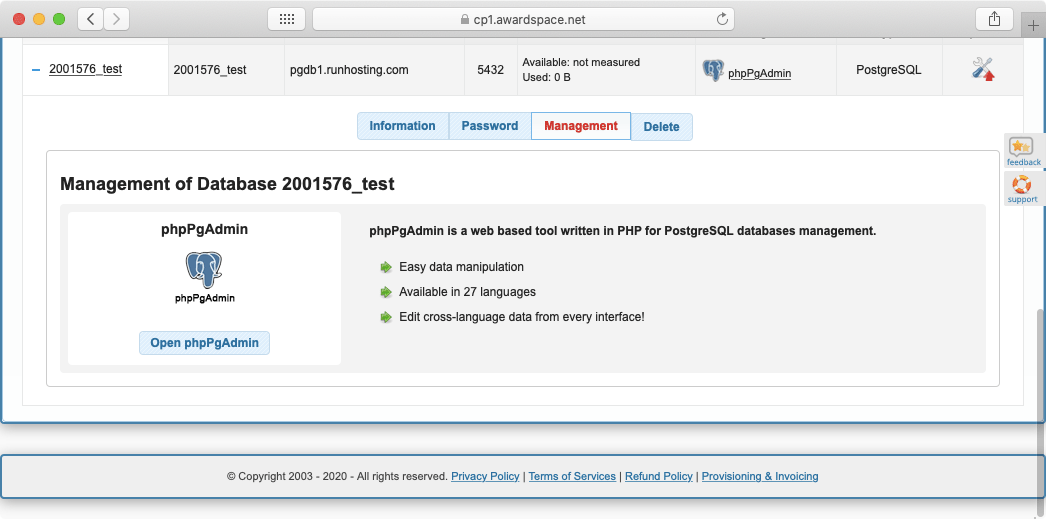
If you need to import new data into your PostgreSQL database or you wish to download a copy of your data for backup purposes, you would need to perform these actions through phpPgAdmin. To learn more about phpPgAdmin, you can refer to the official phpPgAdmin documentation.
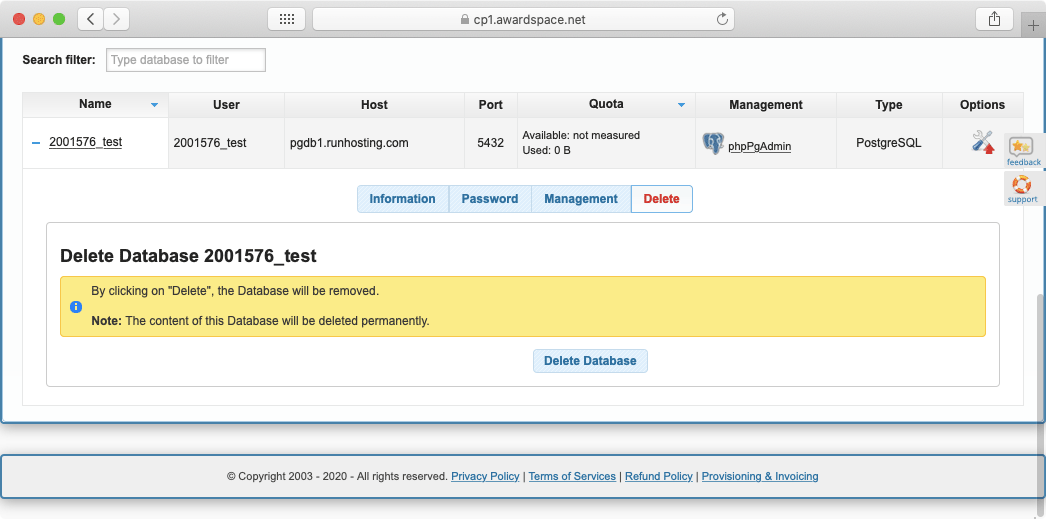
The Delete Tab
The Delete tab allows you to delete the selected database. Be extra careful when using this option as there is no undo button!
How Can I Connect to MySQL Workbench or Similar Software?
Remote connections to our database servers (both MySQL and PostgreSQL) are restricted due to security reasons. Therefore, software packages such as MySQL Workbench and Toad cannot be used for database management. You will also not be able to use our databases to power the backend of your desktop/mobile applications.
For basic database management, please use the phpMyAdmin and phpPgAdmin tools for MySQL and PostgreSQL respectively. If you need even greater control over your hosting environment, you should consider purchasing one of our Virtual Private Server plans.
How Can I Increase My Database Size Limit?
If you require additional disk space for your database, you would need to upgrade your shared hosting account to a better plan. You can review your upgrade options in the Upgrade section of the Control Panel.
Am I Allowed to Use MySQL Triggers?
Regrettably, MySQL triggers are not compatible with our shared hosting environment. As such, MySQL triggers can only be used when you are using a Virtual Private Server package.
Conclusion
The Database Manager is the Control Panel section where you can create and manage your databases. It comes packed with options that cover most basic operations that you would want to perform. And for more fine-grained control, we have integrated the phpMyAdmin and phpPgAdmin utilities. If you ever run into any issues using these tools, you can reach out to our 24/7 Technical Support Team.
