
Database software, such as MySQL, often employs various techniques to speed up the searching and delivery of any information that is requested. In most cases, these techniques take the form of temporary databases that are created to serve as intermediates and help you retrieve the requested data faster. The only downside to these additional databases is that they will consume extra disk space. In this article, we will show you the various ways in which you can reduce your MySQL database size.
How Do I Lower the Size of a MySQL Database?
There are two broad approaches you can take to reduce the size of a MySQL database. You can either try optimizing the database structure or you can delete any unnecessary data. Below we will examine both techniques in greater detail.
How Does Optimization for a MySQL Database Work?
As we mentioned earlier, MySQL databases often create internal tables in an effort to speed up lookup queries. However, these additional tables become less effective over time as you add new data and change existing entries. As such, it is a good idea to optimize your database from time to time. Not only will you reduce the overall size of your database, but you are also likely to see a performance boost as well!
You have two options when it comes to optimizing a database on our shared hosting platform. You can either use our 1-click optimizer that is part of our Database Manager or you can go more hands-on using the tools provided by phpMyAdmin.
How Do I Optimize a MySQL Database Using the Database Manager?
You can easily and quickly optimize all tables in a given MySQL database thanks to the Database Manager section of our Control Panel. The Database Manager will be available to you if you are using our free website hosting, premium shared hosting, or one of our Semi-Dedicated web servers. To optimize your database, follow these steps:
- Go to the Database Manager section of our Control Panel.
- Click on the database name that you wish to optimize.
- Open the Management tab.
- Click on the option titled 1-click Optimization.
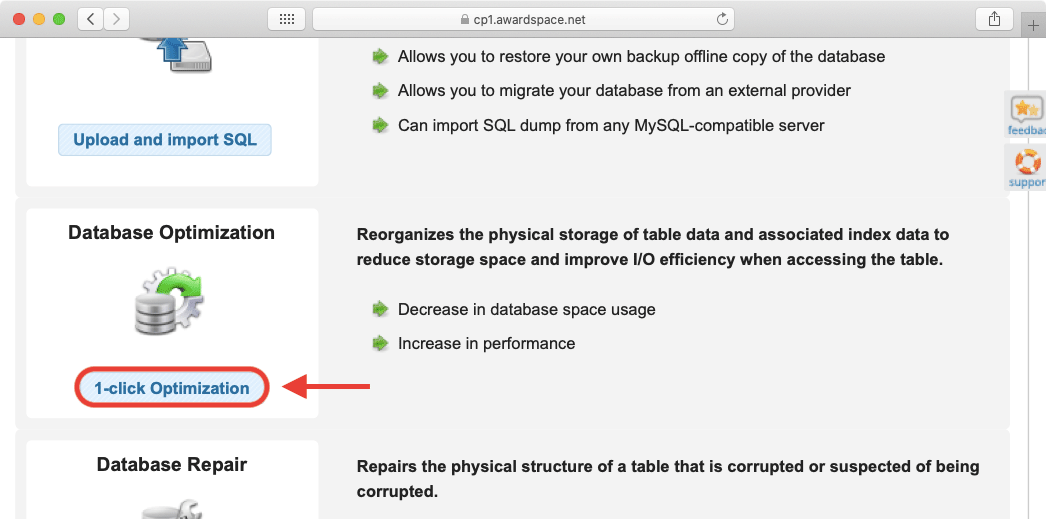
Once you perform the above actions, all tables in your database will be optimized. Keep in mind that our database usage statistics are not updated in real-time, so you may not notice an immediate difference in database usage. To learn more about the various features our Database Manager has to offer, you may go through our complete guide to the Database Manager.
How Do I Optimize the Tables of a MySQL Database Using phpMyAdmin?
Unlike our Database Manager which optimizes all tables in one fell swoop, phpMyAdmin gives you much more granular control when it comes to which tables should be optimized and which tables should remain unchanged. Below we will examine two techniques for reducing table sizes through phpMyAdmin: the Optimize option as well as compressing data from tables that use the InnoDB storage engine.
In addition to table optimization, phpMyAdmin provides you with a plethora of other options that you might find useful. You can learn more about this handy utility in our phpMyAdmin overview.
How Do I Reduce My Table Size Using the Optimize Feature in phpMyAdmin?
Follow the steps below in order to optimize the tables in your MySQL database using the optimization function in phpMyAdmin:
- Open the Database Manager section of the Control Panel.
- Click on the database name that you wish to optimize.
- Open the Management tab.
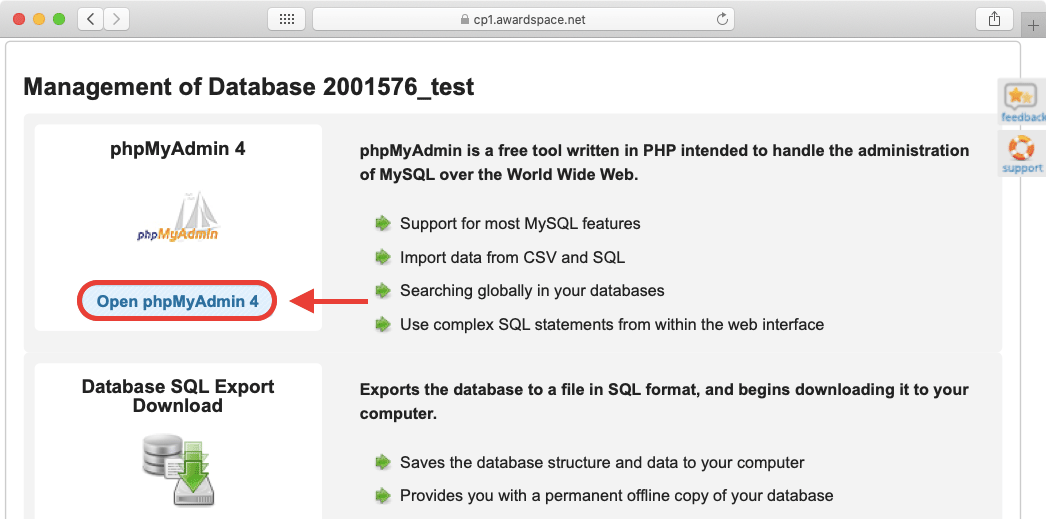
- Click on the phpMyAdmin option as is shown below:
-
-
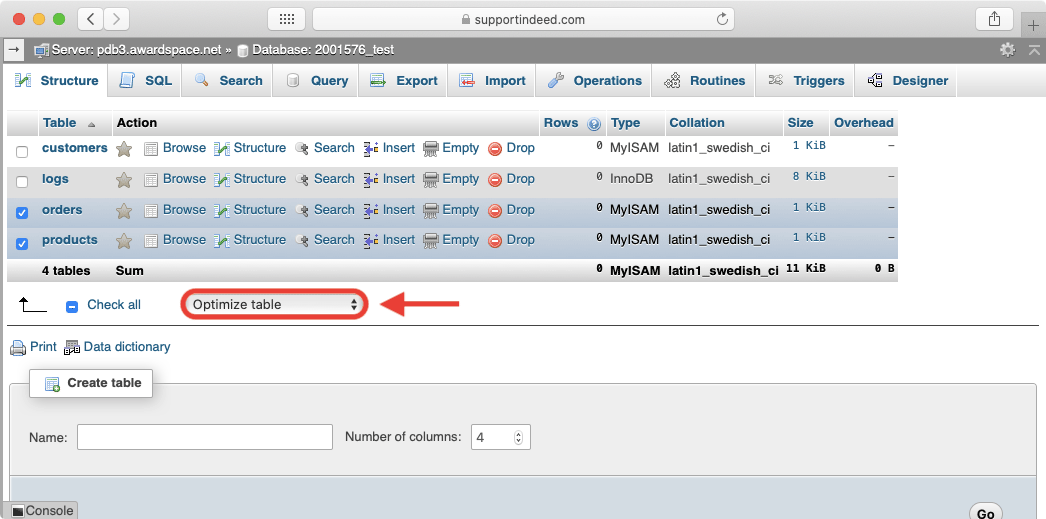
- phpMyAdmin will now open in a new tab and you will be presented with the list of tables that comprise the database. Place checkmarks in front of the tables that you wish to optimize.
- Once you have made your selection, choose the Optimize table option from the dropdown menu. The option is part of the Table maintenance section:
-
-
-
-
-
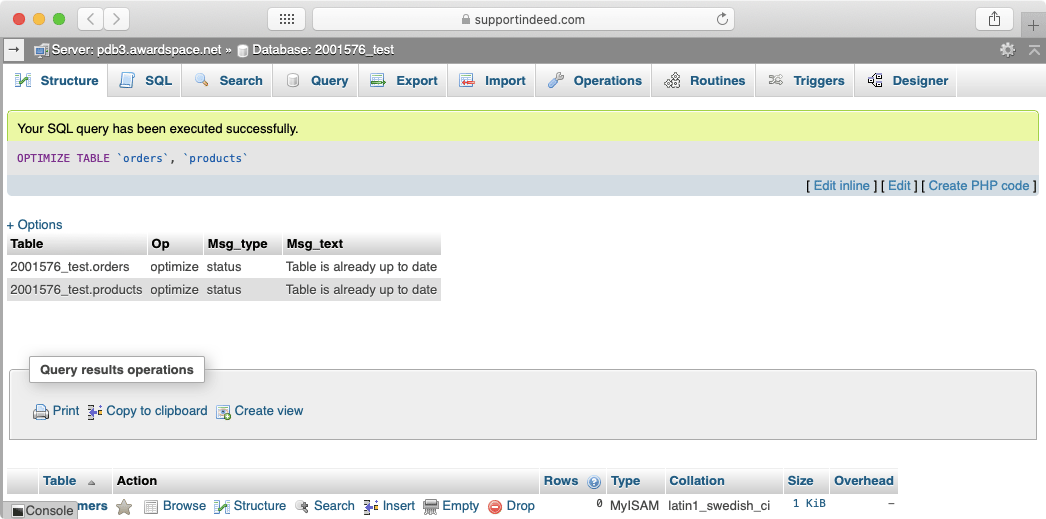
- Once you select the Optimize table command, it will be executed automatically and you should be presented with the Your SQL query has been executed successfully. message:
-
-
-
One thing to keep in mind is that the Optimize table option performs different actions depending on the storage engine that your tables are using. As such, the option’s effects can vary from table to table. This is especially true if you are utilizing different storage engines and if some of your tables undergo regular edits while other tables remain relatively unchanged.
How Do I Compress the Data in a MySQL Database?
As we have previously noted, different storage engines come with different feature sets. One standout feature of the InnoDB storage engine is its ability to compress your data without any loss of information. The compression is most effective if your tables have columns that use the TEXT, BLO, VARCHAR, and VARBINARYdata types.
To run the compression on a given table, you first need to make sure that the table in question is using the InnoDB storage engine. You can find this information in phpMyAdmin’s database structure view. This view is most easily accessed by clicking on your database name as is shown in the screenshot below:

Once you are in the structure view, you should see a list of all tables that are contained within your database. The column that shows your current storage engine is called Type and is highlighted below:
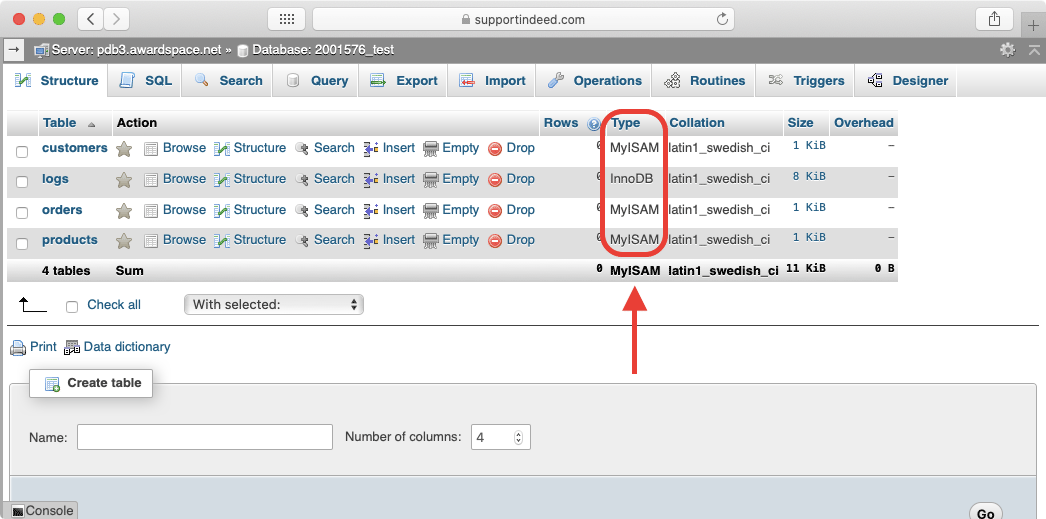
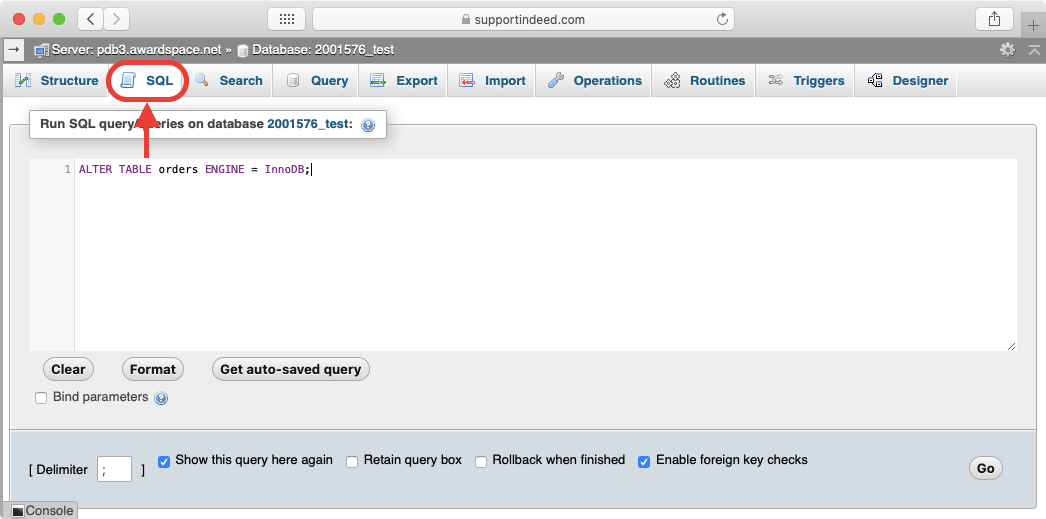
If you see InnoDB listed as the storage engine on the tables that you wish to compress, then you are good to go. If you see any other value, however, you would need to convert your table(s) to use the InnoDB storage engine first. The conversion is done by executing a short SQL command. To get started, switch to the SQL tab in phpMyAdmin:
Once there, paste the following code:
ALTER TABLE my_table ENGINE = InnoDB;
Be sure to replace my_table with the name of the table that you wish to convert. In our example, we are converting a table called orders, so our command would look like this:
ALTER TABLE orders ENGINE = InnoDB;
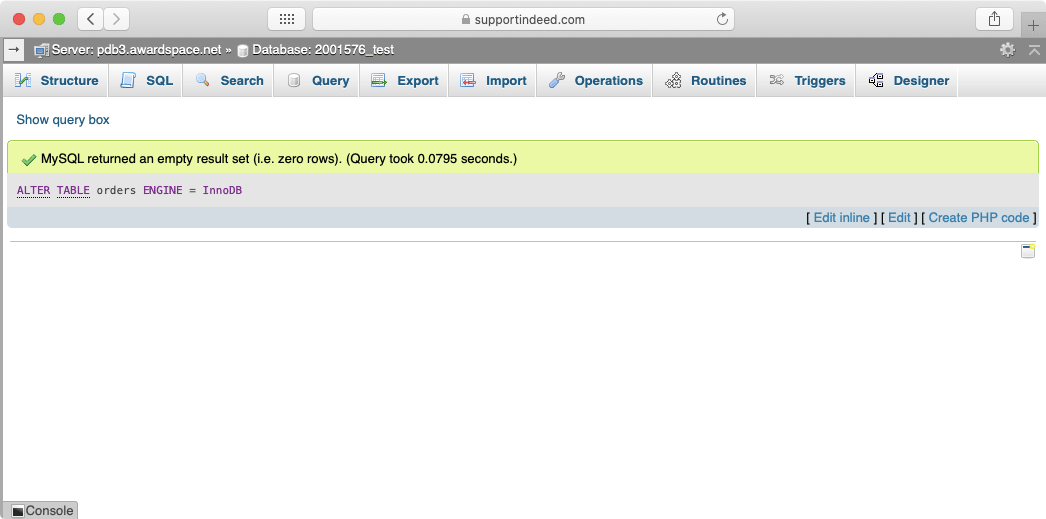
Once you have entered the command, click on the Go button in the lower-right corner to execute it. If successful, you should be presented with a success message as the one shown below:
If you wish to convert multiple tables to the InnoDB storage engine, you would need to run the above command for each of them.
Now that your tables are using InnoDB, you can proceed with the actual MySQL data compression. The compression itself is a short SQL command that also needs to be run from the SQL tab in phpMyAdmin. Here is the command:
ALTER TABLE my_table ROW_FORMAT=COMPRESSED;
Just like with the table conversion, you need to replace my_table with the actual name of your table. As an example, in the screenshot below we are compressing the table called orders:
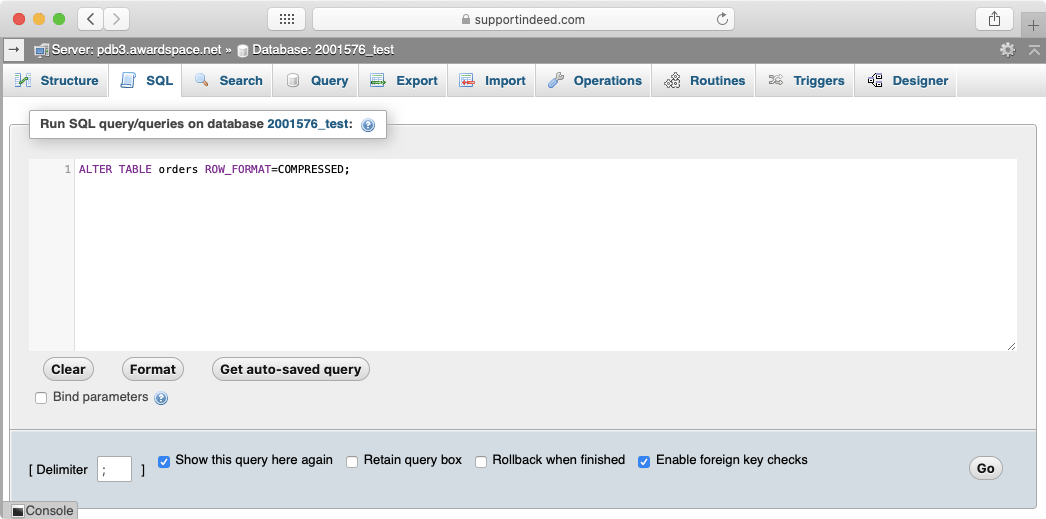
Once you have entered the compression command, press the Go button to execute it. If you wish to compress multiple tables, you may do so by running the SQL command for each table.

How Do I Delete Tables Using phpMyAdmin?
Your other alternative when it comes to freeing up storage space is to remove data that you no longer need from your database. You can either delete individual entries or entire tables.
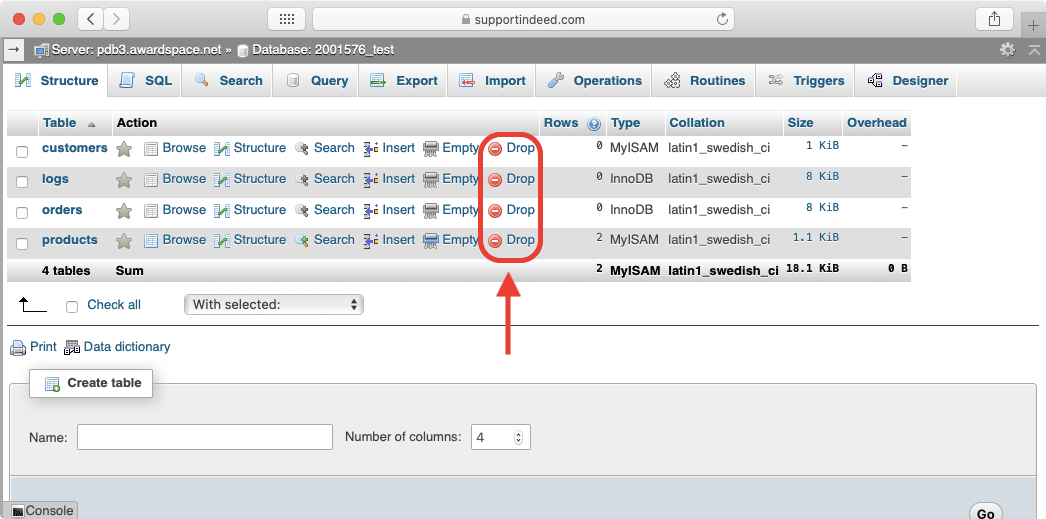
To delete a table, just go to the Structure tab for your database so you see all of your tables. From there, choose the Drop option next to the table you wish to delete and confirm your choice. Double-check that you have selected the correct table before you confirm the deletion as this action cannot be undone.
If deleting an entire database table is not an option for you, then you can consider removing individual entries from different tables that you no longer need. This can be achieved by running various SQL commands. Below, we will showcase a very basic SQL command that can delete a single database entry.
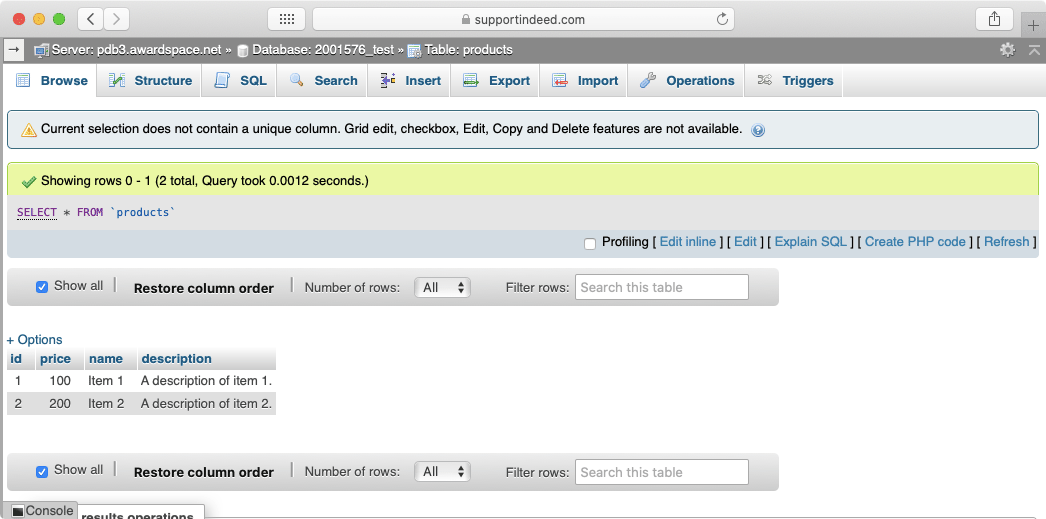
In this example, we will use the above table with two rows. The goal is to remove the second row while preserving the first.
You will notice that all tables usually have an id column that contains a unique number that identifies the given entry. In our example, the id column is actually called id, but your tables may use a different word as the column’s title. Once you locate the column that stores the unique identifiers for each entry, make a note of the value associated with the entry (row) that you wish to delete. With this information at hand, switch to the SQL tab and run the following SQL command:
DELETE FROM my_table where id_column = 'my_id';
In the above code you will need to make three replacements:
-
-
-
-
my_tableshould be replaced with the name of the table that you are deleting from.id_columnshould be replaced with the name of the column that stores your unique identifiers.my_idshould be replaced with the actual identifier for the row that you wish to delete.
-
-
-
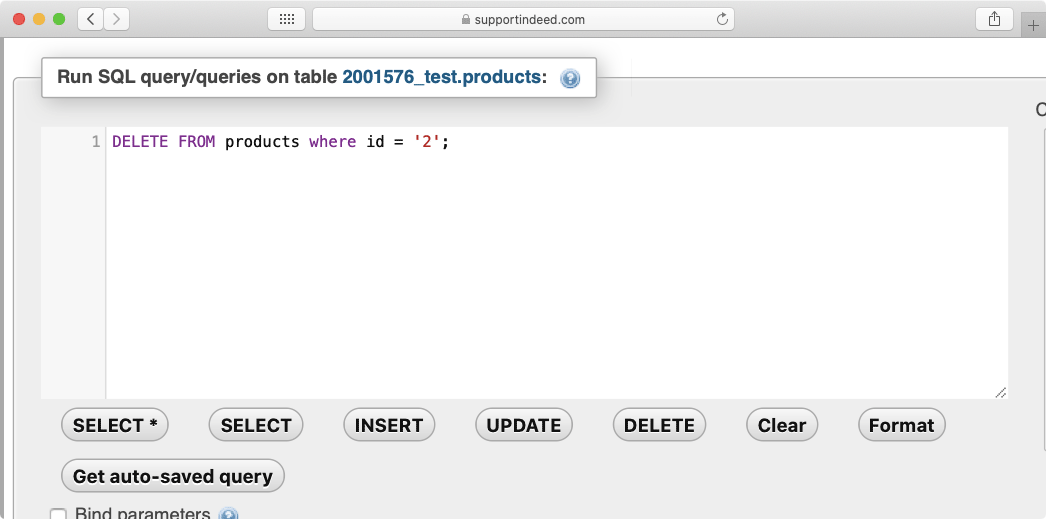
Our example uses the products table. This table has an id column and the unique identifier for the entry that we wish to delete is 2. So our SQL command should look like this:
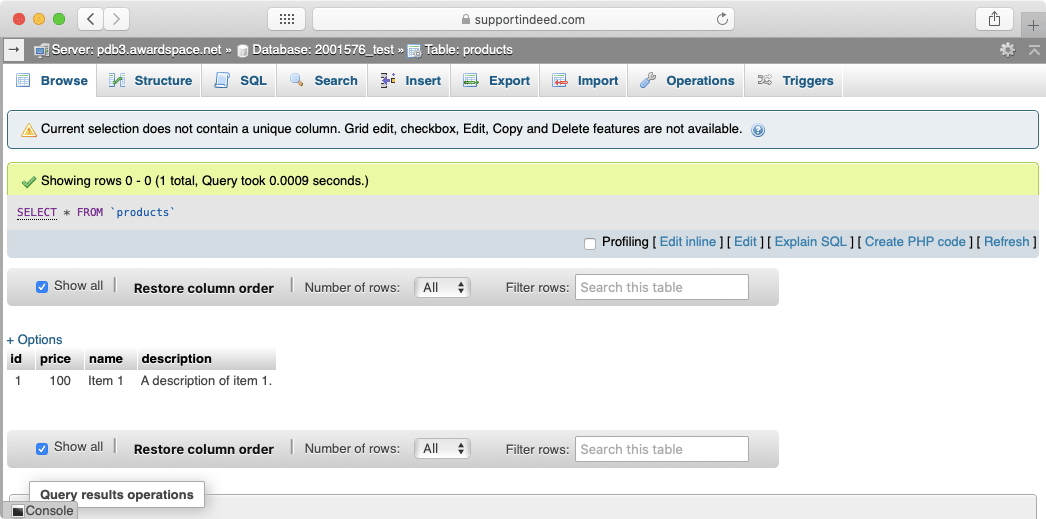
When we press the Go button, the SQL command gets executed and the deletion will be completed. Now our table no longer contains the second entry:
If you are using a modern content management system like WordPress, Drupal, Joomla, or similar, you should consider using the CMS’s backend administration tools for data management and removal. Manually deleting entries from the database should be your last resort.
Conclusion
As a website owner, it is always a good idea to keep an eye on your database usage. This is especially true if you are using a shared hosting plan and you have a cap on your database size. If you happen to reach your storage limit, your website can start displaying all manner of warnings and error messages, such as the perplexing “INSERT command denied to user” message.
