
In this tutorial, we will provide information about SSL, including instructions on how to enable HTTPS in a WordPress application.
What Is an SSL Certificate?
SSL was originally developed in 1994 by a company called Netscape. SSL stands for Secure Socket Layer and allows you to view web pages in a secure manner, via HTTPS. Its main purpose is to protect and encrypt transmitted data over the Internet.
Why Is It Important to Have an SSL Nowadays?
Enabling SSL/HTTPS adds an extra level of protection and security to your online pages. When active, SSL protects sensitive information (such as passwords, and credit card details) from being viewed and compromised by third parties. It can also help improve a website’s ranking on search engines.
Having a non-secured page increases the risk of losing potential customers and can lead to a significant drop in sales. That’s why it is recommended to consider SSL for your online page.
How Can I Know If My Website is Not Secure?
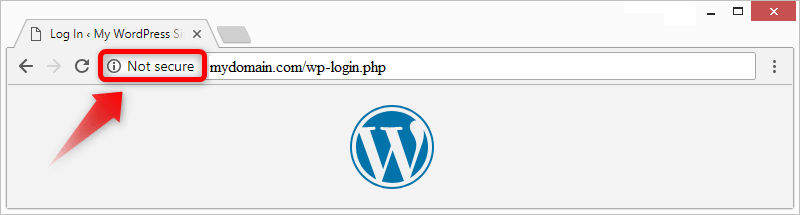
A web page will be marked as unprotected if it lacks an SSL certificate or has no HTTPS enabled on it. Additionally, browsers will display a Not Secure message in the address bar of your website.
The screenshot below illustrates what a non-secure web page looks like:
How to Make WordPress Run Over HTTPS and Avoid Any Warning Messages?
You can secure your existing WordPress blog in 3 easy steps:
Step #1: Obtaining an SSL Certificate
When it comes to securing a web page, there are three types of SSL certificates to choose from:
- Dedicated (premium) SSL certificate. Premium SSL certificates have a validity period of up to 2 years and can be purchased directly via the AwardSpace Control Panel’s SSL Certificates section.
- SSL certificates are obtained from an external SSL authority (provider).
- Let’s Encrypt certificates. Let’s Encrypt certificates come free of charge and are valid for a period of 90 days. To get your free certificate, submit a support ticket from your Hosting Control Panel and request Let’s Encrypt for your desired hostname.
Note: It is important to mention that each individual SSL certificate requires a private IP address. Private IP addresses can be purchased from the SSL Certificates page.
Step #2: Installing the SSL Certificate on the Server
Installing a premium SSL certificate can be done within a matter of clicks:
- Sign in to your AwardSpace account and navigate to the SSL Manager page.
- Click on the hostname you’ve purchased an SSL certificate for and open the Upload Your Certificate tab.
- Copy and paste the root certificate, your private key, and intermediate (CA) certificate into the corresponding boxes and press Upload SSL Certificate.
Please kindly review our quick SSL Certificate Installation guide for detailed instructions on how to get your certificate installed on the server.
Step #3: Configuring WordPress to Work with HTTPS
Now that you have your SSL certificate installed, it’s time for you to configure WordPress to work over SSL.
Configuring an SSL certificate in WordPress is seamlessly easy and requires no coding skills.
Here’s a step-by-step guide on how to redirect the HTTP version of your blog to HTTPS:
-
- Log in to the admin area of your WordPress website.
- Once logged in, please navigate to the Settings page.
- Change the WordPress Address (URL) and Site Address (URL) fields from http://mydomain.com/ to https://mydomain.com/.
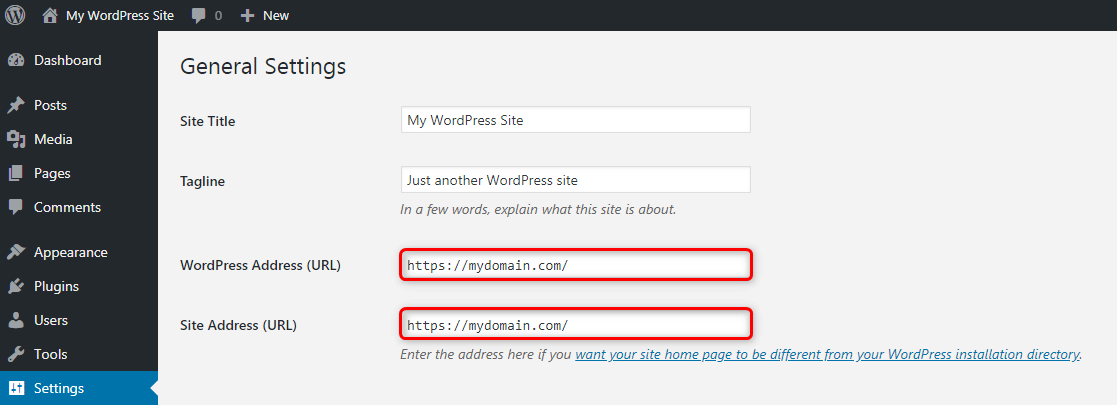
- Press Save to submit the changes you have made.
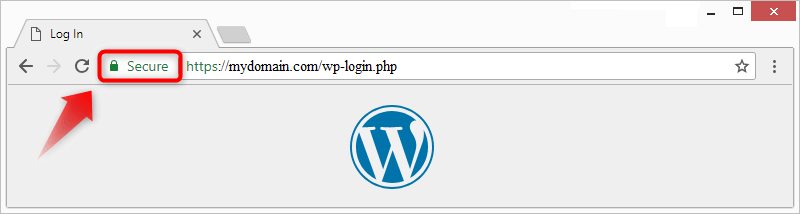
That’s it! WordPress is now configured to use SSL and can be accessed securely.
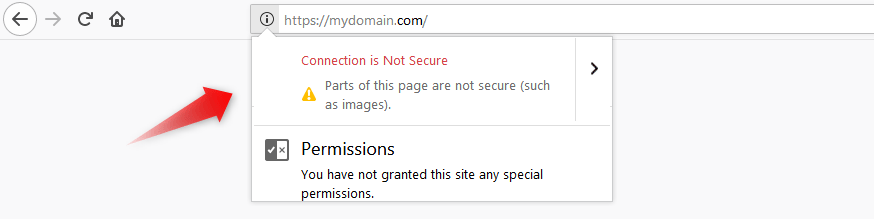
Mixed Content Warning Appears After Enabling SSL
If you’re seeing a Mixed Content warning, it means that there are certain parts of your web page (such as image, video and css files) still being loaded via HTTP.
The easiest and most straightforward way to remove the Mixed Content warning from being displayed on your page is by using the SSL Insecure Content Fixer plugin.