
Let’s face it, the world is no safe place. And when you are creating a website, you are using a strong password for a reason. You, understandably, want to be the only one to enter your WordPress admin panel. And to do so, there is probably no more securer step to take than to limit WordPress dashboard access.
And while building a WordPress website, it would be wise to think of liming WordPress dashboard access. Which is, in essence, the same as blocking IP addresses from a WordPress site.
Doing so will limit the IP addresses from which one can access the wp-admin and wp-login.php pages of your WordPress website.
There are a number of ways to achieve that. Say, by installing a plugin to your WordPress website. Yet, if you choose to do it that way, there is a possibility to diminish the performance of your website.
Read: WordPress Performance Optimization
Thus, the best way to limit WordPress dashboard access is to get in your .htaccess file and fill in the IP addresses from which you enter your website.
Find the Htaccess File in WordPress
In order to edit it, you need to know where to find the htaccess file of WordPress.
The WordPress htaccess location should always be the same. Yet, there is a possibility for the file not to exist in your WordPress installation.
Here is what you need to do in order to find the htaccess file if there is one, and to create it if there is none.
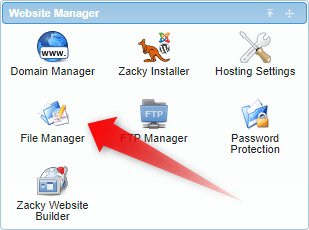
Login to your AwardSpace account, and go to the file manager, which you’ll find on the first screen.
Once you enter the file manager, go to the folder of the website whose dashboard access you want to restrict.
When you enter the folder of the website, you’ll probably see that there is an htaccess file in the main website directory. You shouldn’t edit this file, as it is the file that commands the whole WordPress installation.
To limit WordPress dashboard access, go to the wp-admin folder, which you’ll see on the same page.
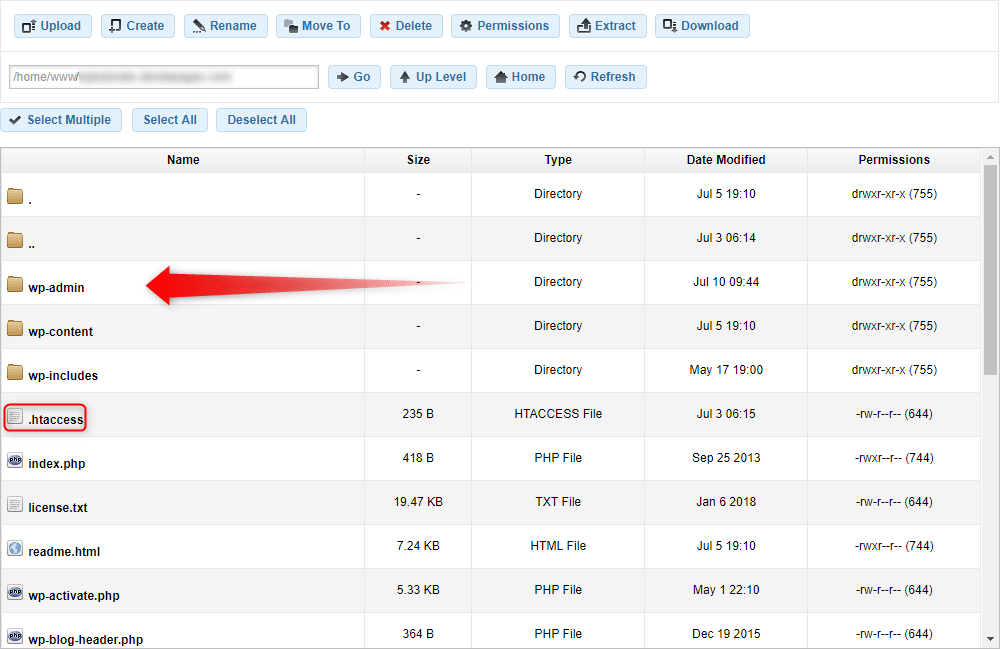
In this folder, you can either find an htaccess file or not. If there is one, go to the next step and start to edit the htaccess file of WordPress.
If your installation doesn’t have such a file, just create it, by clicking on the Create button at the top of the page.
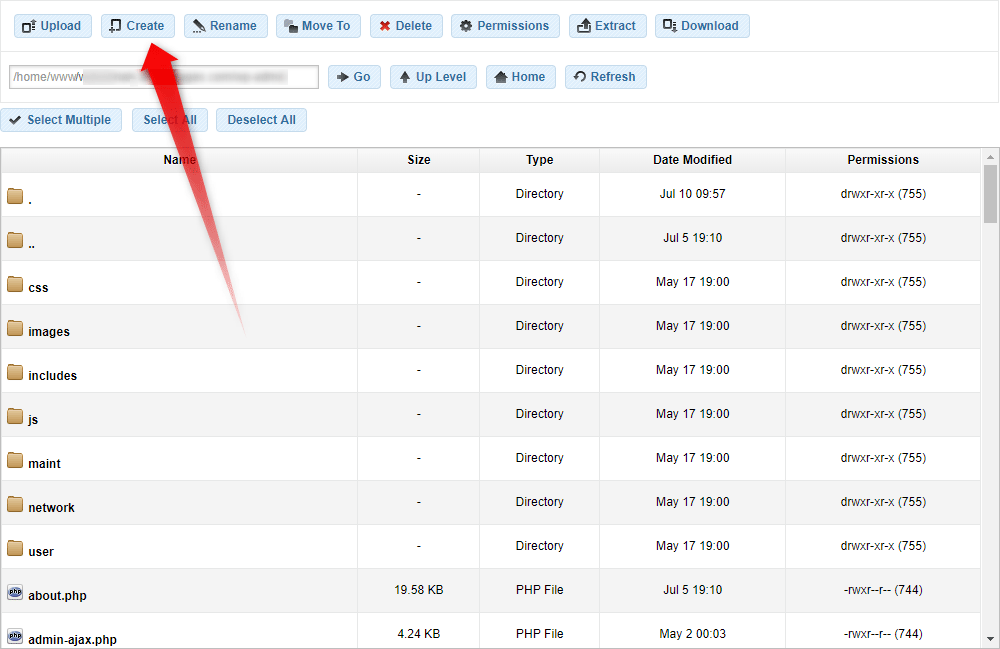
When you click that button, a pop-up will emerge. It will offer you to create either a file or a folder. Click on the Create File: option, and fill the text field with .htaccess.
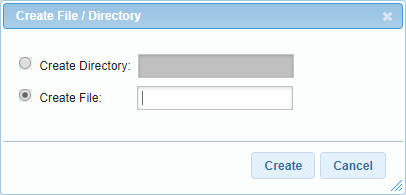
After you’ve typed .htaccess in the field, click the Create button. Right after that, a new file will emerge. What is left to do is to edit it.
How to Edit Htaccess File WordPress to Limit the Dashboard Access
We are at the end of the process. What is left for you to do is to just double-click the newly created file and fill it with the right text.
But beforehand, there is one mini step you need to take. Find your IP address, so you can put it in the empty file.
To find your IP address, you can just write ‘my IP’ on Google, or go to this website, for example.
Now that you know your IP address, go back to editing the htaccess file.
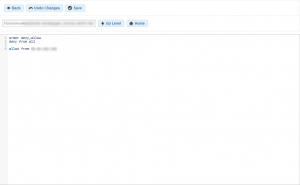
In it you need to type the following:
order deny, allow
deny from allallow from 11.11.111.111
Where 11.11.111.111 is your IP address.
To give yourself the chance of editing your website from multiple IP addresses (say one from home, and one from your office), just add a second allow from row, like this:
order deny, allow
deny from allallow from 11.11.111.111
allow from 22.22.222.222