
What you need to know:
A new feature in WordPress 5.7 and later allows you to quickly enable HTTPS on your website. The option is found in your Site Health settings. You just need to make sure that you have a valid SSL installed beforehand.
WordPress has long supported the ability to use HTTPS for enhanced security, however setting up HTTPS and SSL on a WordPress site has always been a hassle that involves multiple steps and various tools. Fortunately, with the release of WordPress 5.7, the CMS developers have made the process much simpler and more straightforward. In this article, we will show you how you can enable HTTPS on a site running WordPress 5.7 or later.
Table of Contents:
Prerequisites
WordPress will surface the option to enable HTTPS only when it detects that you have a valid SSL certificate installed. As such, you need to get an SSL certificate for your website before you can proceed further with this tutorial.
Important:
You must ensure that your SSL certificate is properly configured and fully operational before proceeding. If in doubt, you can reach out to the Technical Support Team for assistance.
At this point, we should mention that SSL certificates are considered an advanced hosting feature. Therefore, only our premium shared hosting plans and Semi-Dedicated servers support SSL. If you are still using our free hosting service, then you would need to upgrade before you are able to take advantage of HTTPS.
How Do I Enable HTTPS on a Site Running WordPress 5.7 or Later?
With the release of WordPress 5.7, the basic setup of HTTPS has become a one-click task. Here, we will guide you through each step:
- For starters, you should log into your WordPress Dashboard:
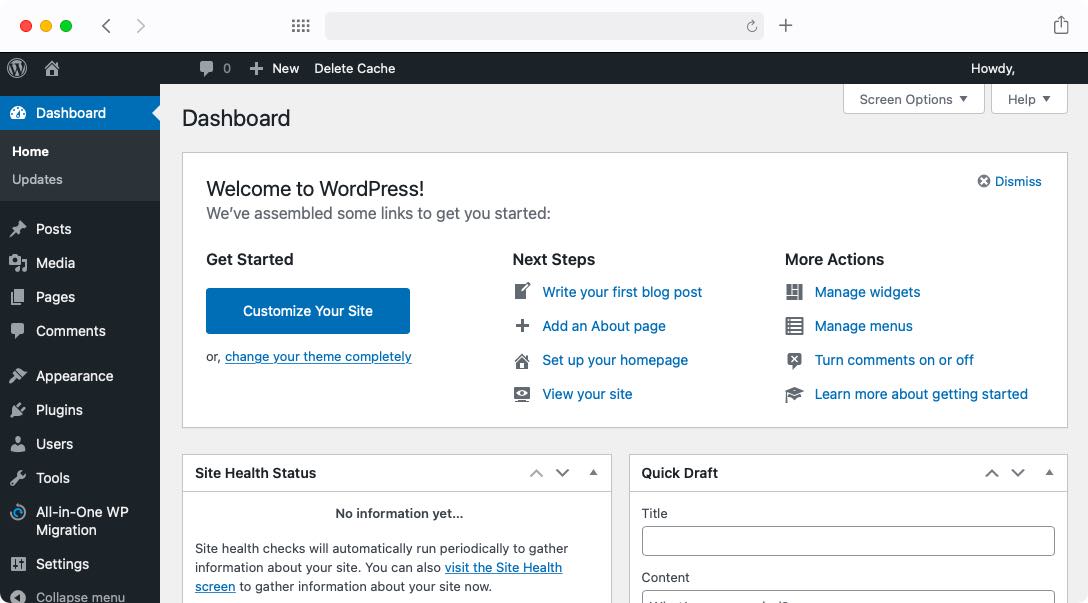
- While you are on the Dashboard, look for the Site Health Status widget:
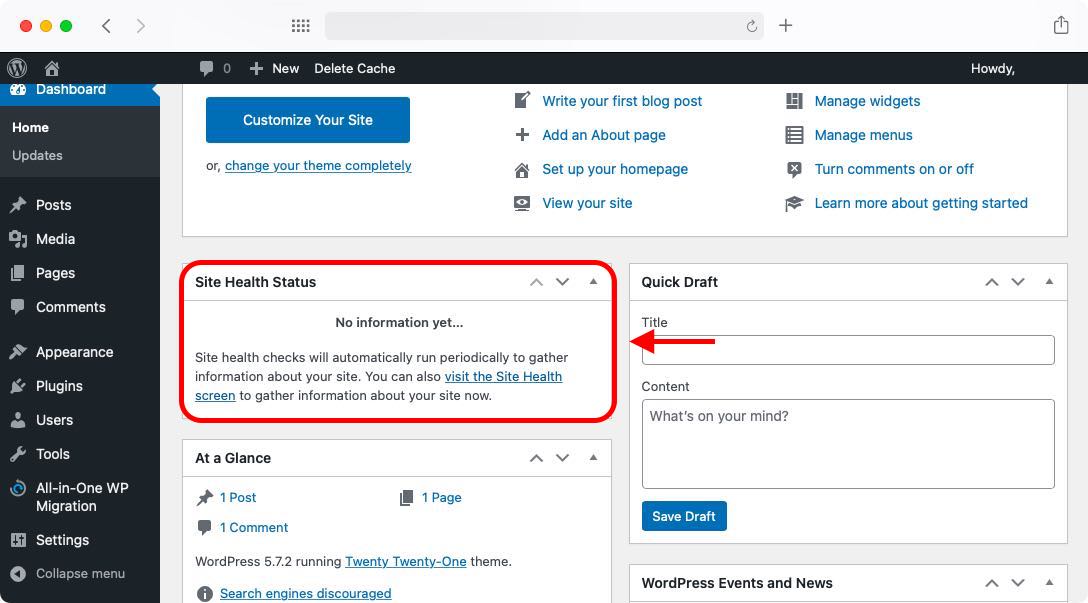
- In the widget, there should be a link that invites you to visit the Site Health screen. Click on this link.
Tip:
If you cannot find the Site Health Status widget or the link contained therein, you can simply select the Tools menu item and choose the Site Health option from there.
- Once you arrive on the Site Health screen, look for a recommended improvement that mentions HTTPS:
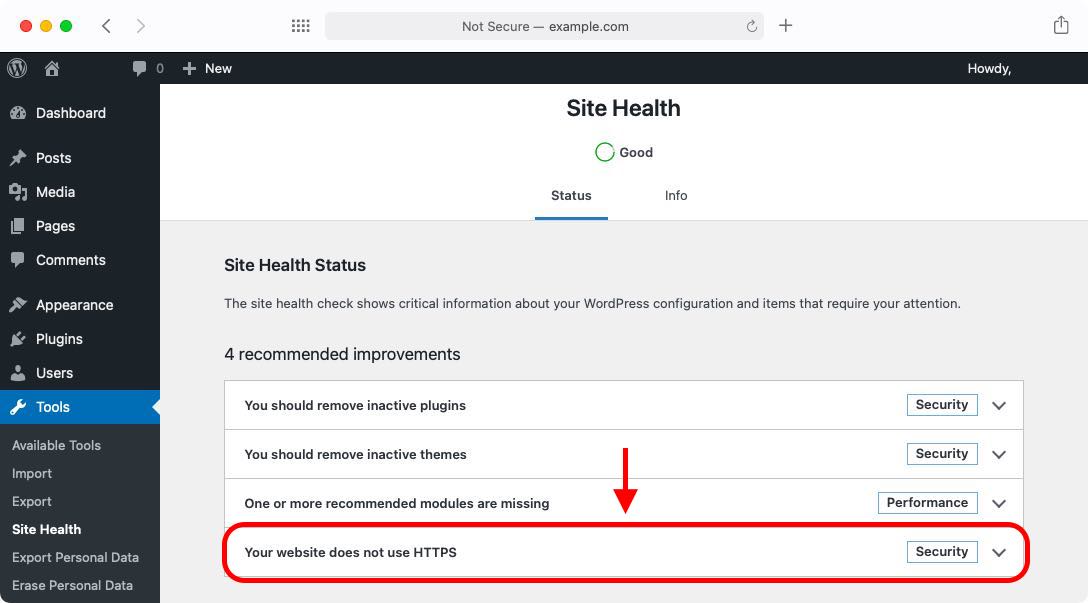
- Click on the HTTPS recommendation in order to expand it and view its details.
- You will see a button that says Update your site to use HTTPS. Click on it.
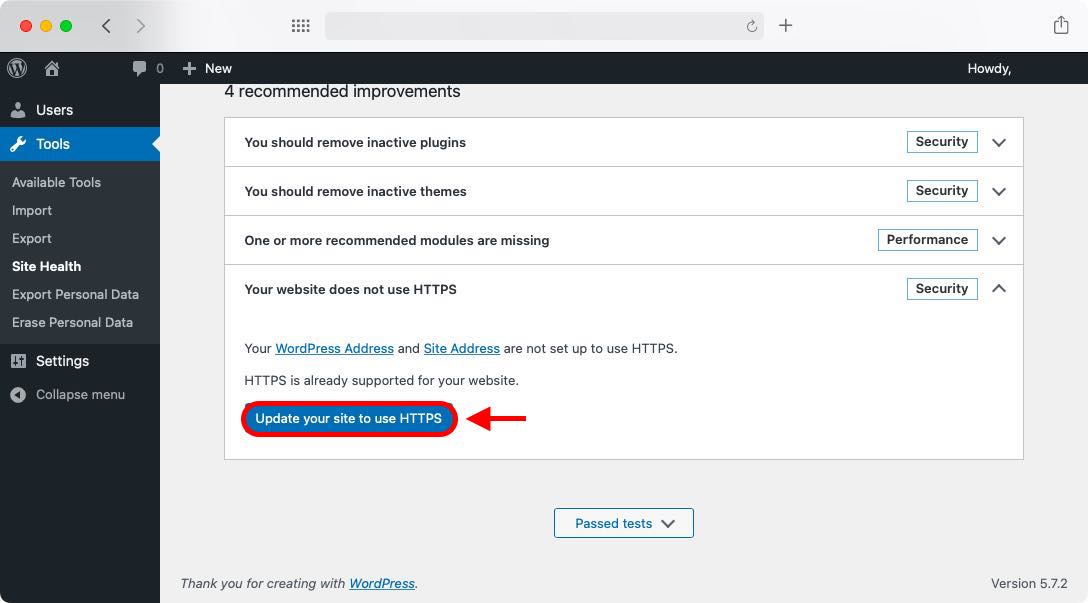
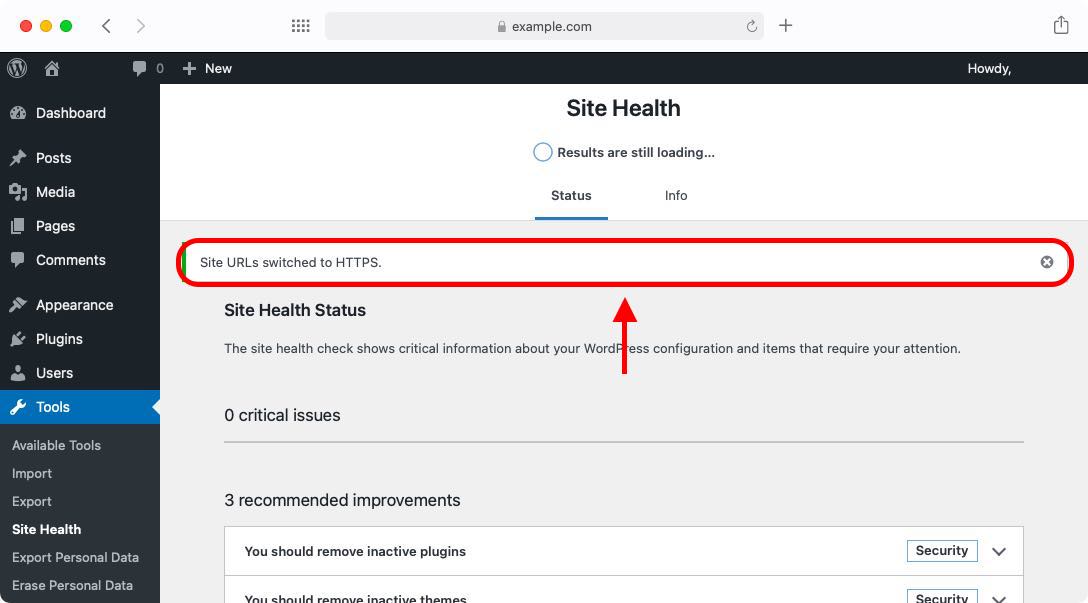
- That’s it! Just like that, your site was updated to use HTTPS:
The HTTPS migration tool provided by WordPress is truly a one-click solution that makes it straightforward and easy to use. Unfortunately, at its current stage, it leaves one notable security hole open that needs to be dealt with manually. We will describe this security hole in the next section and show you how to fix it.
Additional Tweaks
While the WordPress one-click HTTPS setup is very handy and convenient, its current version (5.7.2) leaves out one essential security setting – the ability to force a secure connection from the moment a visitor tries to access the website. In other words, if a visitor uses http:// to access your website, they would not be using HTTPS for that initial connection. Fortunately, there’s an easy fix for that.
In fact, we have already covered this fix in a whole separate guide about redirecting HTTP traffic to HTTPS. We recommend using one of the three .htaccess options to force a secure connection for your WordPress site.
Below, we will show you the before and after versions of our WordPress .htaccess file. We will be applying the third .htaccess option in the after version.
The default WordPress .htaccess contains:
# BEGIN WordPress
# The directives (lines) between "BEGIN WordPress" and "END WordPress" are
# dynamically generated, and should only be modified via WordPress filters.
# Any changes to the directives between these markers will be overwritten.
<IfModule mod_rewrite.c>
RewriteEngine On
RewriteRule .* - [E=HTTP_AUTHORIZATION:%{HTTP:Authorization}]
RewriteBase /
RewriteRule ^index\.php$ - [L]
RewriteCond %{REQUEST_FILENAME} !-f
RewriteCond %{REQUEST_FILENAME} !-d
RewriteRule . /index.php [L]
</IfModule>

# END WordPress
The above directives do not force a secure connection in any way, which is why when you navigate to your website without specifying https://, you may see a Not Secure warning, like the one shown below:

And here is the .htaccess file once we have included the additional directives:
# BEGIN WordPress
# The directives (lines) between "BEGIN WordPress" and "END WordPress" are
# dynamically generated, and should only be modified via WordPress filters.
# Any changes to the directives between these markers will be overwritten.
<IfModule mod_rewrite.c>
RewriteEngine On
RewriteRule .* - [E=HTTP_AUTHORIZATION:%{HTTP:Authorization}]
RewriteBase /
RewriteRule ^index\.php$ - [L]
RewriteCond %{REQUEST_FILENAME} !-f
RewriteCond %{REQUEST_FILENAME} !-d
RewriteRule . /index.php [L]
</IfModule>

# END WordPress

RewriteEngine On
RewriteBase /
RewriteCond %{HTTPS} off
RewriteRule ^(.*)$ https://%{HTTP_HOST}%{REQUEST_URI} [L,R=301]
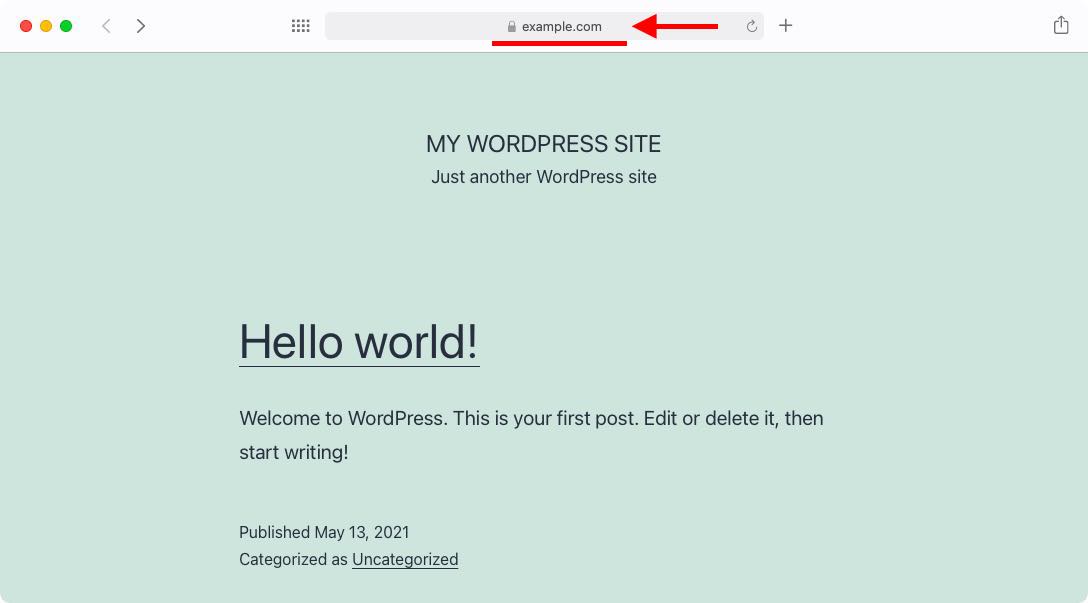
With this upgraded .htaccess file, all visitors will be redirected to a secure version of your homepage:
And that’s it! Simply saving your changes will be enough for the changes to take effect immediately.
Tip:
If your WordPress site still does not force a secure connection even after saving your changes, you should try clearing your web browser’s cache and cookies, or alternatively, you may try using a different web browser.
Conclusion
Undoubtedly, the addition of a 1-click HTTPS enabler is one of the best features to come with WordPress 5.7. It transforms the error-prone process of manually editing your site configuration and database into a straightforward solution that is safe and fully automated. We truly believe that this will result in fewer broken WordPress sites and a safer web for all of us.