
To Install WordPress You Have to:
- Start the Zacky Installer.
- Choose WordPress as the CMS you want to install.
- Pick any themes and plugins that you want to install with the CMS.
- Configure the website settings.
- Install WordPress.
- Enjoy!
As for now, WordPress is the most common CMS. This is mainly because it works. And it doesn’t take a Ph.D. to find out how to use it. In fact, we’ve created a full step-by-step guide on how to create a WordPress website.
We’ve also built an easy way to install the CMS to your site. So, without further ado let’s go through this how-to-install WordPress step-by-step tutorial.
Step 1: Get into the Control Panel and Gear the Zacky Installer
Once you’ve registered an account and entered into the Hosting Control Panel, you’ll see a menu like this. Click on the icon that says “Zacky Installer”
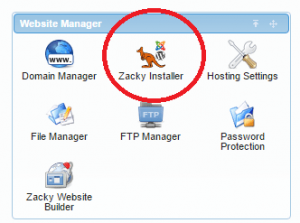
Now, the installation process is about to start.
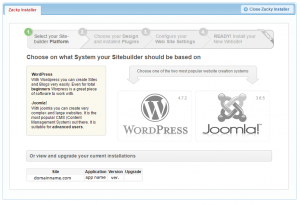
Step 2: Choose WordPress
Here, you’ll have the opportunity to choose between the different CMSs (WordPress & Joomla only, if you are using free hosting). This is a WordPress installing tutorial, so click on the WordPress image.
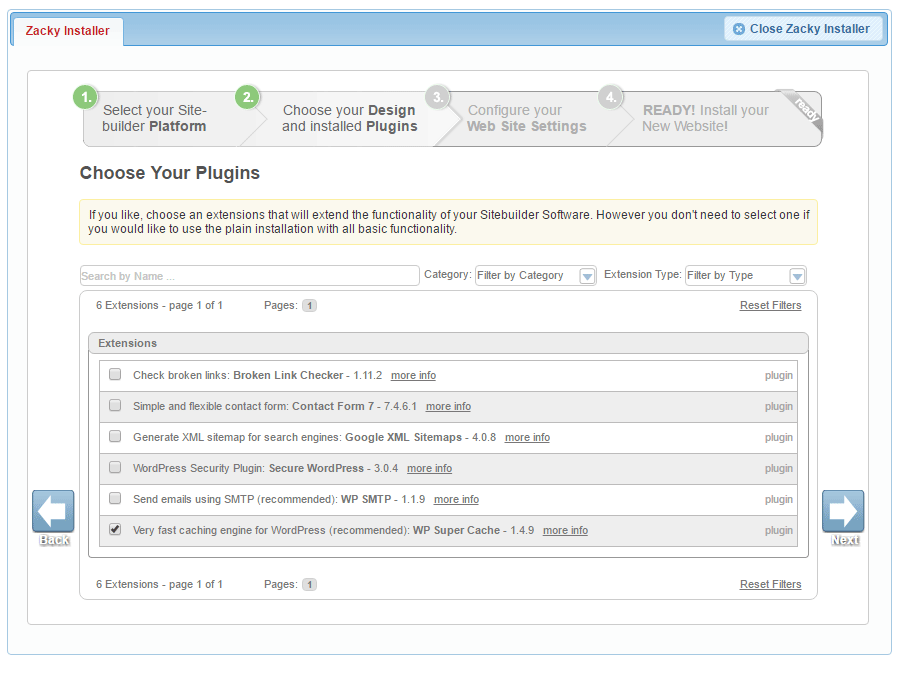
Step 3: Choose Design & Plugins
In our installer, we’ve made an effort to integrate some themes and plugins, which you could install simultaneously with WordPress. Of course, you could skip that part by clicking Next. If you want to install a theme – click on the one that you prefer. And click Next afterward.

Next are the plugins. You can follow the instructions above. If you like some of them mark them and they’ll be installed automatically. Afterward, click Next.
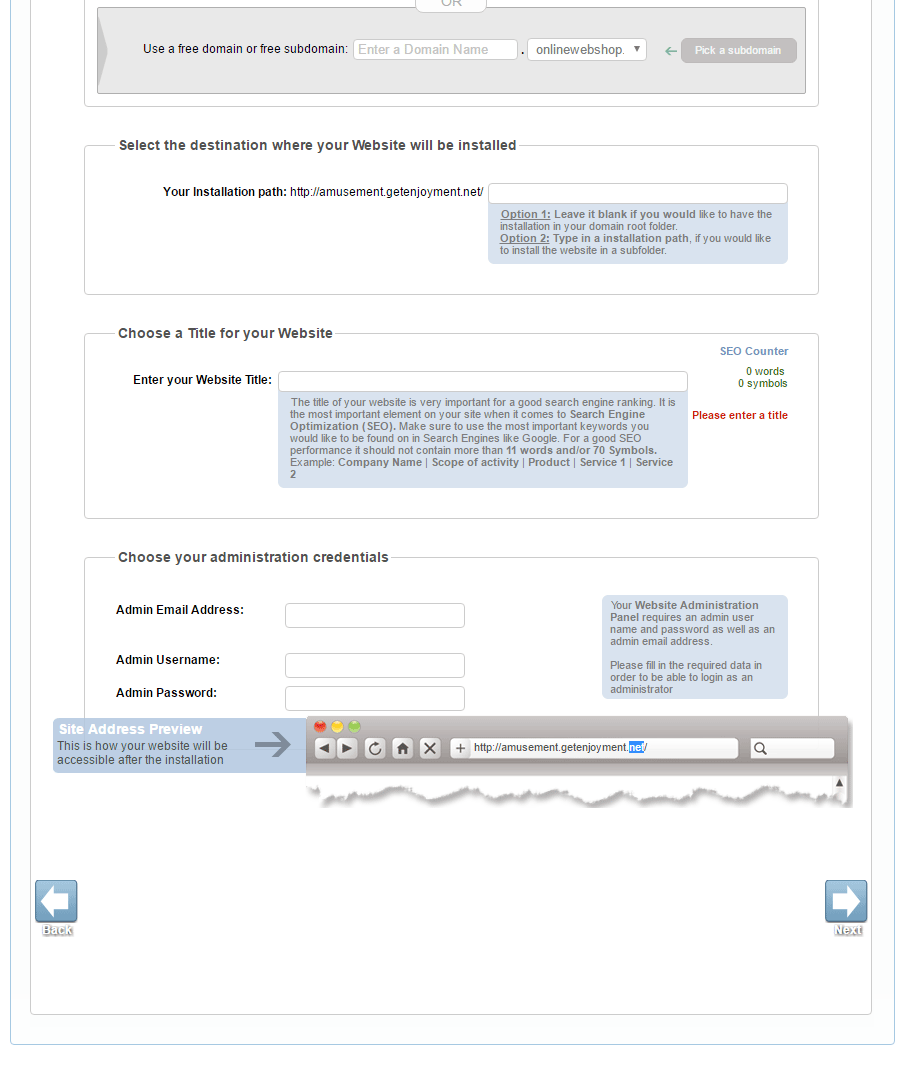
Step 4: Configure Your Web Site Settings
Here you’ll be able to choose your domain, register a new one, or pick a free subdomain.
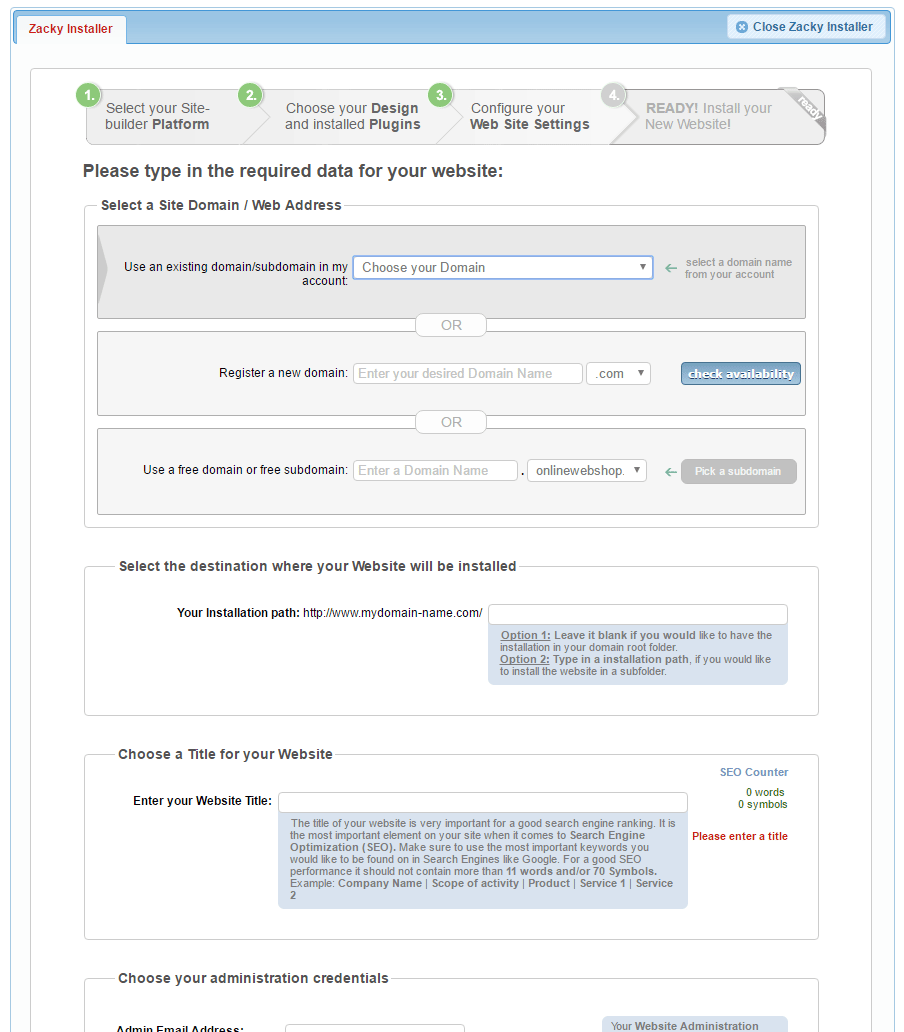
If you already have a domain, you can use the falling menu to choose it, as shown in the picture.
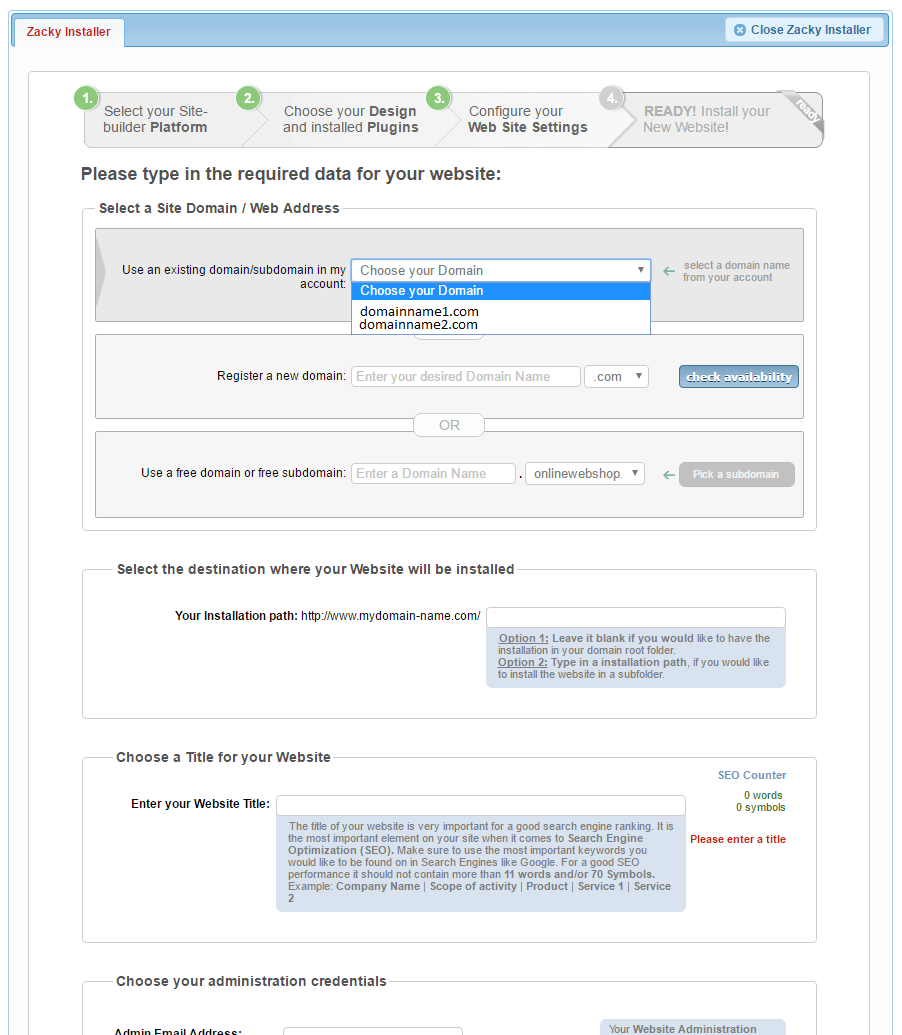
Choose your Site name, fill in the Admin profile details and click Next.
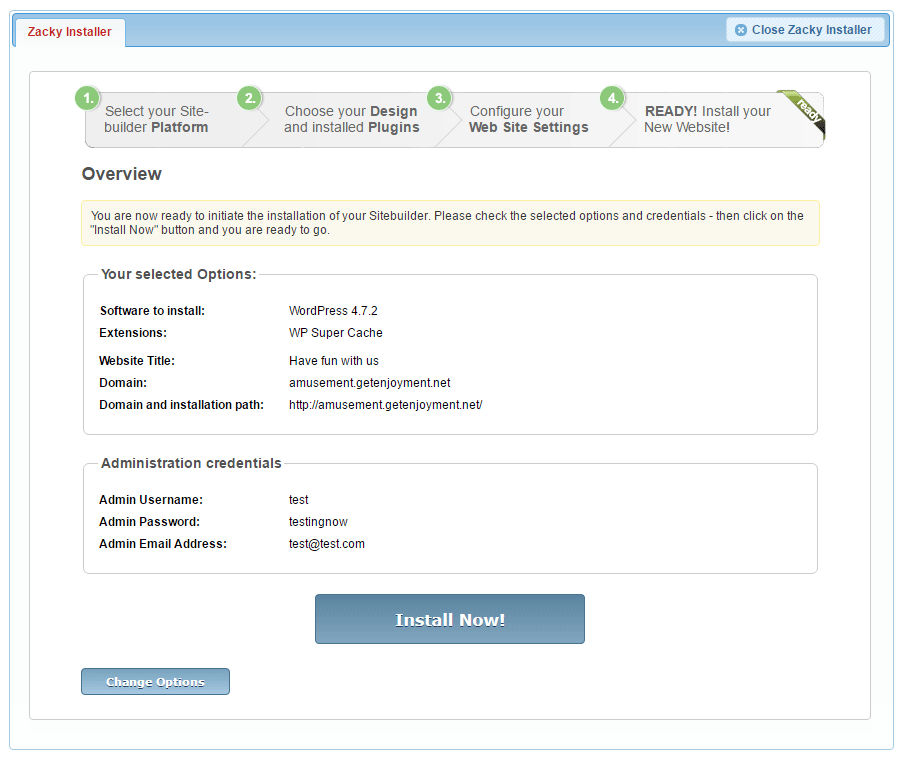
Step 5: Install WordPress
Check and double-check the information you’ve entered, so you won’t have to re-install the CMS. After you are sure, everything is as it should be, click the Install Now! button.
Congratulations! You’ve just learned how to install WordPress.
Now that you’ve installed WordPress on your site, maybe you are interested in what exactly is WordPress?