
Should you sign up for a free web hosting service, or any of our premium hosting solutions, you’ll be automatically redirected to your brand new Hosting Control Panel. From there, you’ll be able to purchase and/or manage your domain names and create free subdomains. Your hosting control panel is essentially where you’ll be dealing with most of the things, regarding your hosting account. Including but not limited to creating databases and taking the first steps towards creating a website. This is where you’ll check your bandwidth usage, etc.
Related: Learn everything about AwardSpace’s Control Panel
After you’ve installed a CMS of your choosing, most often than not, you’ll spend a lot more time in the CMS’s Dashboard, where most of the website settings are to be tuned. Especially if you are new to website maintenance, chances are, at a certain point, you’ll forget that there is another place for you to log in and to make changes.
As you can guess, the hosting control panel and your CMS Dashboard are quite different entities.
How to log into the Hosting Control Panel?
In order to log into your hosting control panel, click the button on the top right of the current page which says Login:
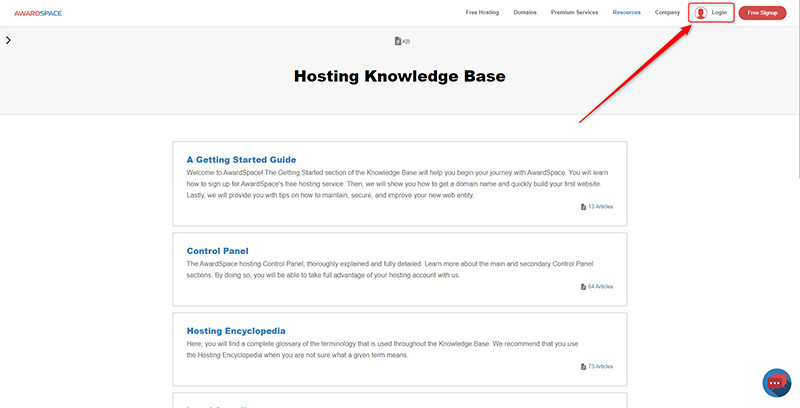
Now that you’ve navigated to the Login Page, choose the option that is related to the way you’ve signed up for our services.
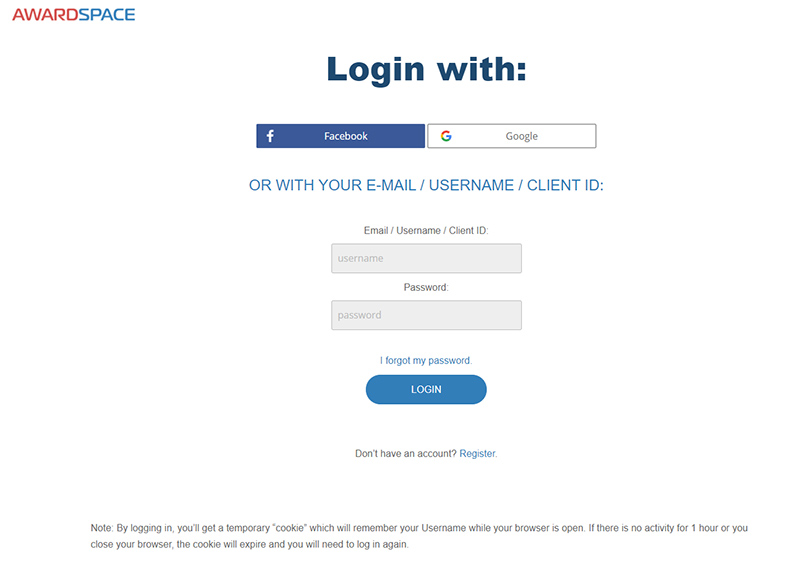
That is, if you used your Facebook or Google account, click on the button related to the service you’ve used. Otherwise, if you used the more classic way of signing up for our free services – an email and a password (it is highly recommended to add a strong password to your account, no matter the method you’ve used to signup) – you simply navigate to the fields below.
If you log in with your email and password, you can use your Email, Username, or Client ID.
It is an either-or situation. You should only fill in one of those, and the password that you’ve created with the account.
Further reading: How to retrieve a lost account or password?
