
Learning how to install themes in TYPO3 is essential, as it enables you to personalize your website fully. Whether you are working on a personal blog or a complex business website, the process of installing a theme in TYPO3 is the same.
In this article, we share how to install themes in TYPO3 in a few simple-to-follow steps.
How to Install Themes in TYPO3
The process is very simple to follow and requires only a few clicks here and there.
Step 1: Log in to TYPO3
The first step in the process is to log in to TYPO3.
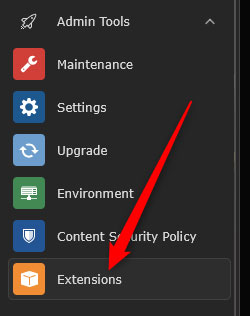
Step 2: Open the Extension Manager
Once you have logged in to TYPO3, navigate to Admin Tools -> Extensions. This is the place from which you can install and uninstall TYPO3 themes:
Step 3: Browse and Install a Theme
The next step in the process is to browse the available TYPO3 themes and install the one most suitable for your preferences.
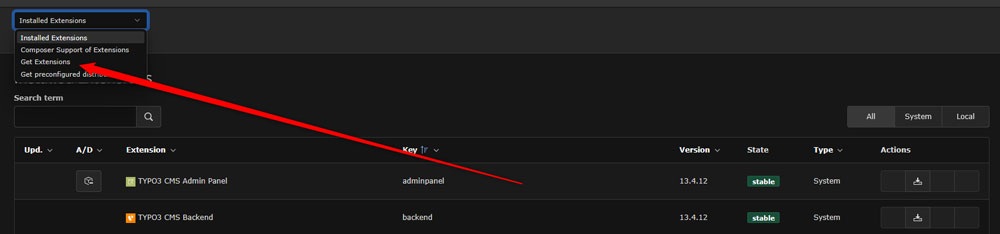
To search for themes, from the upper left corner, select Get Extensions:
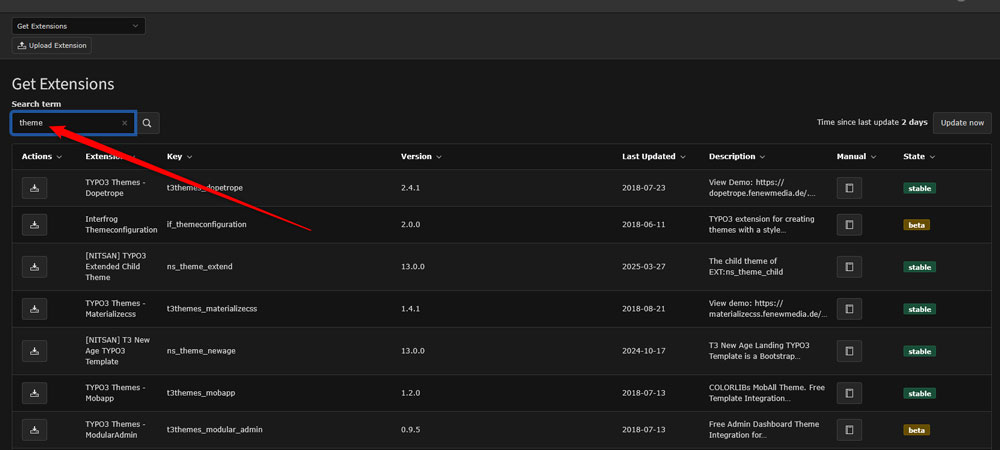
Then, in the Search Bar on the same page, type in “themes” or the name of a particular theme you wish to install:
After that, browse the list with suggestions and when you find the theme you wish to install, click on the Import and Install icon to the left of each theme name:
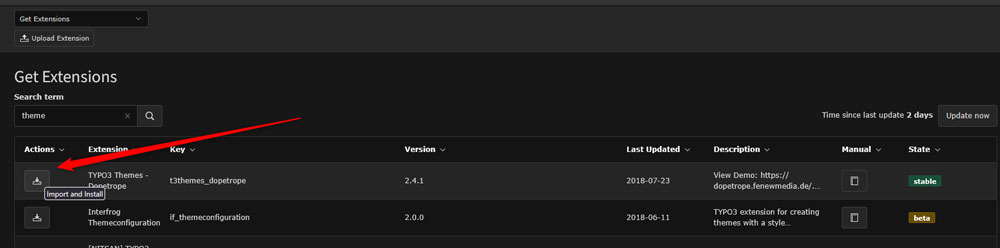
Now, wait until the installation is completed.
Step 4: Activate Your Theme
Now that you have installed a TYPO3 theme, it is time to activate it. To do so, do the following:
- Navigate to Site Management -> Sites
- Select your site configuration.
- From Root Template, head to Template -> Info/Modify.
- Click Edit the whole template record.
- Set the Include static template to the newly installed theme.
- Save the changes.
Conclusion
Knowing how to install themes in TYPO3 helps you customize your website and speed up all your project development processes.
