How to Manage Global Record Actions in SuiteCRM

Home » Knowledge Base » Design Tools » SuiteCRM » How to Manage Global Record Actions in SuiteCRM

SuiteCRM is a handy and versatile CMS that allows you to manage customer relationships, leads, and business processes within a single platform. One of the many useful SuiteCRM features is the Global Record Actions – a tool that lets you take quick actions across multiple modules and records, so that to can manage them in bulk, instead of editing one at a time.

In this article, we share how you can use Globar Record Actions on your SuiteCRM project.


What are Global Record Actions

Global Record Actions are a set of buttons and links you see within the List View of each page module (such as Accounts, Contacts, Leads). These buttons apply changes to multiple selected records. For example:

  • Mass Update
  • Merge Records
  • Mass Delete
  • Mass Export


How to Manage Global Record Actions in SuiteCRM

Alongside being versatile, SuiteCRM is also easy to use. This means that you can easily manage the Global Records Actions with only a few clicks here and there. In the following paragraphs, we share how to do so in the simplest way possible.


Step 1: Log in to Suite CRM

The first step in the process is to log in to SuiteCRM. Accessing the dashboard is crucial to working on your project and accessing the Global Record Actions settings.

Step 2: Go to Role Management

The next step in the process is to permit the global record actions. To do so, first hover your mouse cursor over your avatar picture at the top right of the screen and click on Admin:

head to the admin page in SuiteCRM


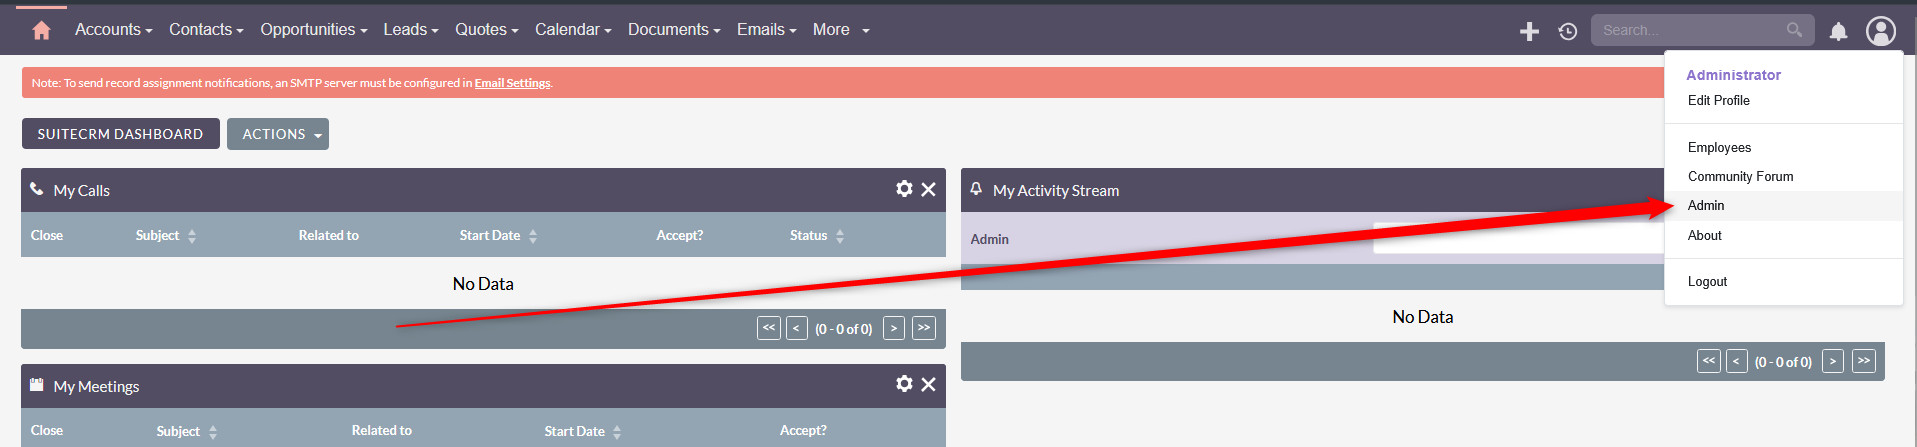
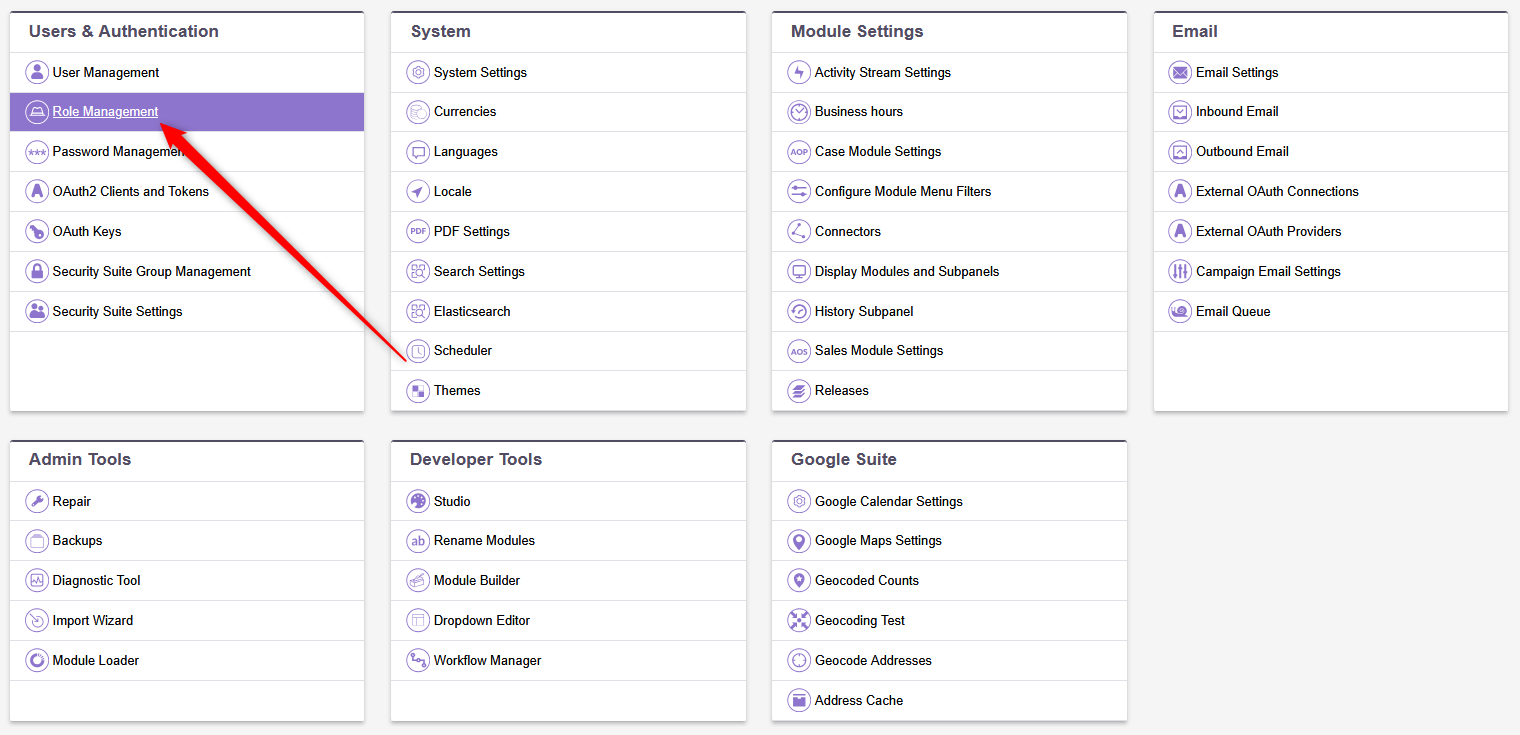
Then, within the Admin page, head to Role Management under Roles & Authentication:

head to the Role Management section while on the Admin page


Step 3: Create a New Role

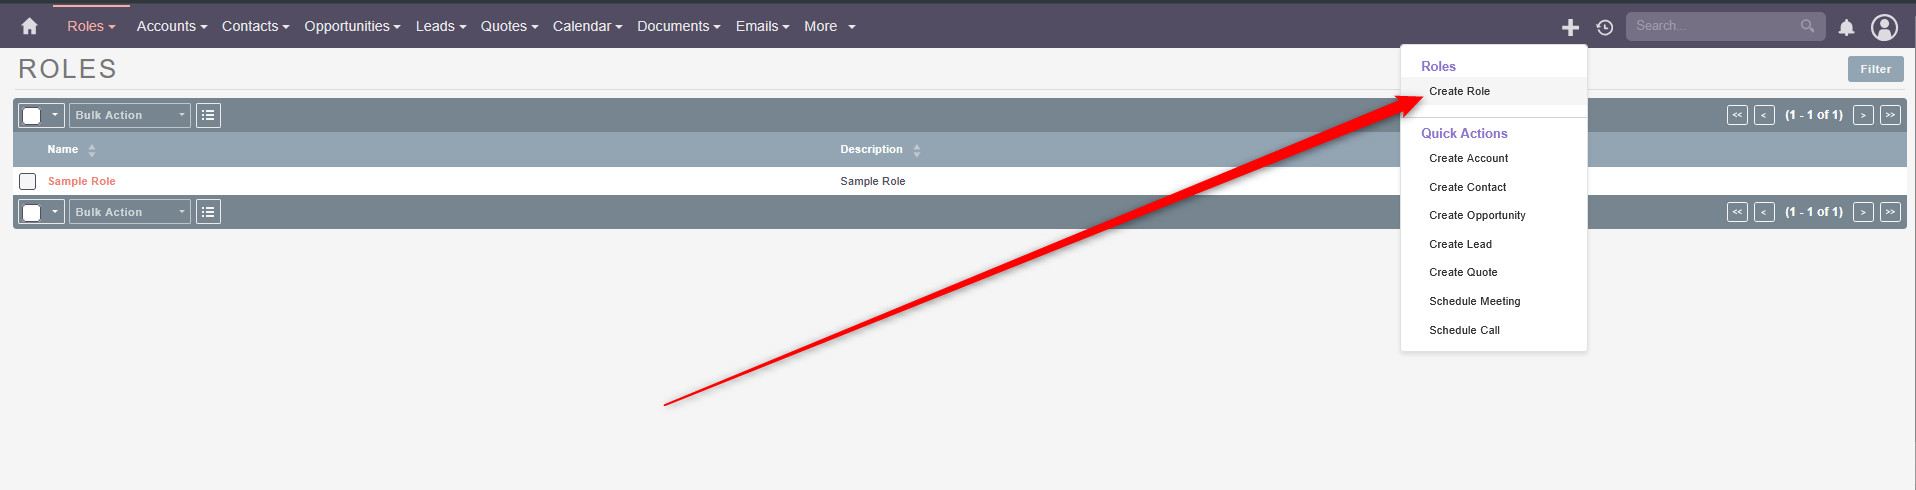
Within Role Management, create a new role by clicking theicon at the top of the screen and selecting Create Role:

Create a new role in SuiteCRM


Then, add a role name and description and save the changes:

Add role details


A new page with role permissions will appear. From this list, activate the ones that you need for global record actions:

  • Mass Update
  • Merge Records
  • Mass Delete
  • Mass Export


Step 4: Assign Global Actions to Users

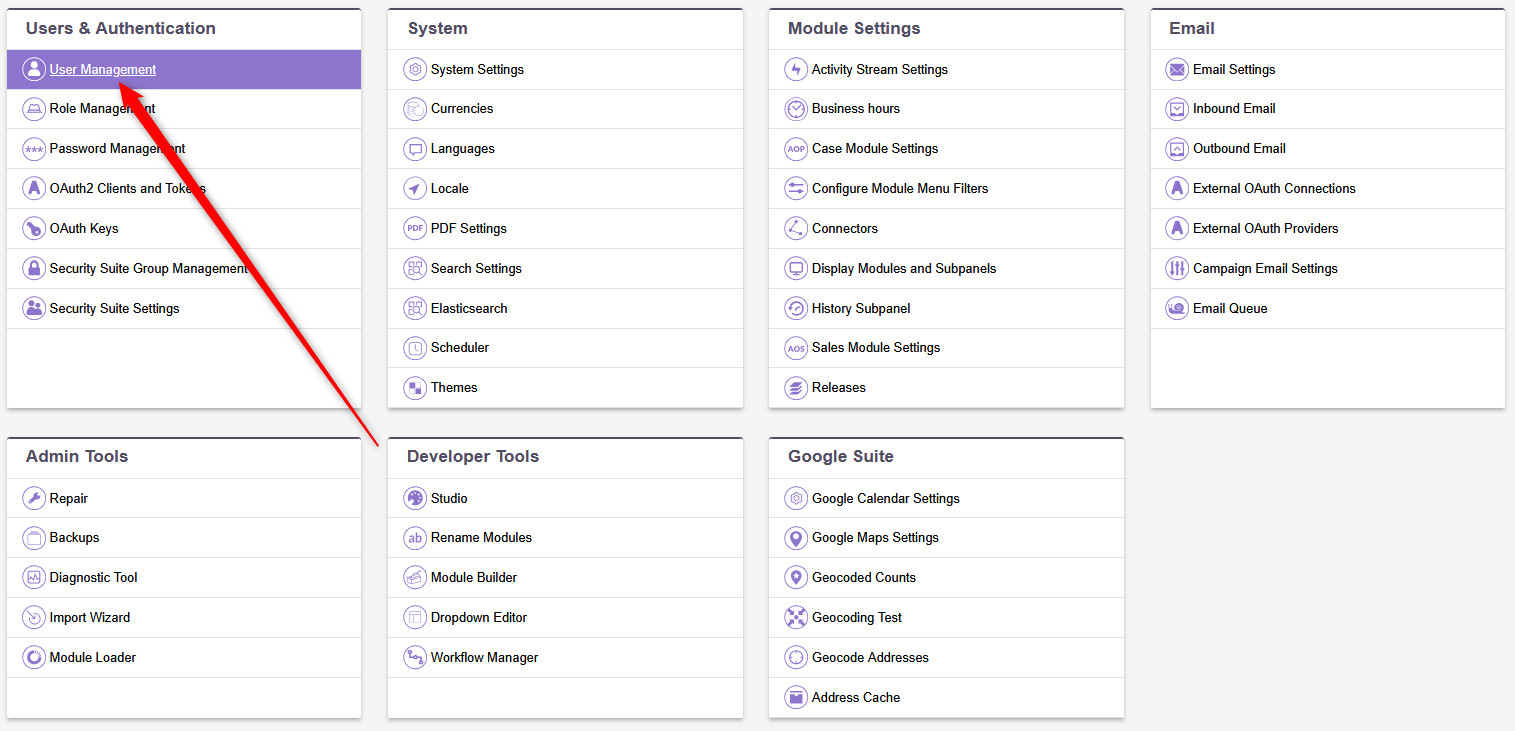
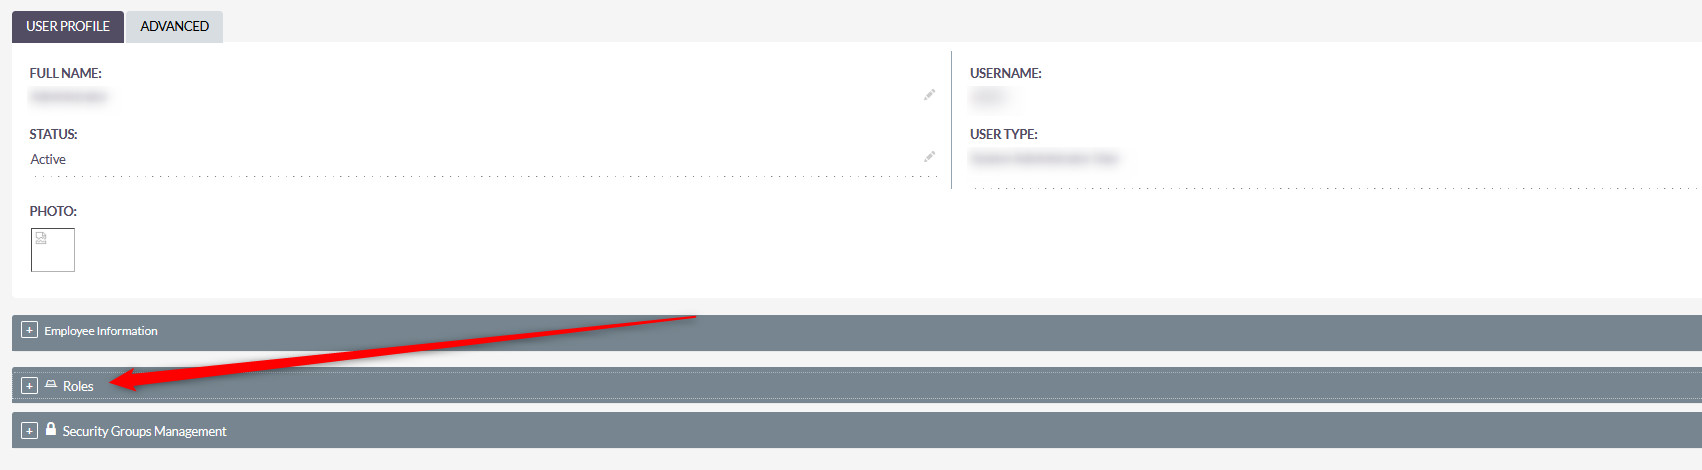
After you have created a role, it is time to assign it to a SuiteCRM user. To do so, head to Admin -> User Management:

head to the User Management page in SuiteCRM


Once there, click on a user you want to give the role to, scroll down to the Roles section, and assign the newly created role to this user.

Assign Roles for a User in SuiteCRM


Now you know how to manage global record actions in SuiteCRM.

Was this post helpful?

i

Relevant tags:

Connect

Latest posts:

How to Upgrade My Hosting Services

Upgrading a hosting plan with AwardSpace is quite simple. Just follow the steps below. First, you need to log in to the AwardSpace hosting panel. Then, head to Services Upgrade, located in the Buy Services category within the hosting dashboard:   Then, select...

How to Purchase a Semi-Dedicated Hosting Plan

You can quickly and easily purchase a Semi-Dedicated hosting plan with AwardSpace. You only need a few clicks and a few minutes of your time. Here's what to do. First, log in to the AwardSpace hosting panel. Then, head to Semi-Dedicated Hosting in the Buy Services...

How to Purchase a VPS Hosting Plan

Purchasing а VPS hosting plan with AwardSpace is simple. You only need to follow a few steps, and you will have the setup made in no time. Here's how to proceed. First, log in to the AwardSpace hosting panel. Then, click on the Virtual Private Servers (VPS) icon...


Create a website for free!


Free forever

Our Support Team is Here to Help


If you need any questions answered, don't hesitate and contact us. Click the button below and follow the instructions. You can expect an answer within an hour.


Contact AwardSpace


iNewest knowledge base articles

How to Upgrade My Hosting Services

Upgrading a hosting plan with AwardSpace is quite simple. Just follow the steps below. First, you need to log in to the AwardSpace hosting panel. Then, head to Services Upgrade, located in the Buy Services category within the hosting dashboard:   Then, select...

How to Purchase a Semi-Dedicated Hosting Plan

You can quickly and easily purchase a Semi-Dedicated hosting plan with AwardSpace. You only need a few clicks and a few minutes of your time. Here's what to do. First, log in to the AwardSpace hosting panel. Then, head to Semi-Dedicated Hosting in the Buy Services...

How to Purchase a VPS Hosting Plan

Purchasing а VPS hosting plan with AwardSpace is simple. You only need to follow a few steps, and you will have the setup made in no time. Here's how to proceed. First, log in to the AwardSpace hosting panel. Then, click on the Virtual Private Servers (VPS) icon...

How to Check My Hosting Limits

To check your hosting limits, follow these steps: First, log in to the hosting control panel. Then, via the dashboard, head to Hosting Settings:   After that, click the Hosting Limits tab:   Then, you will access the information about your account's hosting...

Even more web tutorials

Check out our web hosting knowledge base and the WordPress tutorials to learn more, and be better prepared for your website creation and maintenance journey.