Create a WordPress Post

Home » Knowledge Base » Design Tools » WordPress » Create a WordPress Post

After you have chosen the best web hosting plan for your WordPress website, and finished the CMS installation process, you can log in to your new site and start creating.

The posts in WordPress are the primary content. Posts are typically used for dynamic content such as blog articles, news updates, and other timely content. They are one of the key features that make WordPress an ideal platform for blogging and content sharing.

They are the key building blocks of your new website.

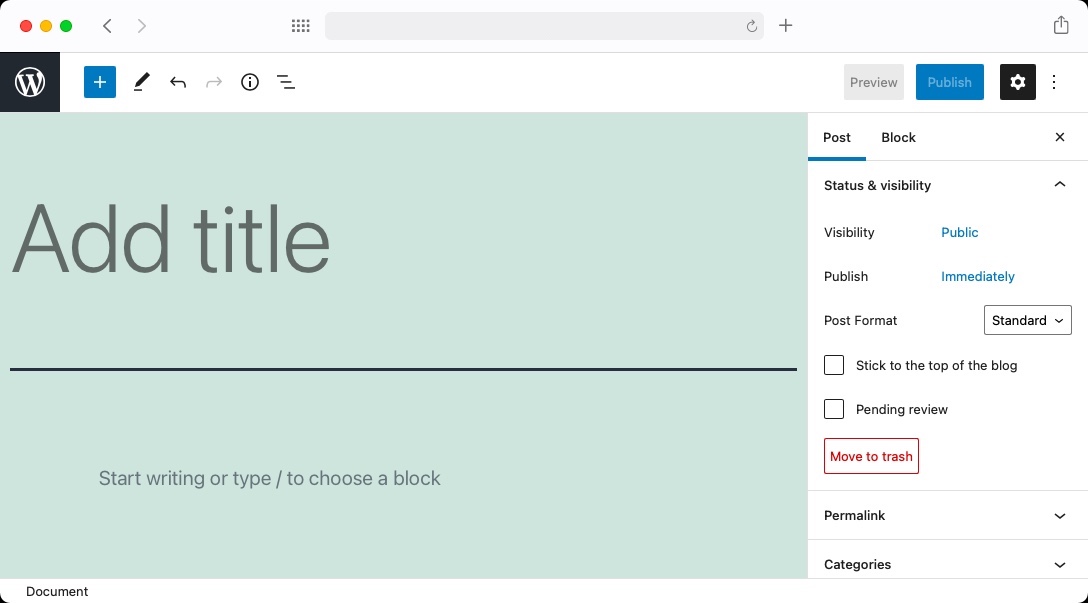
After you’ve logged in to the backend of your new website. On the left part of the screen, you’ll see the sidebar menu of the WordPress Dashboard. Hover the mouse pointer over Posts. A submenu will open. Click Add New.

WordPress Post

If you’re interested in creating a new post just to familiarize yourself with the process, focusing solely on adding textual content, here’s what you need to know:

  • Post Title: This is where you input the post’s title. It will be displayed above the content on the website’s front end.
  • Post Content: This refers to the larger, white text area where you’ll type or paste your post’s body. In the upper right corner of this area, you’ll notice two tabs:
    • Visual: Select this to format your text using the editor.
    • Text: Choose this to insert HTML code directly.

Once your post’s content is ready, you have several options available in the screen’s right corner:

  • Save as a Draft: If you’re not ready to go live, save your work for later.
  • Preview: Take a sneak peek at how your post will appear on the site.
  • Publish: Make your post live for viewers.

In the same area, you’ll find information regarding:

  • Status: Whether your post is published or remains a draft.
  • Visibility: Determines if your post is public and viewable by anyone, restricted to certain viewers with a passcode, or private.

You also have the option to delete the post by selecting Move to Trash.

After finalizing the Post Title and Post Content, simply click on Publish to share your post with the world.


To view your newly created post on the front end of your website, follow these steps:

1. Ensure you’ve successfully published the post by clicking the Publish button in the WordPress editor.
2. Navigate to the main URL of your website (e.g., yourdomainname.com).
3. Your post should appear on the homepage if your site is set to display the latest posts. If not, it may be accessible through the blog or posts section, depending on how your site is structured.
4. Click on the post title or the read more link to view the full post.

This will allow you to see how your post appears to visitors, including the post title and content as you’ve formatted it. Remember, the appearance of your post can vary based on the theme and customizations applied to your site.

Check the article on how to add media to your new post.


Was this post helpful?

i

Relevant tags:

Connect

Latest posts:

How to Fix 308 Permanent Redirect

308 Permanent Redirect is an HTTPS status code indicating that the requested resource has been permanently moved to another location. Similar to 301 Moved Permanently, 308 informs the user of the movement of a given online resource, and unlike the 301 redirect, 308...

How to Fix 301 Error Moved Permanently

The 301 Moved Permanently is an HTTP status code that indicates a permanent relocation of an online resource from a given URL to a new one. More technically, the moved resource has been moved to the new URL specified in the Location header. The HTTP 301 status code is...

How to Fix 307 Temporary Redirect

307 Temporary Redirect is a response HTTP status code that indicates the requested resource has been moved to a different URL for a limited period of time. Unlike a 301 permanent redirect, the 307 Temporary Redirect message indicates that the change is temporary and...

How to Access Crontab Settings

To access the crontab settings, first, you need to log in to your AwardSpace hosting panel. After you have logged in, head to Crontab Settings, located within the Advanced Tools category:   After you click the Crontab Settings icon, a new page should load. Once...

How to Check My Auto Renewals

To check your AwardSpace hosting plan auto-renewals, first log in to the admin dashboard. Then, head to Wallet, within the Orders & Invoices section:   After that, click the Auto Renewals tab, where you can check any relevant information about your hosting...


Create a website for free!


Free forever

Our Support Team is Here to Help


If you need any questions answered, don't hesitate and contact us. Click the button below and follow the instructions. You can expect an answer within an hour.


Contact AwardSpace


iNewest knowledge base articles

How to Fix 308 Permanent Redirect

308 Permanent Redirect is an HTTPS status code indicating that the requested resource has been permanently moved to another location. Similar to 301 Moved Permanently, 308 informs the user of the movement of a given online resource, and unlike the 301 redirect, 308...

How to Fix 301 Error Moved Permanently

The 301 Moved Permanently is an HTTP status code that indicates a permanent relocation of an online resource from a given URL to a new one. More technically, the moved resource has been moved to the new URL specified in the Location header. The HTTP 301 status code is...

How to Fix 307 Temporary Redirect

307 Temporary Redirect is a response HTTP status code that indicates the requested resource has been moved to a different URL for a limited period of time. Unlike a 301 permanent redirect, the 307 Temporary Redirect message indicates that the change is temporary and...

How to Access Crontab Settings

To access the crontab settings, first, you need to log in to your AwardSpace hosting panel. After you have logged in, head to Crontab Settings, located within the Advanced Tools category:   After you click the Crontab Settings icon, a new page should load. Once...

How to Check My Auto Renewals

To check your AwardSpace hosting plan auto-renewals, first log in to the admin dashboard. Then, head to Wallet, within the Orders & Invoices section:   After that, click the Auto Renewals tab, where you can check any relevant information about your hosting...

How to Check My Payment Requests

To check your payment requests, first log in to the AwardSpace hosting panel. Then, head to Wallet within the Orders & Invoices category:   Then, click the Payment Requests tab. There, you can browse all the information you need about your...

Even more web tutorials

Check out our web hosting knowledge base and the WordPress tutorials to learn more, and be better prepared for your website creation and maintenance journey.