
This knowledge base tutorial provides information about one of the most used e-commerce platforms nowadays – Magento. It also contains step-by-step instructions on how to properly install a Magento CMS on a shared hosting server.
What is Magento?
Magento is an open-source platform developed in PHP and used for building and managing e-commerce websites. The software is known to offer a great set of tools and features, such as full website management control, catalog and product browsing, search engine optimization, support for multiple payment gateways, marketing analysis tools and many more. To get an in-depth look at the full feature set, please visit the official Magento Feature List page.
Magento is available in two distinct versions – Magento 1 and Magento 2. In this article, we’re going to review the most recent one, which was released and made publicly available in 2015.
Is Magento 2 Compatible With Your Shared Hosting?
Most Magento users would say that the software is system-intensive and resource-consuming and that it requires a cloud hosting service in order to run and function properly. Although we could not disagree with their opinion, there was still one question that was bothering us for a long time:
Would it be possible to run a Magento CMS on a shared hosting plan?
In order to find out, we decided to perform a quick test, by manually installing Magento 2 on one of our shared hosting servers. We must say – our test produced a really positive outcome.
What Are The Steps to Install Magento 2?
The process of installing Magento 2 is easy to follow and requires absolutely no coding or programming skills. To install and configure a Magento 2 CMS on your shared hosting account, please follow the steps that we have outlined below:
Step 1: Preparing the server for the installation
In order to make Magento 2 work under a shared hosting account, you would be required to make certain modifications to the main PHP.ini file.
Go ahead and sign in to your AwardSpace account. Once in the dashboard, navigate to the PHP Settings page. Click here to enter the PHP.ini editor.
Set the max memory limit value to 1024M and enable the following three PHP extensions:
- extension=intl.so
- extension=soap.so
- extension=xsl.so
To enable a PHP extension, simply uncomment the corresponding line by removing the semicolon (;) next to the module. Finally, press Save to confirm the submitted changes.
Step 2: Setting up a new MySQL database on the server
While being logged in to your account, open a new tab in your favorite Internet browser and go to the Database Manager. Choose an appropriate name and password for your database and press Create Database.
If this is the first time when you manually register a database in your account and are not quite sure how to proceed, please review our step-by-step Database Manager tutorial.
Step 3: Downloading the software package
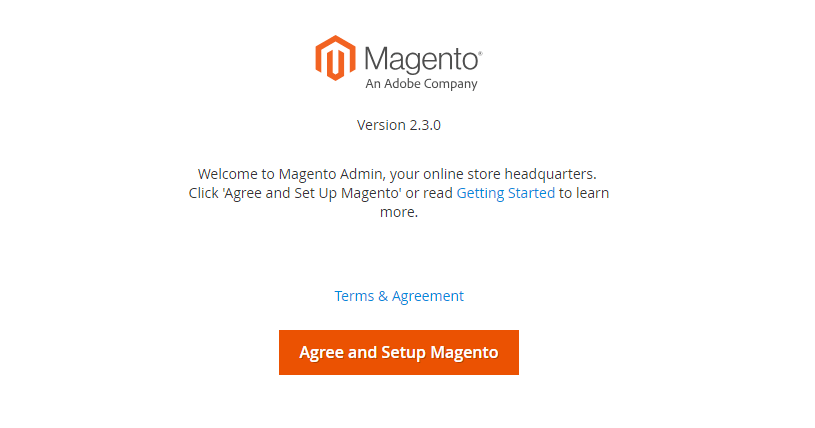
The next step in the process of installing Magento is to choose and download an installation package. The latest release is 2.3.0 and can be obtained from the official Download source.
Note: You must register for a free account before you are able to download a copy of the free Magento community edition.
To sign up for an account, visit Magento’s Create an Account page in a browser and fill in the required fields. Once your free account has been confirmed and validated, you will be allowed to get a copy of the desired installation package.
Step 4: Uploading the installation files to the hosting space
After you have downloaded the installation package to your computer, you will need to extract the archive on your local computer (server) and then upload its contents to your domain’s main directory.
To upload your data, launch your favorite FTP software and connect to your server via FTP. A typical Magento installation package contains 100-150MB, so please be patient while your files are being transferred to your hosting space.
When you receive a confirmation that your upload has been successful and that your installation files are on the server, please proceed to the final step.
Step 5: Completing the installation
Run the Magento installation script in a web browser. This should be the URL where you’ve uploaded your files (e.g. .
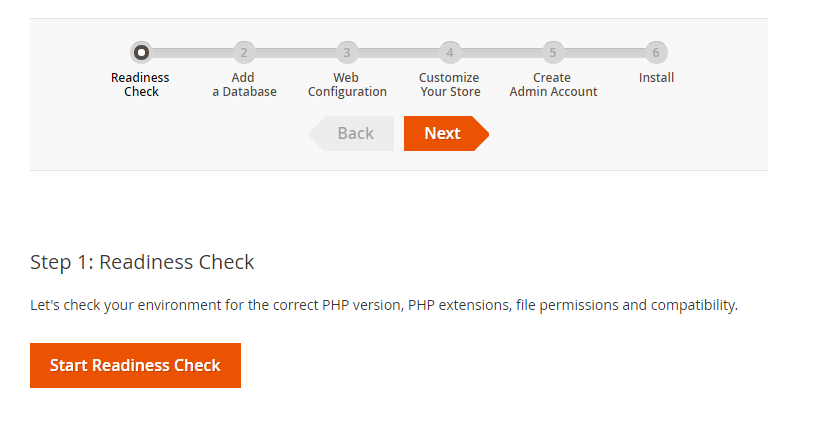
Magento will check your current server configuration. Click Start Readiness Check to continue.
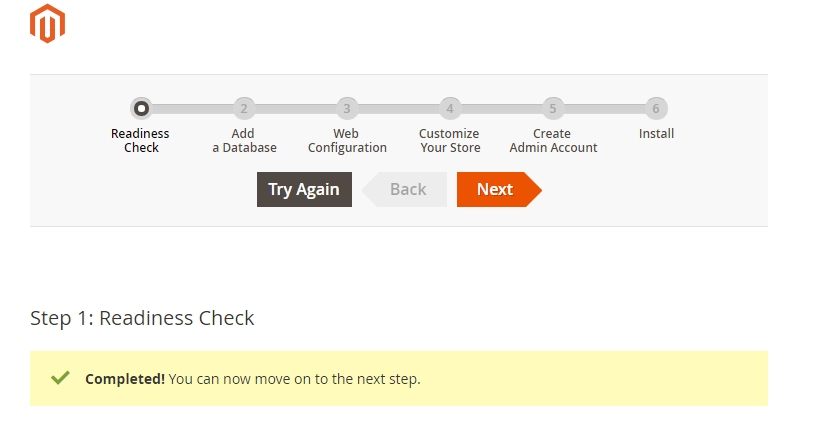
Once your environment has been checked, you will receive a message saying Completed! You can now move on to the next step. In order to proceed further, press the Next button.
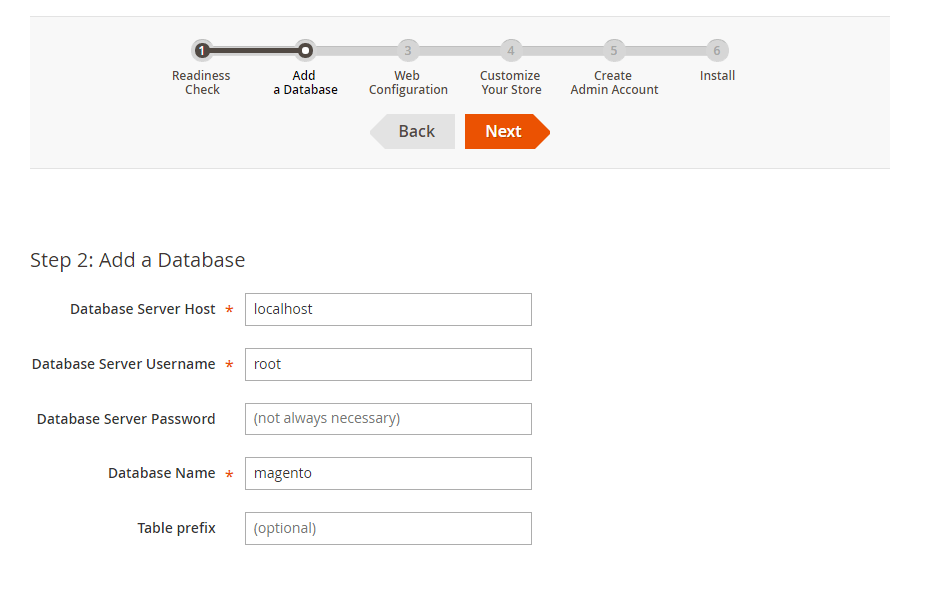
Obtain your database details from the Database Manager, after that fill in the required fields.
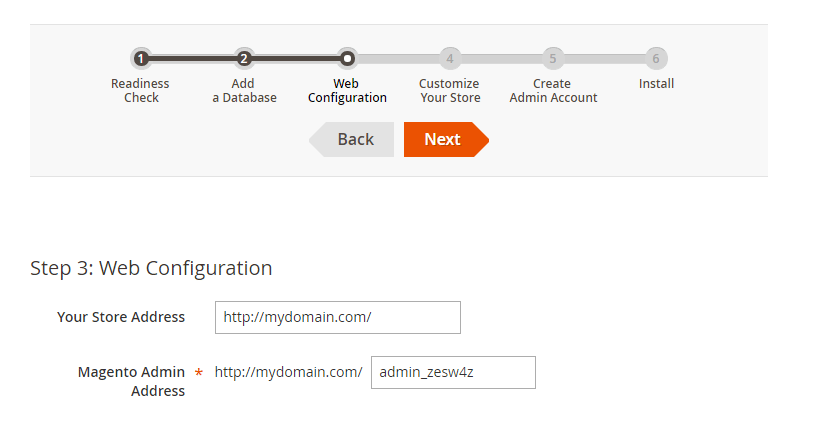
Confirm the web address (URL) of your Magento store and your admin panel, then press Next.
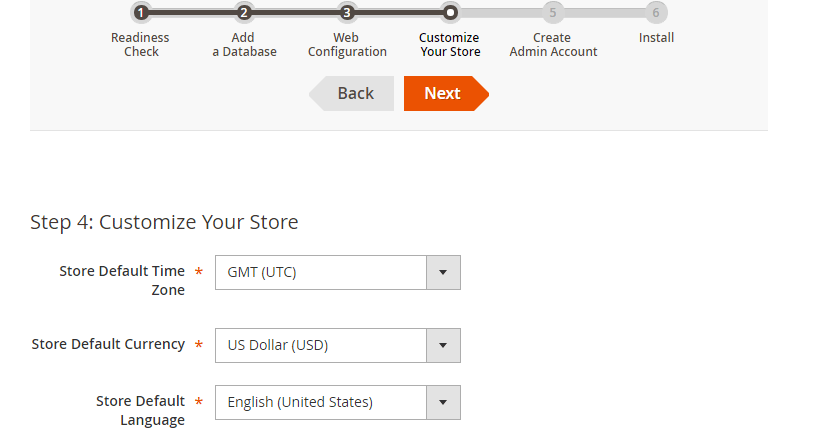
On the next page, you will have the ability to specify your store’s default time zone, language and currency. Configure the store settings according to your preferences and click Next.
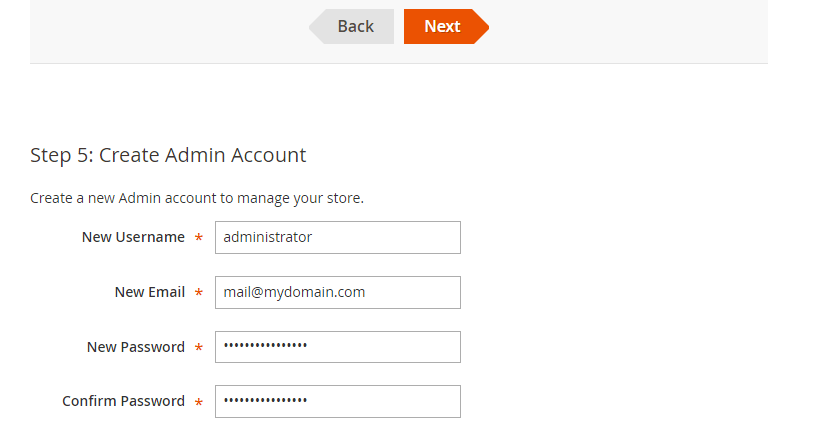
You will be prompted to create an administrative account. The admin account will be used for administering and developing your store. Once you have entered your username, e-mail address and password, press Next to continue.
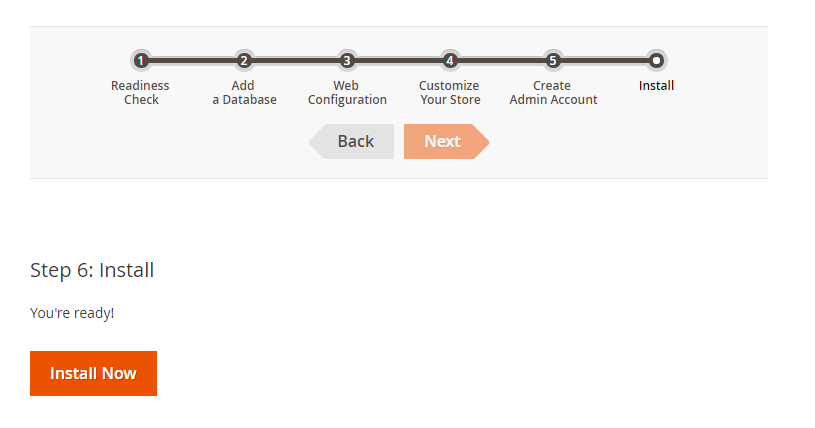
Click on the Install Now button to finalize the setup. Depending on the size of the archive, the time needed to complete the installation may vary.
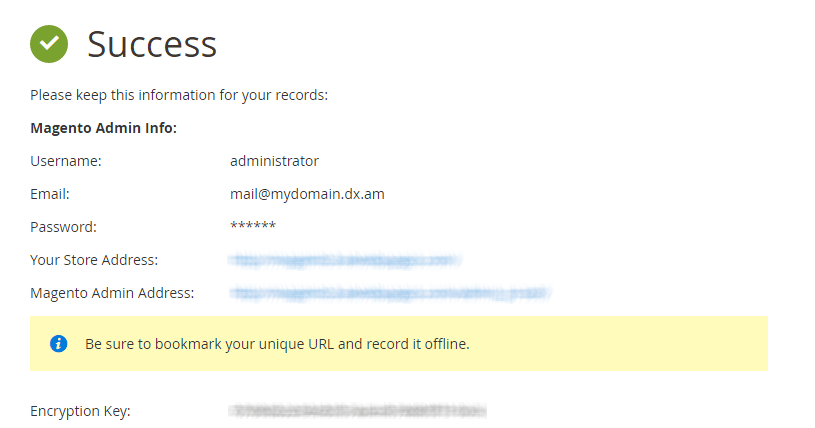
Once Magento has finished installing the files, you will receive a confirmation message. Additionally, you will be provided with a link to your store’s main page and admin panel.
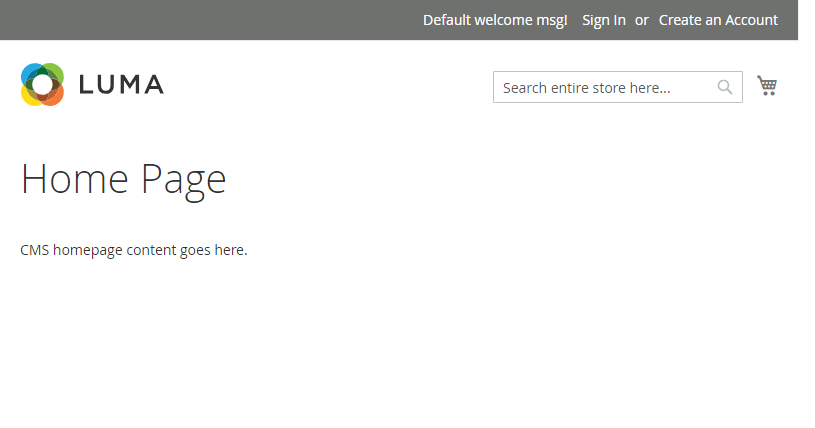
The screenshot below shows how the application looks on a Windows device. To start administering your store, simply click on the Sign In link in the upper right-hand corner of your screen.
That’s it! You’ve just learned how to install Magento 2 on a shared hosting account.
