Any WooCommerce shop that sells physical goods will have some kind of inventory management to cope with. Fortunately, stock management functionality is built into WooCommerce by default.
The use of inventory controls in WooCommerce is a significant component of handling physical goods and guarantees that you do not over-sell an item. It also helps you a lot in planning wholesaler buy requests, completing backorders, and generating metrics that visualize how well your company is running and where customers are doing better.
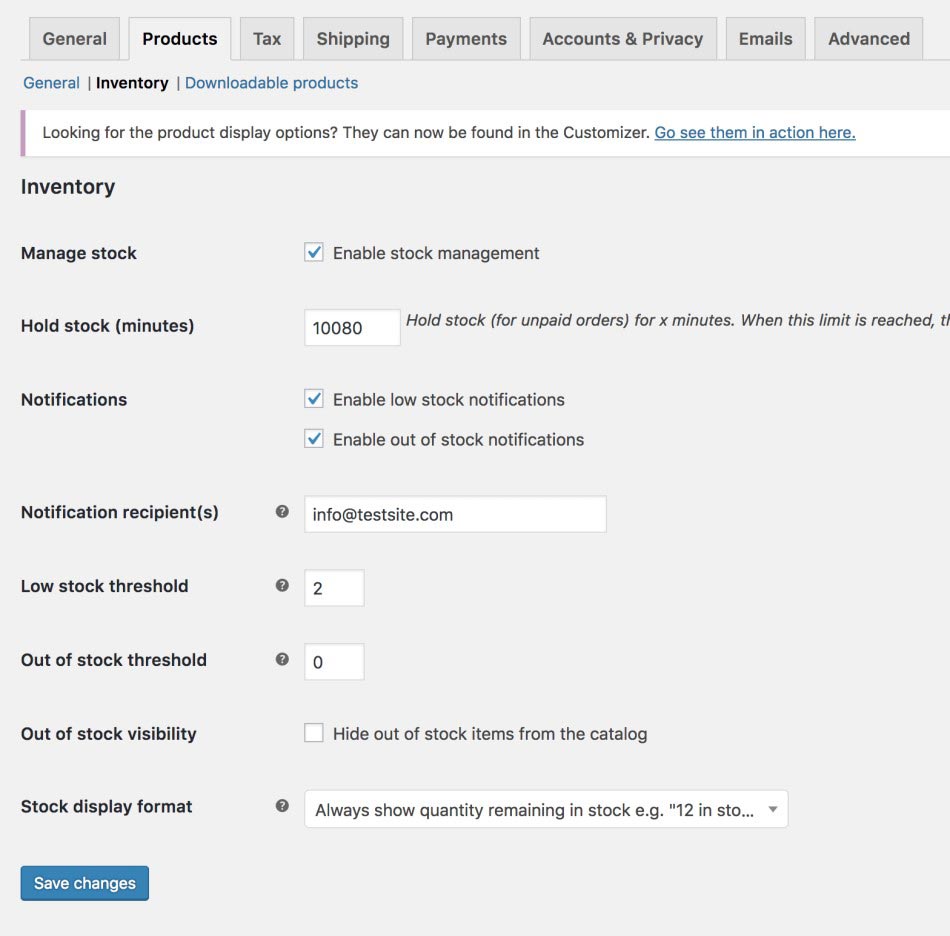
Global Inventory Settings
These settings enable you to configure how WooCommerce manages inventory and inventory, as well as a range of thresholds that can relate to all of your shop’s products.
- Go to WooCommerce > Settings
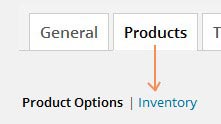
- Click the Products tab, then the little Inventory link
- Check the option Manage Stock to enable stock on all products. You can skip this option here if you have a combination of digital and physical products and allow inventory on individual item posts (described in the next chapter)
- Hold Stock (minutes) – This option determines the amount of time WooCommerce holds inventory for unpaid orders. This means that if a person has a pending order, WooCommerce will remove the item from the global inventory amount until this duration has expired. 1-4 hours is usually the optimal value. Be careful to make it too brief – the value should be equal to the average amount of time of moment that someone might spend shopping in your store before checking out.
- Check the Notifications option to receive email notifications for low or out of stock items
- Enter the email to send notifications to in the Notification Recipient field
- Enter a Low Stock threshold – A low stock notification will be sent when inventory hits this amount (should be at least 1).
- Enter an Out of Stock Threshold – The value in this field will determine the point at which a product is out of stock (typically 0).
- Check Out of Stock Visibility if you want to conceal out-of-stock products in the WooCommerce catalog.
- Select a Stock Display Format for how stock should be displayed within the WooCommerce product page.
Per-Product Inventory Options
The following measures will guide you through setting inventory via the Product options panel in the Product post. For detailed information, mouse over the small (?) buttons next to each option.
- Log in to the WordPress Dashboard
- Go to Products and edit or create a New Product
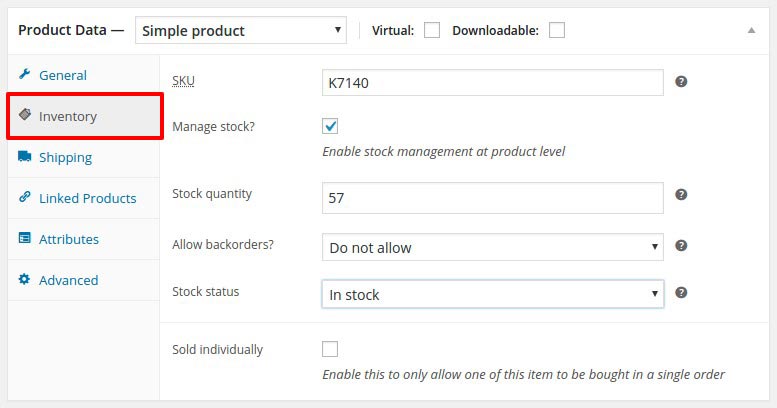
- Scroll down below the post editor to find the Product Options panel and click the Inventory tab.
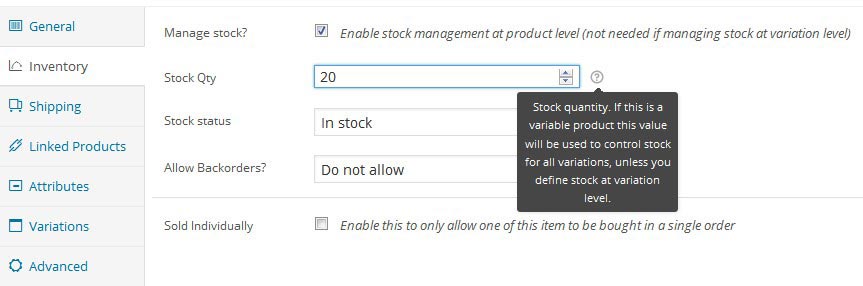
- Check Manage Inventory if you need to set the option on this individual product
- Enter a Stock Qty for how many products you have on hand.
- The stock quantity entered here will be copied to all variations. If you have a different number of blue sweaters compared to red sweaters, for example, click the Variation tab and enter the stock quantities separately in each variation.
- Set the Stock Status – if the Stock Qty is zero, then the Stock Status is out of stock and vice versa.
- Choose whether to Allow Backorders or not.
- Enabling backorders allows customers to purchase out-of-stock items, so be sure you are equipped with a quick turnaround to avoid customer service meltdowns or charge-backs.
- As noted, enable Sold Individually only to allow one of these items to be bought in a single order. This is useful if you sell one-of-a-kind items, limited editions, or collectibles.
How to hide Out of Stock products
In your WordPress Dashboard, click on inventory on the dashboard on the left and enter relevant product details like stock-keeping unit (SKU), stock quantity, stock status – whether the quantity is in stock or out of stock, etc.
If you are getting out of inventory and want to delete the stock, you can manage it from the above dashboard. You can also update your stock from the same page.
Choose whether to enable stock management. If selected, you have these options:
- Manage stock
- Enable stock management – Inventory for physical products is auto-managed. You enter quantity, and WooCommerce subtracts items as sales are made, displaying: Stock, Out of Stock or On Backorder.
- Disable (box left unticked) – Inventory and status for physical products must be entered manually. You can still Enable Stock Management on a per-product level if desired.
- Hold Stock (minutes) – Hold products (for unpaid orders) for X minutes. When the limit is reached, the pending order is canceled. Leave blank to disable.
- Notifications
- Enable low stock notifications
- Enable out of stock notifications
- Notification Recipient – Enter the desired email address for notifications.
- Low Stock Threshold – Number of products to trigger a low stock notification
- Out Of Stock Threshold – Number of products to trigger out of stock status.
- Out Of Stock Visibility – Choose to hide out of stock items from the catalog.
- Stock Display Format
- Always show stock – “12 in stock.”
- Only show stock when low – “Only two left in stock” vs. “In stock.”
-
- Never show amount
-