WordPress is arguably the best CMS that exists. But it is one hundred percent the most famous. And that is quite understandable. This content management system is versatile, customizable, and while in the beginning it was created mainly for people to be able to create blogs, as of today the users of WordPress can create pretty much any website by using it.
To create a website with WordPress is easy, and doing so could be free. The CMS itself is an open source website creation tool, and the web offers Free Hosting and Free WordPress Hosting. Choosing either of them on AwardSpace.com will guarantee you access to a free .dx.am domain, and if you choose to go with our main WordPress Hosting Service, you can get a .com domain for free.
But the abundance of WordPress services is not the only reason the CMS is so famous. In fact, if it wasn’t so good, and easy to use, the services around WordPress probably wouldn’t exist.
One of the main reasons that make WordPress so widely preferred when it comes to website creation is that its creators have had put some thought in every aspect of the CMS.
Almost every media type can be added to your WordPress website content. And as everyone on the web knows, the videos and images are what makes the web so variegated.
When your website grows bigger, naturally, the number of media files uploaded will grow as well.
Depending on how orderly you are as a person, you may want to arrange all those files in separate folders. As the images on your personal computer are composed in separated binders, so you know where exactly are the images from that trip to Europe that you took a few years ago, the images on your WordPress based website, might need an arrangement as well.
Thus, you’ll need to know how to create folders in the WordPress Media Library.
How to Create Folders in the WordPress Media Library
The easiest way to organize your media content is by using a plugin. Although excessive plugin installation is not recommended, as it may form WordPress security problems, while it is maintained within reasonable limits, and the plugins installed are trustworthy, there is hardly a reason to worry. And, on the other hand, adding a plugin is the easiest way to achieve specific functionality on your website.
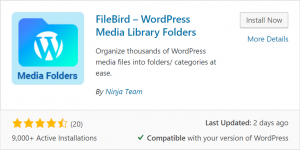
To organize the media files on your website, we recommend you to use FileBird. The plugin has some few thousand installations, a high review rating, and what is most important – it is frequently updated by the developers.
You can, of course, choose another plugin, but FileBird is easy to use, and this is the plugin, we’ll cover in the present WordPress Tutorial.
If you choose to go with FileBird, here are the steps you need to follow in order to organize your media files in folders.
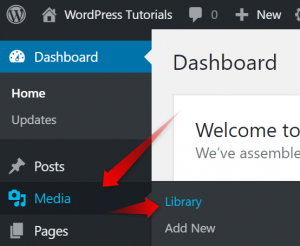
1. Go to Your Dashboard
To do so, go to yourdomainname.com/wp-admin. If you need more information, here is how to enter WordPress’ dashboard.
2. Once in the Dashboard, go to Plugins->Add New.
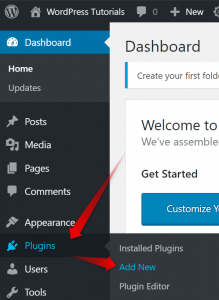
3. Search for FileBird
As usual, when installing a plugin, you need to look up the plugin search engine, integrated in WordPress.

4. Install and Activate FileBird
That’s it.
Now the plugin is installed and activated. You don’t have to tune it up, nor take any additional actions.
When you go to your media library, you’ll see on the left of your media files an option to create, rename and delete folders.
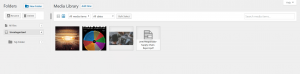
Using the Folders in WordPress Media Library
The new media library page layout is fairly straightforward. On the left-hand side, you can see the Folders section. Right there, you’ll be presented with the option to create, rename or delete a folder.
By default, all the media files are located in the Uncategorized folder, as there are none others.
Now, create the folders you need or want.
To move the files that you want in the folders that you need them to be in, you need to either drag and drop them one by one or use the Bulk Select button on the top menu-like bar.

Once, you’ve created the folders and selected the files that you wish to move to a specific folder, drag and drop them there.
Now you know how to create folders in the WordPress Media Library.