
Before you install WooCommerce, it is highly recommended to take a moment and review the hosting requirements. Doing so will ensure that your WooCommerce store will run smoothly. If you need a new host or don’t have one yet see our WordPress Hosting Plan which can get you set up with WooCommerce right away.
Install WooCommerce
Depending on whether you are about to create a new website, or you already have a WordPress website and wish to install WooCommerce to it, refer to one of the options below:
Create a New Website
If you are about to start creating your website from scratch, the first step you would need to take is to install WordPress. If you already have WordPress installed for your website, you can skip this step.
Please note that for your new website, you would need to have a domain name and a hosting plan. If you do not yet have a domain name and hosting, then it’s time to acquire these now. With AwardSpace, you can purchase both services with a single order!
You can perform the installation effortlessly by using our automated One-Click installer – Zacky Installer. For your convenience, the WooCommerce plugin for WordPress is also included in the automatic installer. In this way, you can set up your online store effortlessly by following the step-by-step installation wizard.
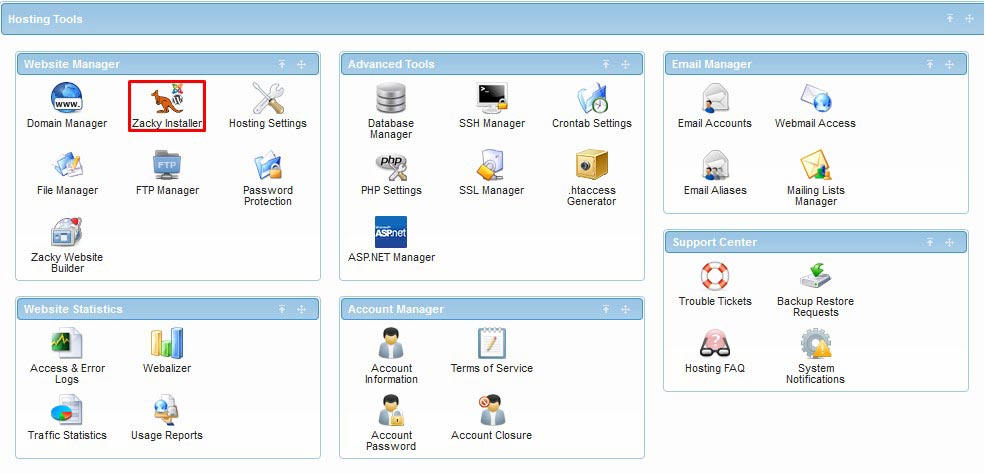
- Go to your Hosting Control Panel -> Website Manager and select “Zacky Installer” to access the auto-installer.
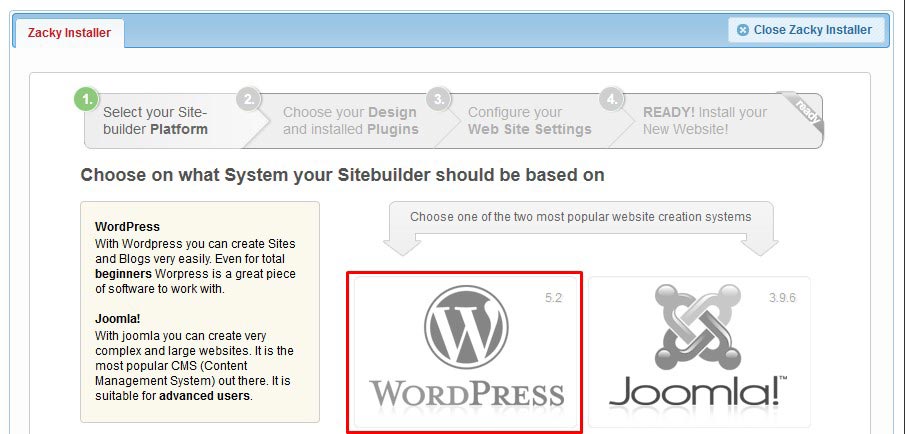
- Select the WordPress platform from the list of available options. Click “Next”.
- Choose a website theme (optional) – you can change the theme later from the WordPress Dashboard. Click “Next”.
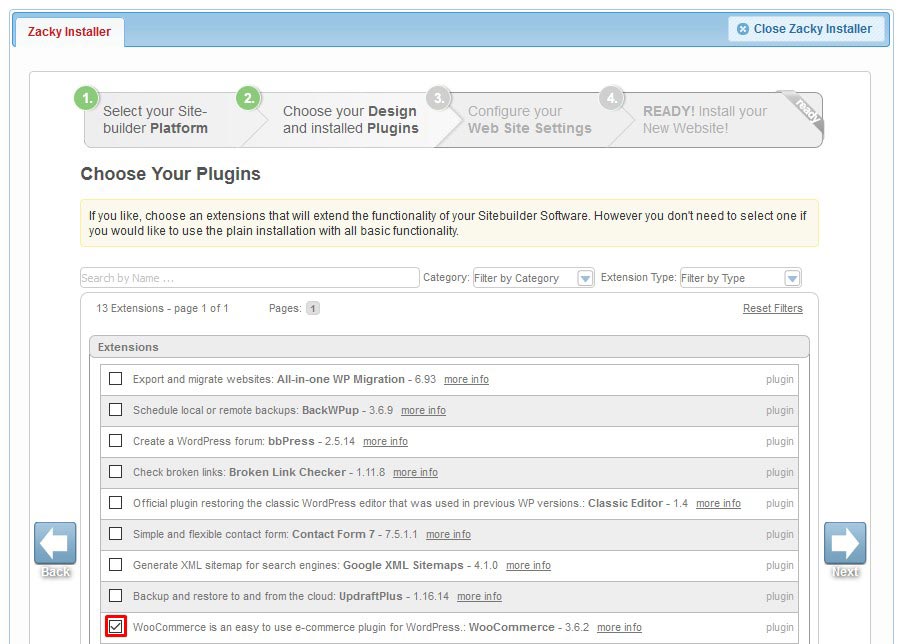
- Choose themes – select the “WooCommerce” plugin. Click “Next”.
- Select a Domain name for your website.
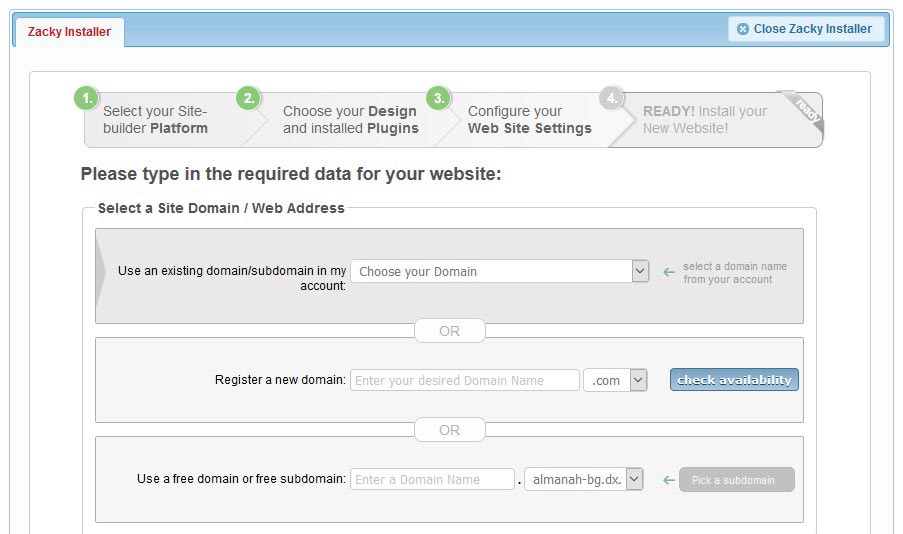
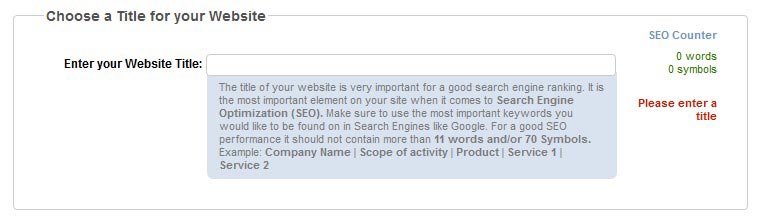
- On the same page, choose a website title.
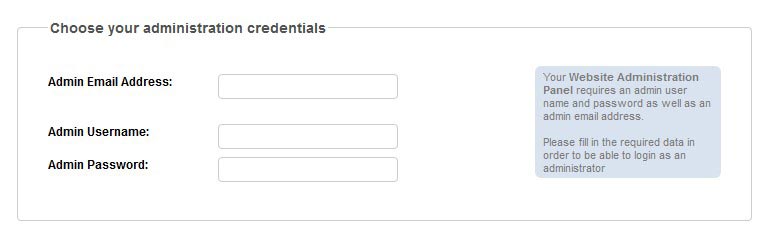
- Still on the same page, provide website administrator login information. Click “Next”.
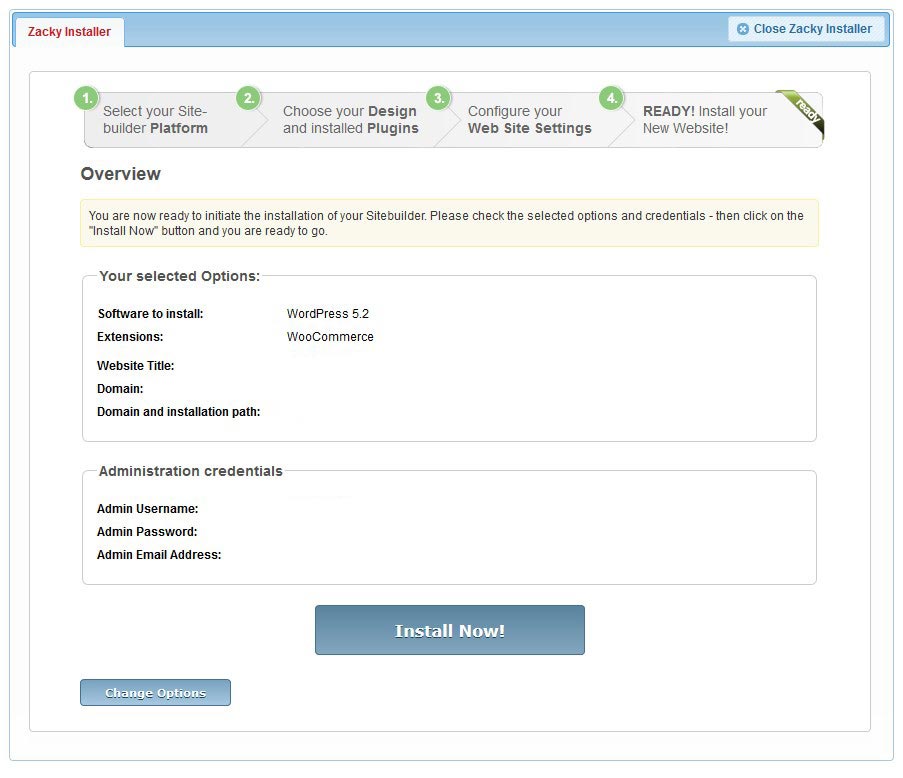
- On the last page, you will be presented with your selected options. Review them, and once you feel that everything is correct click the “Install Now!” button.
This concludes the installation of WordPress and WooCommerce using our Automatic One-Click Installer: Zacky Installer.
Install WooCommerce to an existing WordPress Website.
If you have an existing WordPress site and want to add eCommerce functionality to it, what you need to do is install the WooCommerce plugin.
Install WooCommerce using the WordPress Dashboard
This method is the most straightforward approach to installing WooCommerce. You will perform the installation using the WordPress Dashboard, as it handles everything for you.
- Log into your WordPress Dashboard
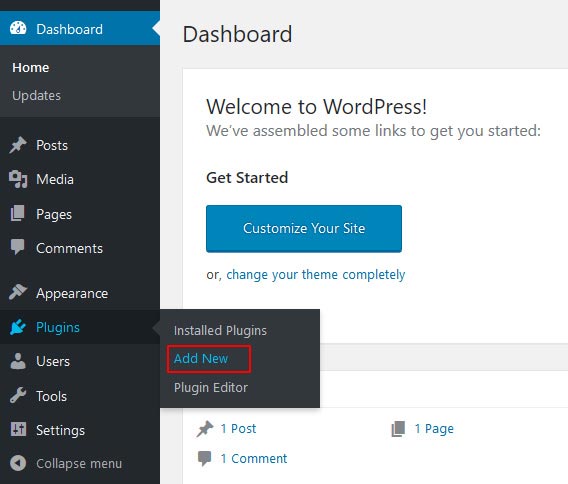
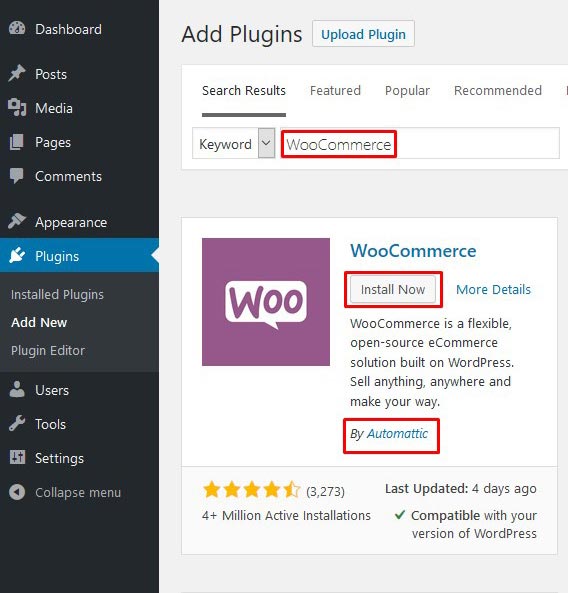
- Navigate to: Plugins > Add New.
- Search for “WooCommerce.”
- Look at the results and select the one by “Automattic.”
- Click on the “Install Now” button.
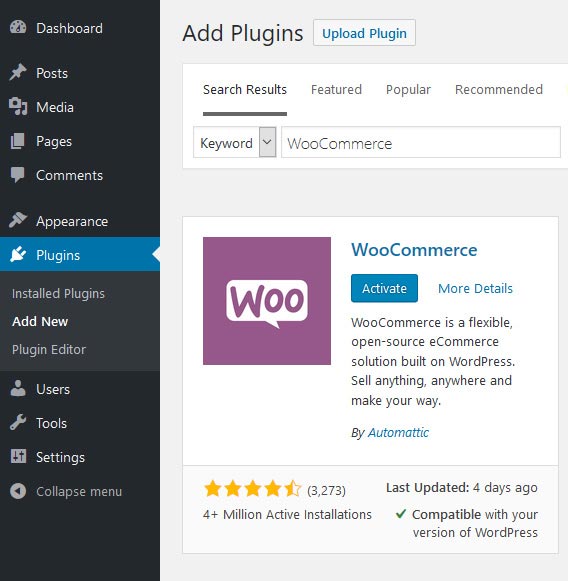
- Finally, press the “Activate Now” button.
On some occasions, you may instead prefer to install the WooCommerce plugin manually.
Install WooCommerce Using FTP Manager.
For this method, you will need an FTP manager software. We would recommend the free software Filezilla.
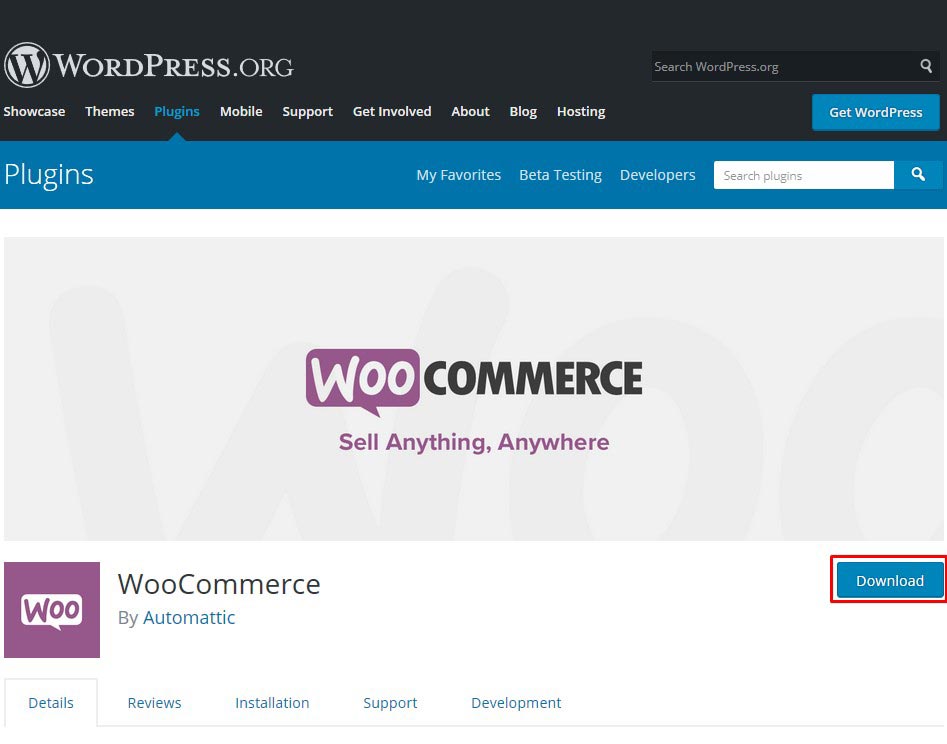
- To start, you would need to download the archive file containing the WooCommerce installation files from the official WooCommerce website.
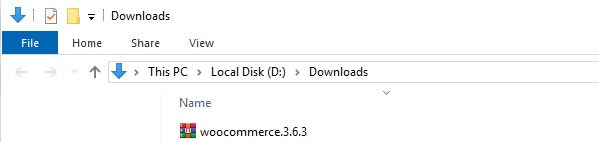
- Extract the archive on your local computer. When finished unpacking, you will end up with a folder named “WooCommerce.”
- Establish FTP connection to your hosting disk space. FTP managers have two “sides,” where the one is your local drive, and the other is your hosting server.
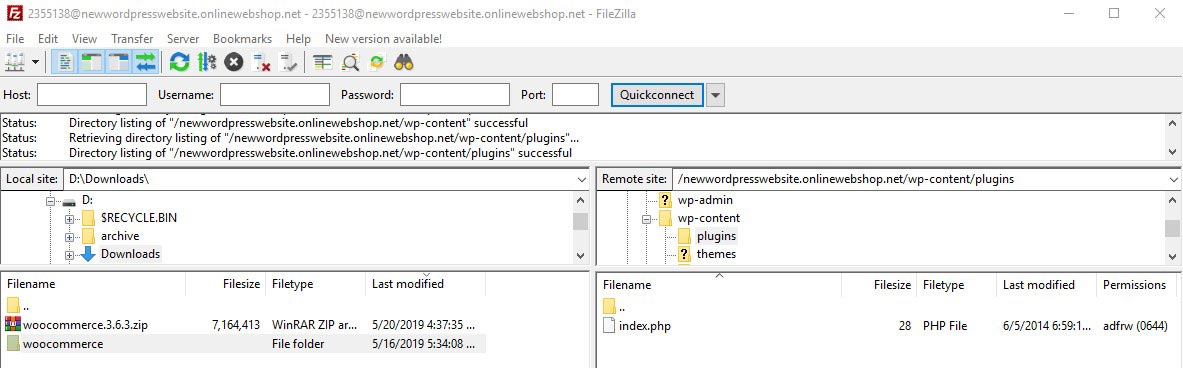
- On the hosting disk space, browse to your WordPress installation folder and head to the wp-content/plugins folder.
- On your local computer navigate to the WooCommerce folder.
- Select the whole folder and move it to the “wp-content/plugins” folder on your server using drag&drop.
- Wait until the upload process finishes.
- Log into your WordPress Dashboard and head to “Plugins.” Your WooCommerce plugin should now be listed with all of the other plugins (if not, you probably have uploaded it to the wrong folder).
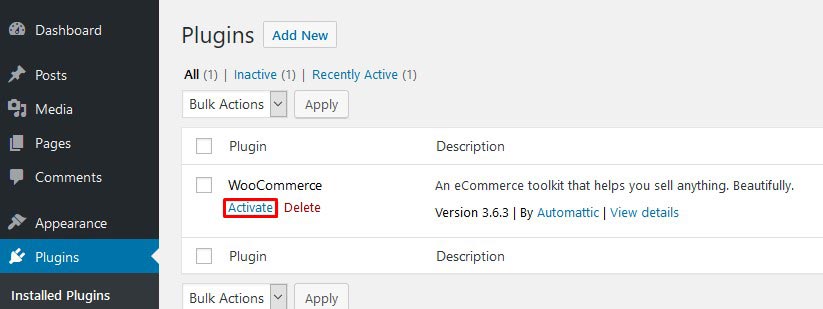
- Now, go ahead and click the “Activate” button next to the WooCommerce plugin.
This concludes the WooCommerce installation tutorial. After installing WooCommerce, you are ready to start the WooCommerce Setup Wizard!