There are a number of things you can (and should) do to optimize the performance of your WordPress Website. In fact, you are obligated to do so. That, of course, if you want to retain your existing users and acquire new ones.
One of the acceleration methods mentioned in the article is to limit post revisions of your WordPress website.
Although we’ve talked a bit on the topic, there is more to it that deserves attention. Like, what in fact is a post revision. And why you need them in the first place. Those and a few others are questions that you need to answer before jumping to the opportunity to limit post revisions.
Doing this will prevent you from making mistakes that are beyond repair.
Of course, you can always backup your WordPress website and make your life easier, but still, some mistakes are better to be edited via revisions and not by restoring your website from a backup.
What is Post Revision in WordPress
When creating a post or a page in WordPress, if you are constantly saving your work, the CMS is preserving all of the previous versions of the document.
It does so, for you and me to be able to compare older and newer versions at any time and to choose which one we like better.
Also, if something happens with your computer, or internet connection, the last saved version of the document will be available for you to go back to and use.
But with all of its good sides, preserving a revision for each and every update of a post or page can at one point start to take way too much space. This will make your website load a bit slower.
Limit WordPress Post Revisions
There are a couple of methods to limit post revisions. You can do it either by adding a piece of code in your wp-config.php or by using a plugin.
If you want to do it with a plugin, you can use Revision Control.
By now, you probably know how to install a WordPress plugin.
Then, you should just follow the interface of the plugin and tune it with your preferences.
Adding the code is definitely the purer and recommended technique. Mainly because installing a plugin is always making your website overall bigger, and thus making it load slower.
The following are the steps that you need to take in order to limit post revisions on your WordPress website:
- Log in to your AwardSpace account.
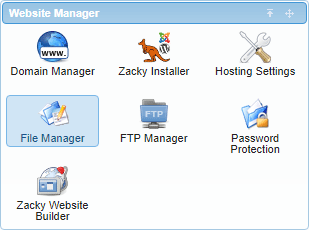
- In the Website Manager window of your Admin Panel find and click the File Manager
- In the page that will load find the directory of the site of which you want to limit the number of post revisions.
- Open the site directory and look for the wp-config.php
- Find the line that says *@package WordPress. It should be somewhere on the top of the document.
- Add the following code, just below the line, mentioned in step 5:
define(‘WP_POST_REVISIONS’, 4);
There are a few things to bear in mind when pasting the code in your wp-config.php file.
This one is obvious, but all the previous revisions will be automatically deleted.
Also, you can change the number (in our case 4) according to your preferences.
You should also know that the number you are entering here will be the number of the available revisions. And the active version of the post or page is not counted as one. Thus, in this case (with the number 4) we’ll be able to go back 4 times and we’ll have one more version of the document, which will be published.
Knowing this can help you to find out the exact number of revisions you need to set your WordPress to preserve.
If you want to fully disable revisions, you need to follow all of the steps above, but the code that you’ll paste (or write) should be:
define(‘WP_POST_REVISIONS’, false);
If you have an already established website with hundreds or thousands of pages, the number of the available revisions is enormous. To delete them, you can use the Better Delete Revision Plugin.
