
What you need to know:
The WordPress Block Editor comes with a handful of options that allow you to customize Gutenberg’s interface and behavior. These options can be accessed by clicking on the three-dot button in the upper-right corner of the page. There, you can toggle various screen elements on and off, switch between the Visual Editor and the Code Editor, choose which panels are displayed in your document settings, and more.
Gutenberg, the WordPress Block Editor, is a great tool for creators as it is modern, intuitive, and flexible. And yet, it offers a number of options that can be used to customize its interface and behavior. In this WordPress Gutenberg tutorial, we’ll show you how you can customize the behavior and interface of the Block Editor.
Table of Contents:
What Is the Gutenberg Editor in WordPress?
The release of WordPress 5.0 brought with it a new content creation experience called Gutenberg. Unlike its predecessor, Gutenberg encapsulates every piece of content inside blocks which enables a greater degree of flexibility when making edits. If you have not used the WordPress Block Editor before, we recommend going through our crash-course on Gutenberg.
How Can I Access the WordPress Block Editor?
WordPress will provide you with access to the Gutenberg editor once you start creating a new post, page, or widget. And if you don’t have a website yet, simply sign up for our free hosting package or one of our premium WordPress hosting plans and start building your online presence.
Learning Gutenberg’s View Options
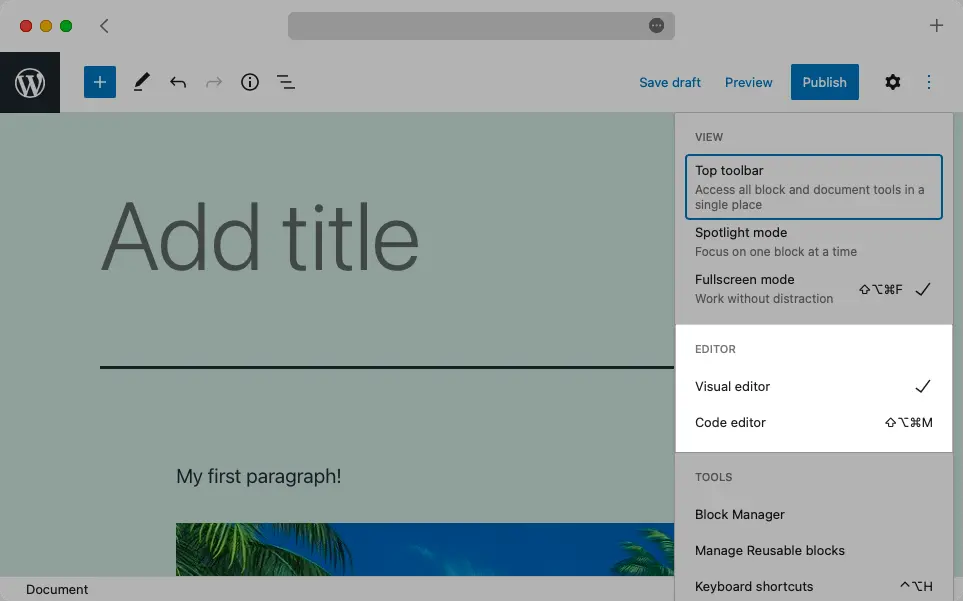
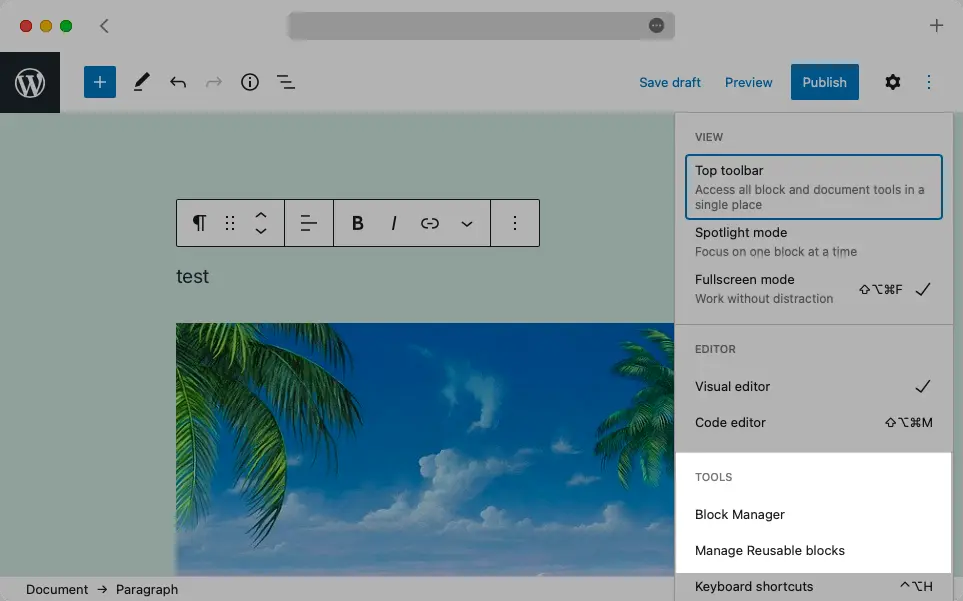
Most of Gutenberg’s settings are hidden in a menu that is activated by the three-dot button at the end of the Top Toolbar. In this section, we’ll take a closer look at the first three settings:
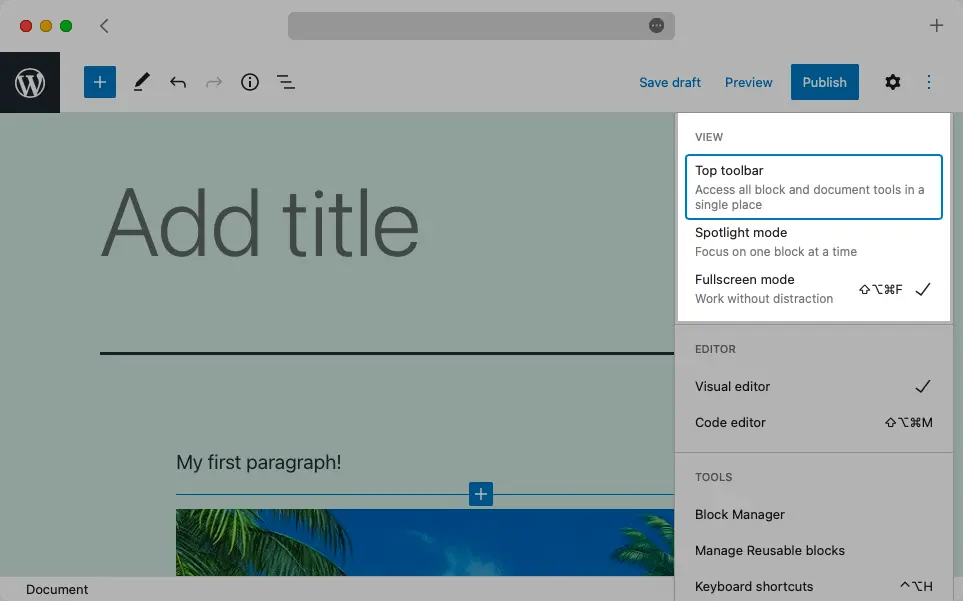
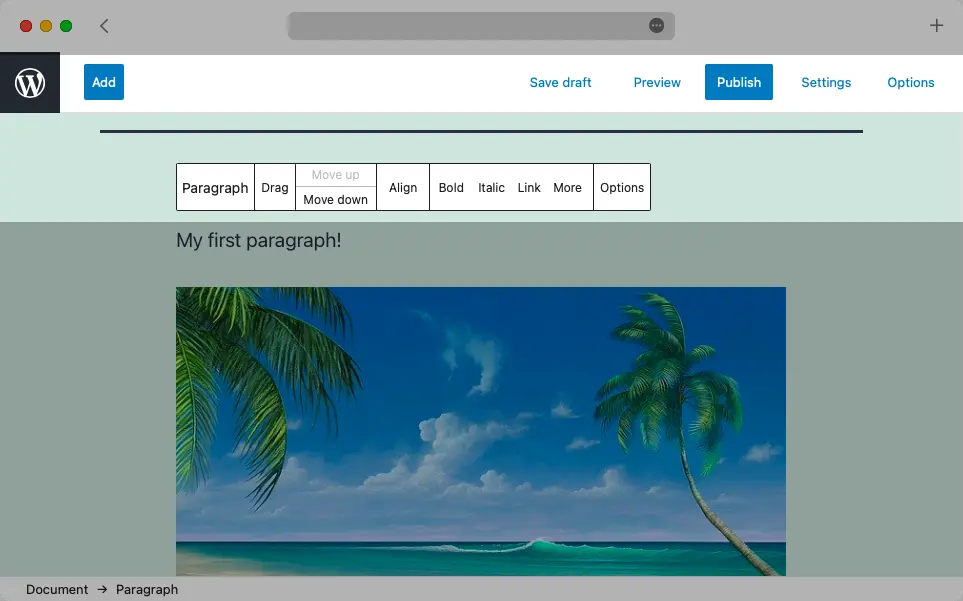
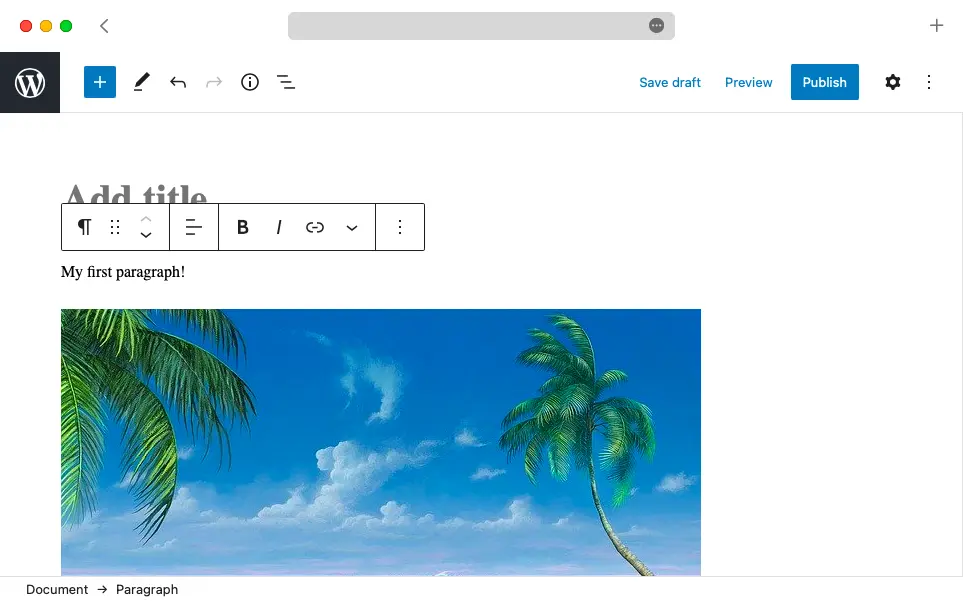
The first setting you’ll encounter is the Top toolbar. When this option is active, as indicated by the checkmark next to it, all Contextual Toolbars will be anchored to the Top Toolbar instead of appearing within the Main Content Area.

The second option in the list is Spotlight mode. When enabled, this option will emphasize the block that is currently active and will fade out the rest.

The last View option is Fullscreen mode. This toggle allows you to show and hide the WordPress back-end interface.
Learning Gutenberg’s Editor Options
The next group of settings deals with the Editor itself. You can use the Visual Editor, which enables you to create content using blocks, or the Code Editor, which lets you write HTML.
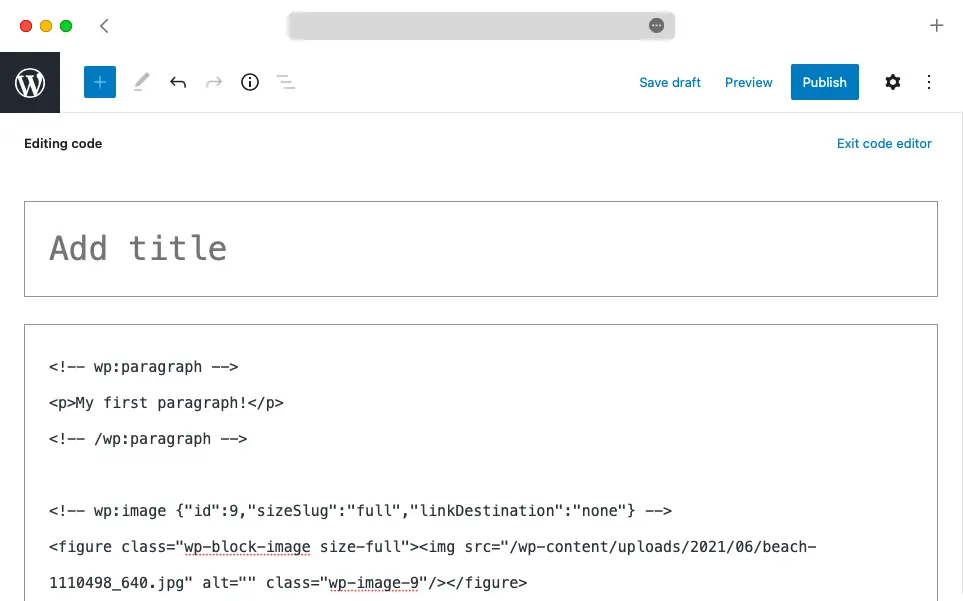
Once you switch to the Code Editor, Gutenberg’s interface will change significantly. You will no longer see your blocks and instead, you will be presented with the HTML that makes up those blocks.
Can I Switch Between the Visual Editor and the Code Editor While Working on the Same Document?
Yes, it is possible to seamlessly switch between the Visual Editor and the Code Editor while working on the same document. That said, you should consider the Code Editor an advanced feature and use it only as a last resort.
Also, you may notice that WordPress annotates your various blocks with custom comments. If you insert HTML code that is not annotated, it will be placed inside a Classic block.
Block Management
Next, we’ll briefly look at two options that allow you to manage the blocks that appear in the Block Library.
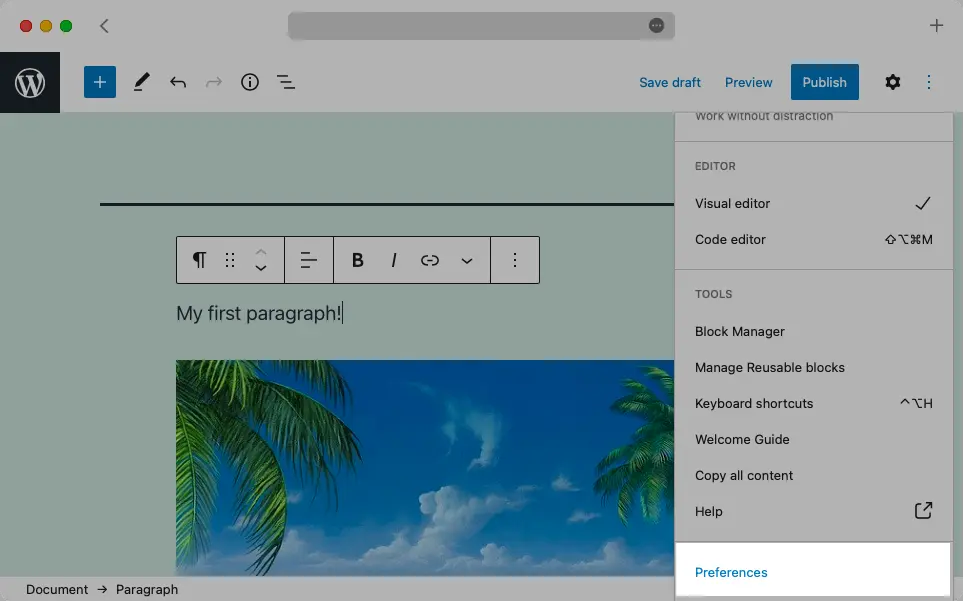
The first option is the Block Manager. Thanks to the Block Manager, you can enable and disable Gutenberg blocks. The other option is Manage Reusable blocks. To learn more about it, you can check our article on what reusable blocks are and how to use them.
Setting up the Gutenberg Editor Preferences
In addition to the various toggles in the Options menu, the WordPress Block Editor also comes with a full-fledged preference pane. You can access it by clicking on the Preferences button at the very bottom of the Options menu.
The preference pane is divided into four sections. We’ll explore those in greater detail below.
General
The General tab lets you enable or disable the pre-publish checklist. If you are not familiar with this feature we recommend going over our guide on publishing with WordPress.
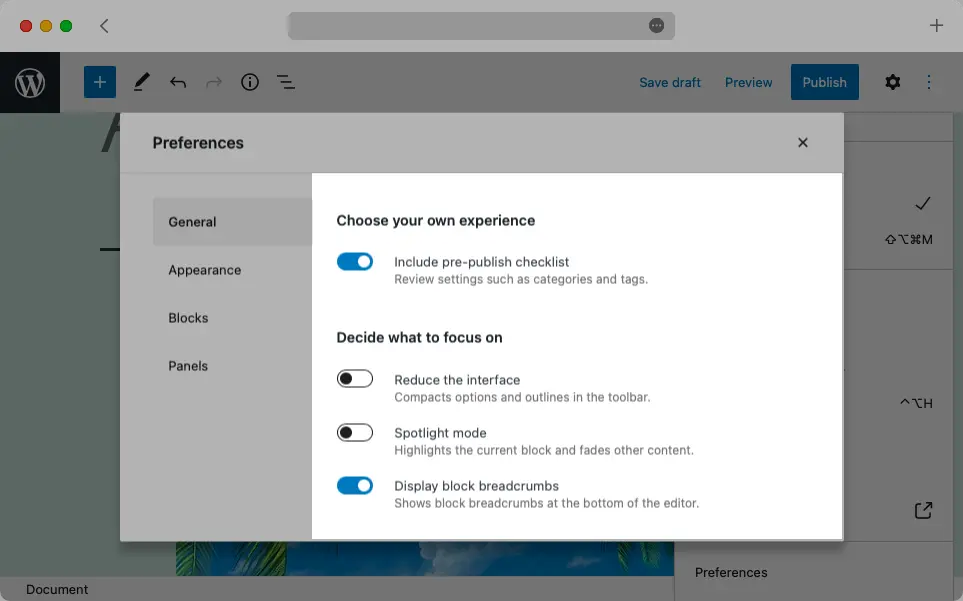
The second group of options allows you to reduce distractions while working with your content. The toggle called Reduce the interface would hide most buttons from the Top Toolbar and completely remove the Status Bar. That said, you can still reveal the buttons from the Top Toolbar by hovering your mouse cursor over it.

Spotlight mode is the same feature that we discussed earlier which allows you to focus on the currently selected block.
And lastly, the Display block breadcrumbs toggle can show and hide the Status Bar. Note that this option will be hidden if the Reduce the interface toggle is turned on.
Appearance
The Appearance section of Gutenberg’s preference pane contains two options: Display button labels and Use theme styles.
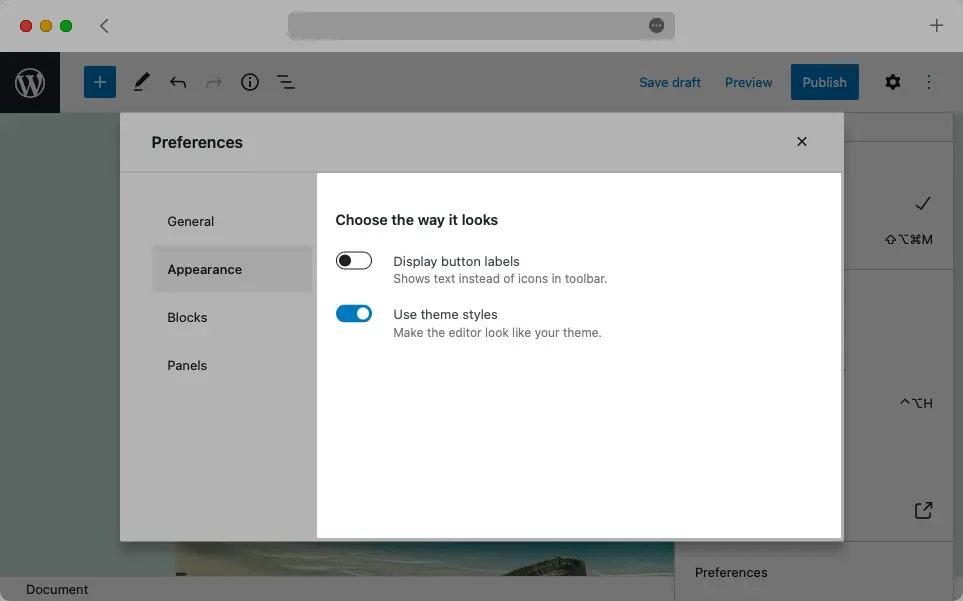
The Display button labels option replaces the glyphs used on buttons with text labels.
Tip:
You can reveal the label for each button as a tooltip by hovering your mouse cursor over it.
The Use theme styles toggle allows Gutenberg to use the visual style of your theme while you’re interacting with your blocks. Turning off this feature would remove all custom styling from the Main Content Area.
Blocks
The third tab in the Gutenberg preference pane is all about Blocks. You’ll find two options here: Show most used blocks and Contain text cursor inside blocks.
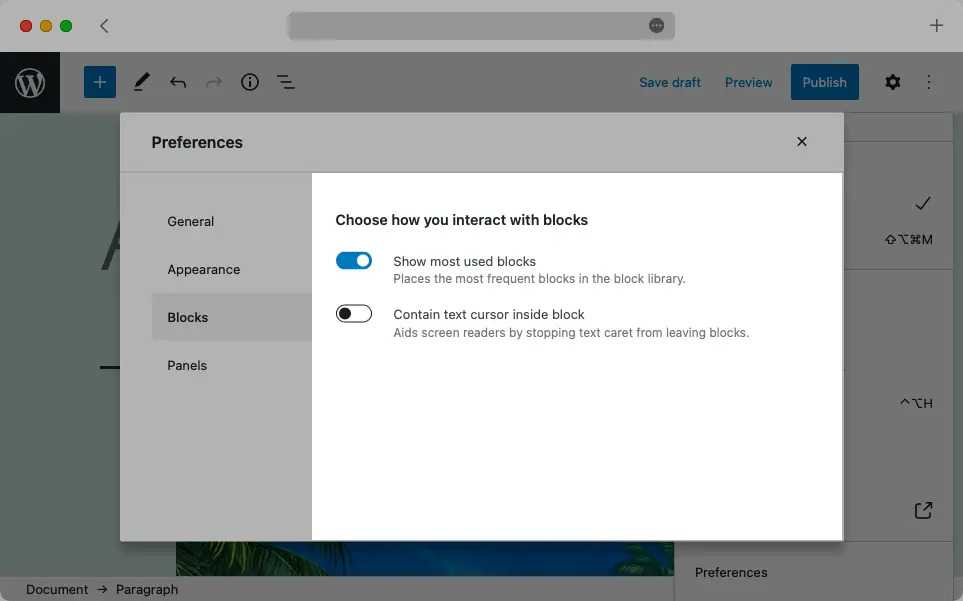
The first option adds a Most Used section in the Gutenberg Block Library where you can quickly access your most frequently used blocks. And the second option aids screen readers by stopping the text caret from leaving blocks.
Panels
The last tab in the Gutenberg preferences is called Panels.

Clicking on these toggles will show and hide the various panels that appear in the Gutenberg sidebar.
Next Steps
Now that we have gone over the various settings and preferences that Gutenberg has to offer, you should be able to customize the Gutenberg interface and behavior to your liking. And if you wish to become even more proficient with the WordPress Block Editor, we recommend learning the most popular keyboard shortcuts in Gutenberg, the best Gutenberg plugins, and how to use Gutenberg blocks.