
If you are seeing the infamous WordPress Critical Error Message on your website, just relax – with us, you are in safe hands, and we will show you how to access WordPress admin panel with a critical error warning in no time.
What is a Critical Error Warning in WordPress
Critical Error in WordPress is an error message that appears on your website when WordPress can’t load scripts that are important for the proper functionality of your website. There can be various causes for this error, such as a malfunctioning plugin, theme, code snippet, or scripts. These malfunctions result in either a dysfunctional file or a code that doesn’t work properly, both prompting a Critical Error message.
Now, let’s see how to access the WordPress admin panel with a critical error warning.
Read also:
- How to Fix “Patterns are Not Uploading” Error to WordPress Theme
- WordPress 404 Not Found
- How to Fix Error 503 Service Unavailable in WordPress
How to Access WordPress Admin Panel With a Critical Error Warning
First, you need to locate where the issue comes from and then fix it. In the following paragraphs, we share how to fix the problem, should it derive from the most common Fatal Error prompts – faulty plugins and themes.
Method 1: Check for Malfunctioning Plugins
Although numerous WordPress plugins work just fine, some can still cause technical issues, such as the Critical Error. To see whether an active plugin on your website is causing the trouble, continue reading. The process is simple and comprises only a few steps: deactivate all plugins, check whether the error message is still present, and if it is, find the plugin that causes the trouble. Here’s how to proceed:
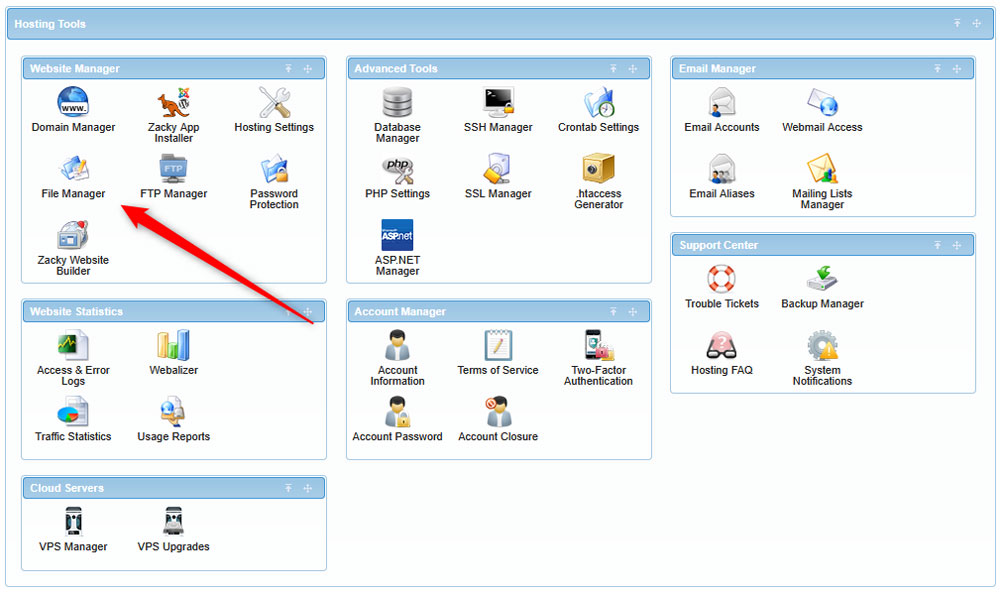
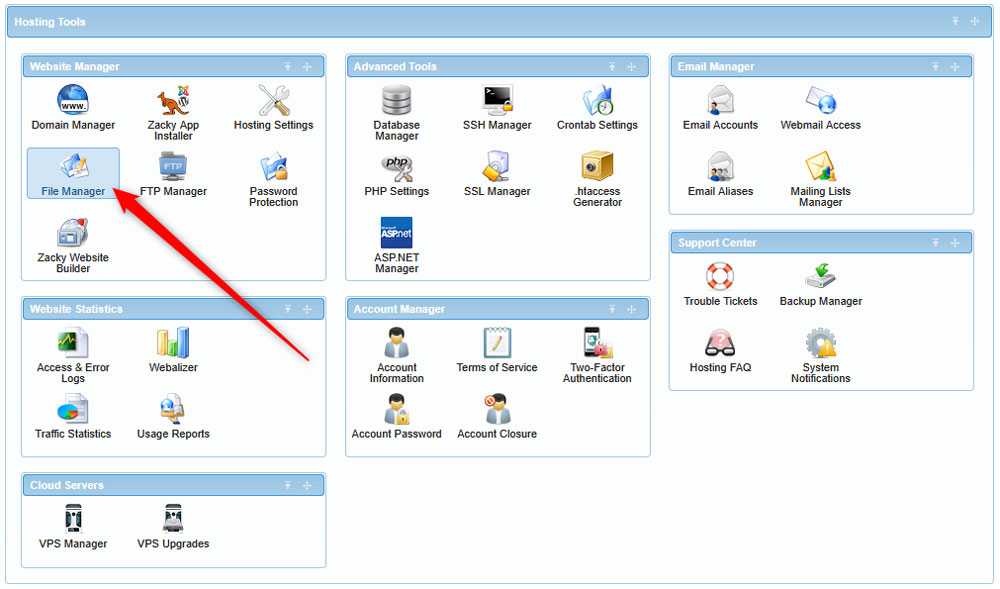
Since Critical Error prevents you from accessing your WordPress dashboard, you should use the AwardSpace hosting panel instead. Once you log in, click on File Manager:
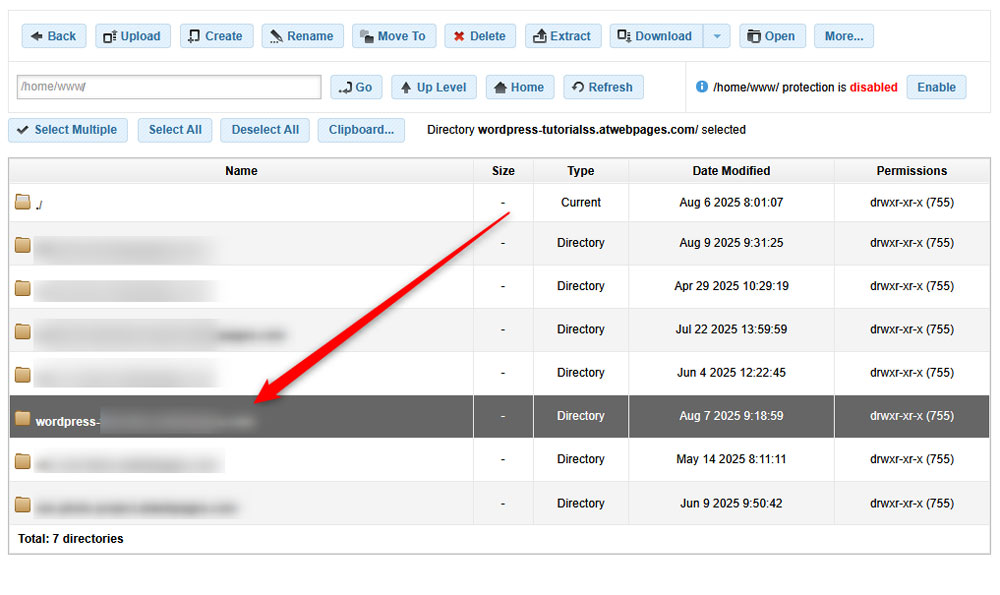
Then, from the list of directories, open one of the problematic WordPress websites:
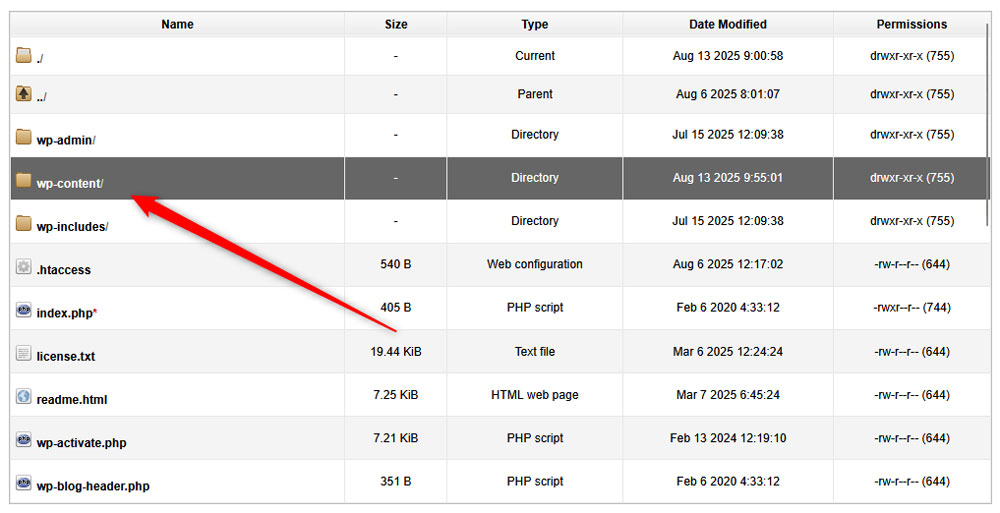
After that, locate the wp-content/ folder and open it:

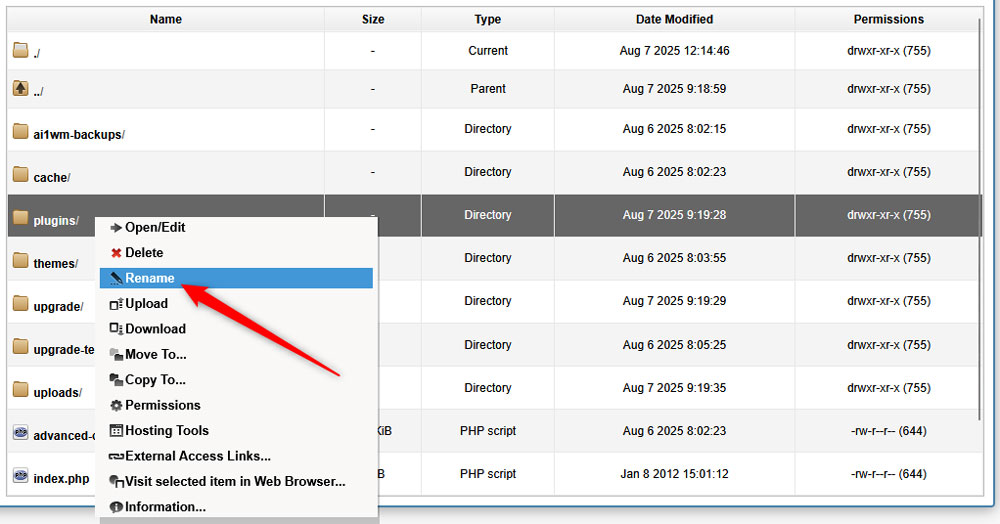
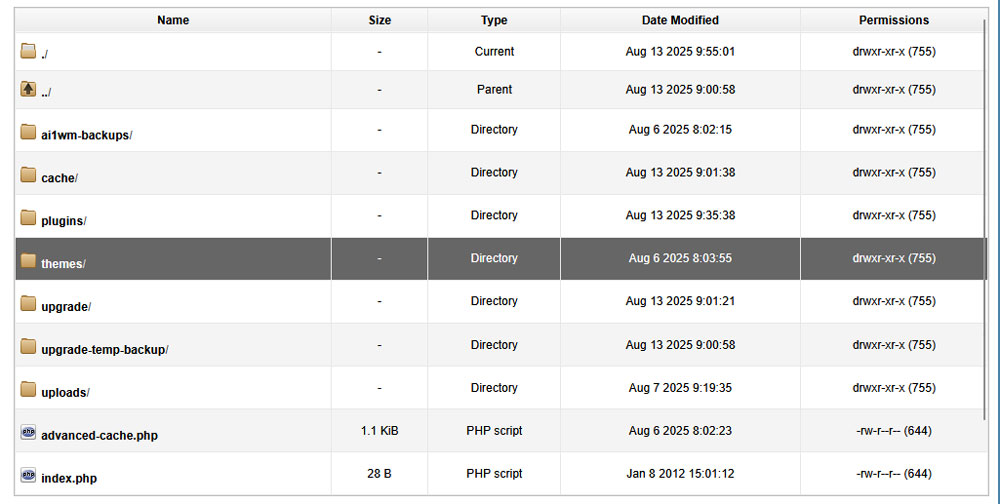
Once you are in, locate a folder called plugins/. Once you see it, right-click on it and select Rename:
Now choose a name for the folder, for example, Plugins_changed_name or anything else different from Plugins.
The idea behind the renaming is simple – WordPress automatically searches for a folder named exactly plugins to browse and incorporate your installed plugins, and when this folder is renamed to something different, the CMS simply can’t find what it searches for and decides there are no installed plugins, so every plugin within the renamed folder is deactivated.
Now, while all plugins are deactivated, try to open your website. If it loads without the Critical Error message, then the issue derives from one of the deactivated plugins. To locate which one is corrupted, you should download all of them on your device, and upload them again one by one and checking whether the error message appears after each upload. Once you see an issue right after an upload is completed, this is the malfunctioning plugin.
Here’s how to proceed:
Step 1: Download all Your Plugins to Your Device
The first thing to do is to download all your plugins to your device before deleting them from WordPress from the hosting panel. To download them, via the AwardSpace hosting panel, head to File Manager -> Your Website’s directory -> wp-content/ -> the renamed Plugins folder.
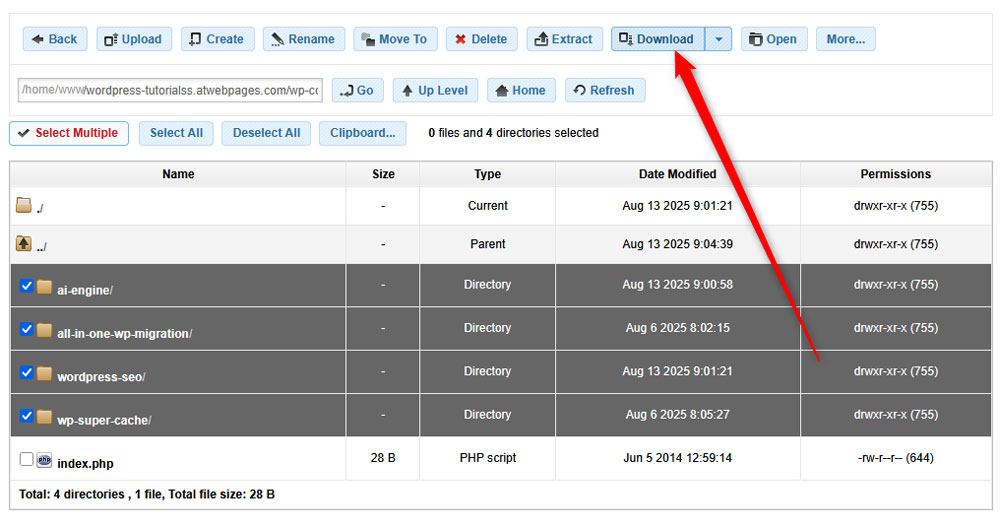
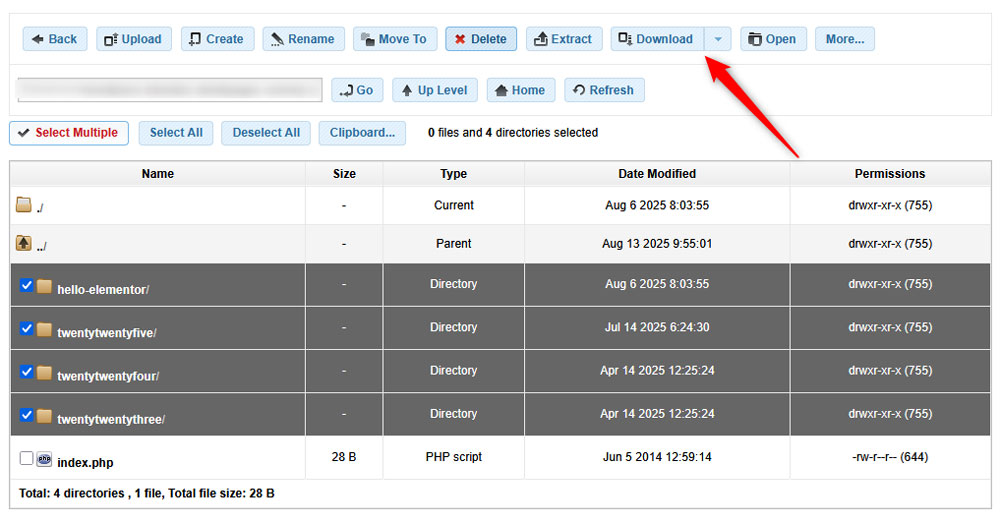
Once inside, select all plugins within the folder and download them via the Download button at the top menu:
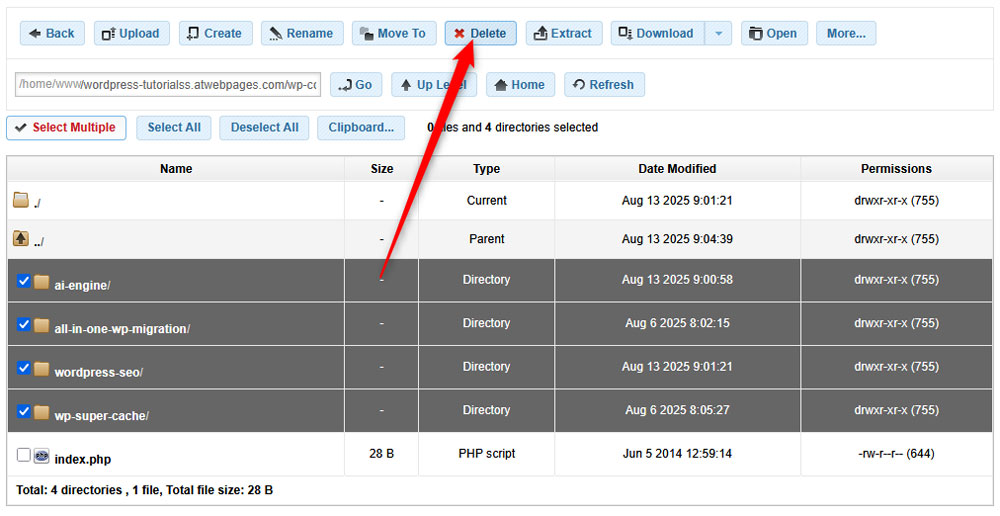
Step 2: Delete All Plugins from WordPress
Now that your plugins are downloaded on your computer, it is time to delete them from WordPress. Don’t worry about losing any that are important for your website, as in a moment, we will be uploading them again.
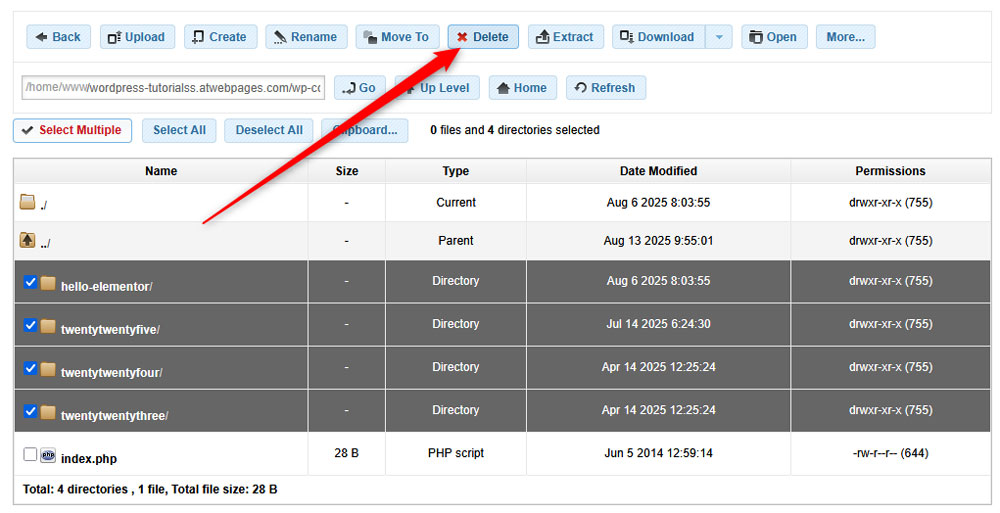
While in the plugins directory, select all plugins and click the Delete button located at the top of the page:
Step 3: Rename The Plugins Directory Again
Now that you have your plugins safely downloaded and deleted from WordPress, it is time to revert to the original folder name, so WordPress can access it and engage with the plugins you are about to re-upload. For this, head to File Manager -> Your Website Directory -> wp-admin and right-click on the renamed plugins folder, select Rename, and type in the original folder name – plugins/
N.B! Keep in mind that WordPress expects the folder to be named exactly plugins (with lower case!), otherwise it will remain unrecognisable.
Step 3: Re-Upload Plugins One By One
The next step in the process is to re-upload each of your plugins one by one and check whether the Critical Error message appears after each single upload. The logic behind such an approach is simple – once a faulty plugin is uploaded, it will prevent WordPress from functioning properly, and therefore, the error message will occur. Once you see this issue, you can then be sure that the last plugin you uploaded is the malfunctioning one. Here’s how to proceed:
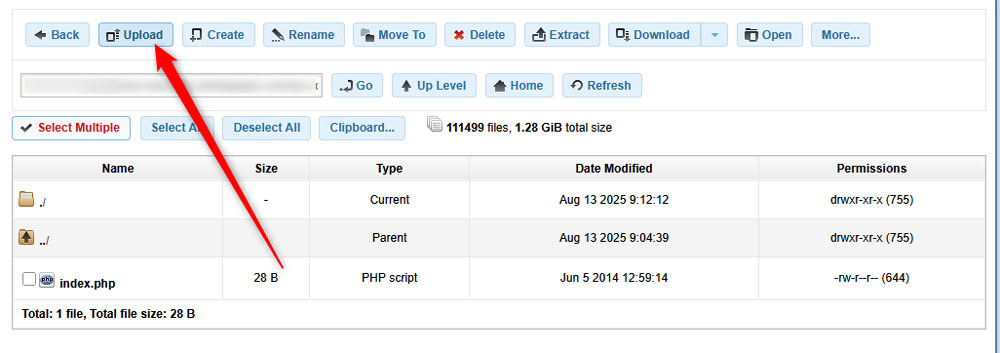
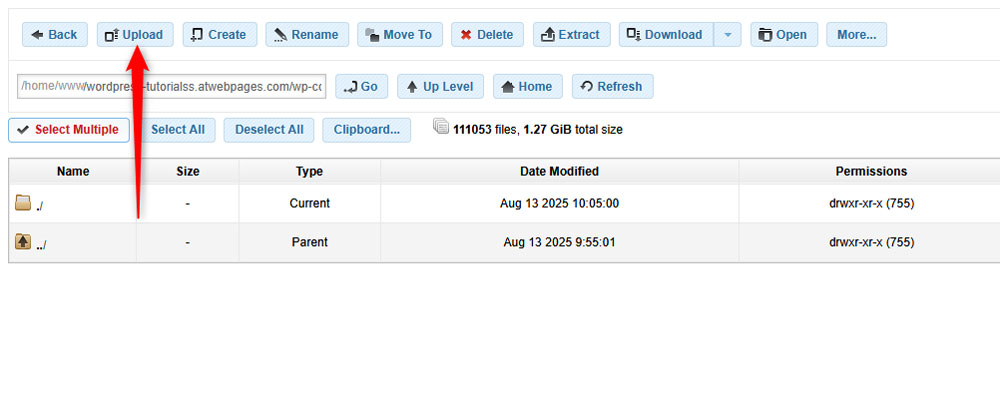
Log in to the AwardSpace hosting panel and again head to File Manager -> Your Website’s Directory -> wp-admin -> plugins. Once there, click the Upload button at the top of the page and select one of the downloaded earlier plugins and upload it again to WordPress. Keep in mind that you should compress the plugin folder before uploading it. Also, make sure to upload a single plugin at a time:
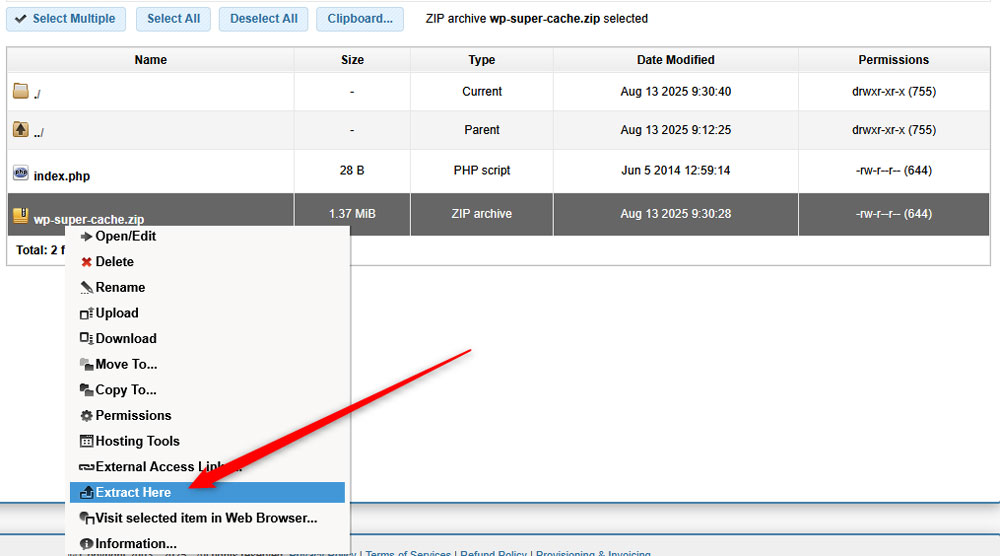
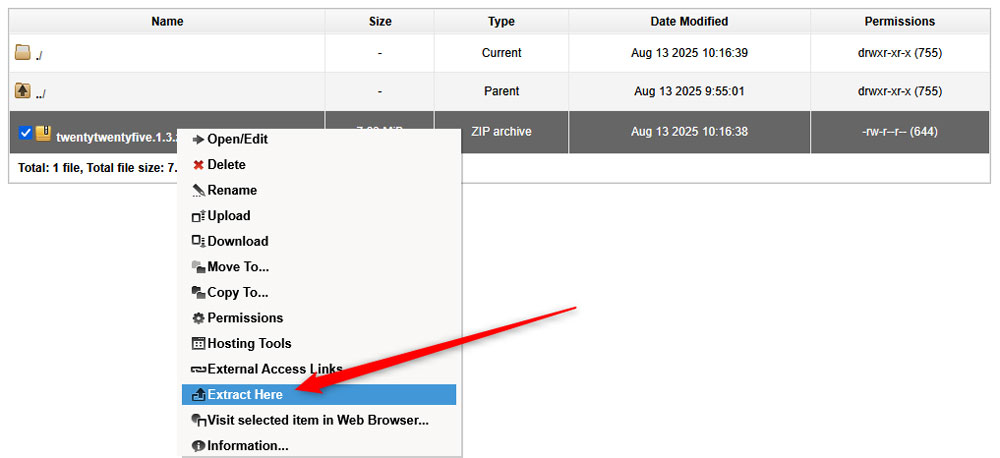
Once the zipped plugin is uploaded to your server, unzip it by right-clicking on its folder and then selecting Extract Here:
Now, reload your website. If you don’t see the Critical Error message, then this plugin functions just fine. If this is the case, then repeat the process outlined in this step until you upload a plugin that prompts the Critical Error message. Once you locate it, you can delete it and install a plugin by another developer, or contact customer support for further help.
However, if shutting down your plugins folder doesn’t fix the issue, then the problem is rooted elsewhere – your plugins function just fine. Should this be the case, proceed with the next method.
Method 2: Check for Malfunctioning WordPress Themes
A theme you use for your WordPress website may prompt the Critical Error message. These are rare occasions, but the chances of stumbling upon a faulty WordPress theme are never zero. To check whether your installed WordPress theme is causing trouble, install a default WordPress theme, check whether it causes trouble, and if not, then the previously active theme is prompting the issue. Here’s how to proceed.
Step 1: Download All Installed Themes on Your Device
Similar to the plugins process, you should first download all installed WordPress themes on your device. To do so, via the AwardSpace hosting panel, head to File Manager:
Then, open the directory of your problematic WordPress website and head to the wp-content/ folder:
Then, open the themes/ folder:
Once you open the folder, download all your installed themes. To do so, select all of them and click on Download at the top of the page. This will download a ZIP containing all your themes on your device:
Step 2: Delete All Themes from WordPress
The next step in the process is to delete all themes you have stored on your server. Don’t worry, you will have them back once the issue is fixed. To delete your themes, while in the themes/ folder, select all of them and click on Delete at the top of the page:
Step 3: Upload a Default WordPress Theme
Now, it is time to test whether your active theme was causing the trouble. To do so, you need to upload a default WordPress theme and see if your website can work with it without displaying any error messages. However, before you upload a theme, you should first download it from the official WordPress site. Simply head to the official WordPress themes library and download any of the default themes, such as Twenty Twenty-Five, on your device.
Once you have downloaded the default theme, it is time to upload it to your server. For this, via the AwardSpace hosting panel, head to File Manager -> Your Website Domain -> wp-content-> themes/
While there, click on the Upload button:
Now, search for the default theme and upload the zip file to your server. Once it is uploaded, right-click on the ZIP file and select Extract Here:
Now that the theme is being extracted, open your website.
Should it load properly and you don’t see a sign from the Critical Error message, then the issue lies within your first active theme you downloaded on your device before deleting it from the server. You can either change it to another one or contact the developers for further assistance.
Should you still see the Critical Error message on your website, even with a default theme, then the problem is not coming from a malfunctioning theme, but is rooted elsewhere. Proceed with he next step.
Method 3: Reinstall WordPress Core Files
A corrupt WordPress core might prompt the Critical Error message. To check whether the problem derives from a malfunctioning core, you should reinstall WordPress; however, from the AwardSpace hosting panel. The process is simple and requires only a few clicks here and there. Here’s how to proceed.
Step 1: Download a Fresh WordPress Copy
First, download the latest WordPress version. This is an important step, as you will work with the latest bug-free version of the CMS. After it is downloaded on your device, unzip the file.
Step 2: Navigate to the Root Folder of Your Website
The next thing to do is to open the currently functioning WordPress core files on your server. To do so, via the AwardSpace hosting panel, head to File Manager -> Your WordPress Website.
Now, download your plugins/ and themes/ folder, as shown above, so you retain all the files you are using.
After that, click the Upload button at the top of the screen:
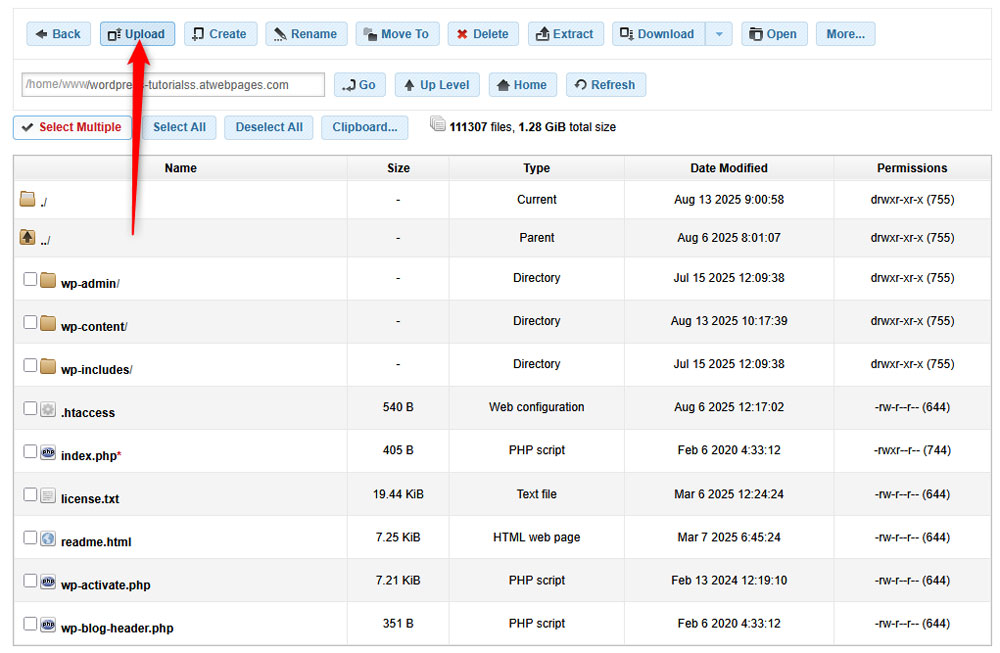
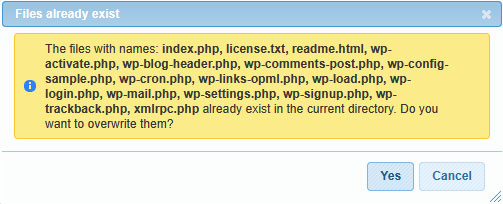
Then, select all the WordPress files you unzipped on your computer and upload them. You will be asked whether you would like to overwrite them. Click Yes and let the process complete:
Then, re-upload your plugins and themes as shown in Method 1, Step 3, and Method 2, Step 3 of this article.
After that, reload your website and check whether the issue is still persistent. If it is not, then some corrupt core files were causing the Critical Error message, and now that you work with a fresh copy of WordPress, the problem is fixed.
Should the error message still be present, then the issue lies elsewhere.
Method 4: Contact Tech Support Team
Should the suggested methods not fix the Critical Error problem, then you can reach out to our customer support team, which is 24/7 available. All our web hosting plans come with such feature, even our free hosting plan.
Conclusion – How to Access WordPress Admin Panel With a Critical Error Warning
Error messages are often annoying and can stunt your work on your WordPress website for hours. Luckily, there are methods that you can quickly use to get your website up and going in no time. For example, there are various approaches you can quickly apply to learn how to access the WordPress admin panel with a critical error warning. Simply follow our step-by-step guide and fix the problem in no time.