
Before we go to the essence of this Yoast SEO Guide, we need to overcome a widely spread misunderstanding about the plugin. As far as my experience show, there is a large number of people, that are interpreting the plugin as some kind of magical SEO tool that will rank your article for whatever keyword you choose. This couldn’t be further from the truth.
Thus, I wanted to clarify from the beginning that Yoast SEO is not a magical tool. Its main function is mere as a compass. One that has a lot of helpful features at its disposal, but still, just a compass. The plugin will help you navigate through the vast and violent SEO ocean.
Making you a better writer along the way.
Also, making your site a better read.
But along with all of its positive sides, we have to keep in mind, that it is merely a compass. And even if we go in the right direction, that doesn’t guarantee our arrival at the most desired destination on planet Earth – the first place of a relevant Google search.
Now, after we cleared that out, let’s get dive into this Yoast SEO Guide for beginners.
How to Install Yoast SEO
We’ve already discussed how to install a plugin on WordPress.
Yet, let’s glide on the surface of the plugin installation process. As you‘ve guessed, you need to be in the admin panel. Once there, click Plugins->Add New. After you do this, in the top right corner, you’ll see a search bar. Search for the Yoast SEO plugin.
This is what you should expect to see:
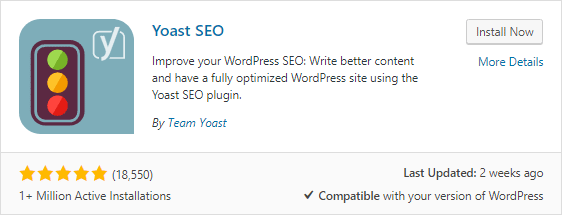
Click Install Now. Wait. Click the now available blue Activate button.
Good. Now we have the Yoast SEO plugin installed. What follows?
Since this is a how-to-use guide for the Yoast plugin, we won’t cover the configuration phase. Which will be covered in another tutorial. Plus, the configuration of the plugin is highly recommended but not necessary to use the plugin for what was created in the first place – content optimization. Thus, let’s find out exactly what the plugin will help you do.
How to Use Yoast SEO Plugin
Once installed, the plugin will be pretty much all over your website’s admin panel. In the bottom of the main menu (located on the left of the admin panel), the toolbar (the strip that you see on the top), and under the WYSIWYG when you are creating a post or page.
As you are probably just starting to use on-page SEO, the functions of the Yoast plugin that you’ll mainly use, are located just below the WYSIWYG.
The following, are the on-page SEO factors which Yoast will help you to perfect before you publish your article:
- At least 300 words. As Google considers everything below that as ‘thin content’, the Yoast plugin will urge you to create content with at least 300 words.
- Add a meta description. When people search on Google for something related to your article and it pops-up, as you know, there is a little description under the headline, right there in the Search Engine Result Page(SERP). This description is called meta description and its main function is to entice the users to your website. By default, it is generated automatically by the first sentences of your article. The Yoast Plugin will allow you to change it. Take advantage of this feature. Don’t overlook it.
Read: How to Write a Meta Description
- Short SERP Title. Like the meta description, the short title is helping you to entice the users of the Search Engines to click on your link, instead of anyone else’s.
- Add the keyword at the beginning of your article.
- Add images. On the web, images are not just images. They are not just making your content more enjoyable but also can help it become more foundable in the search engines. To do so, use the focus keyword in the ALT text so that Google can relate that image to the keyword.
- Interlinking. In order to set a proper site structure, interlinking is a must. Yoast will urge you to link to at least one related page on your site.
- Outbound links. These links open up the web and show Google how different sites relate to each other. Also, with them, you’ll thank in a way the people from which you took the information which you are now sharing with your users.
- Focus Keyword in-title Positioning. The sooner you tell the people what the content is about, the better. That is why Yoast is reminding you to add the keyword you are trying to rank for, at the beginning of your title.
- Focus Keyword in-URL Positioning. The sooner you add your focus keyword in your slug, the easier for the users to find out what they can expect if they click your link. Furthermore, Google also likes having it in there.
- Don’t compete for pages for a single keyword. If you do so, Yoast SEO will warn you. If however, you need to use this keyword, you can take advantage of variations of the keyword or a long tail one.
The plugin is pretty straightforward. As you can see from the logo, Yoast SEO works a lot like a traffic light.
Green is GO.
Yellow is Attention.
Red is a big No-no!
The difference is that here you can, in a way, control the traffic light. The better you are in what you do, the better your ‘traffic light’ will look. And, the better you strive for the ‘traffic lights’ to look, the better you’ll become.
It is a win-win situation. Only in this situation, the first and second winner is you.
Once all the ‘SEO’ traffic lights are green (or a bit sooner), you’ll find out that there is one more traffic light to take care of. Readability.
In the best-case scenario, the readability of your content will be green, to begin with. If not, you can just follow the instruction for what you’ve missed and how you can better the readability of your article.
As I already mentioned, the Yoast SEO plugin is pretty straightforward. You can always look at the traffic light to see if you can go and publish the article. If not, wait, make it better, and go.
Or continue learning in our WordPress Tutorial.